Showing posts with label pancakes. Show all posts

Saturday, October 27, 2018

Pumpkin Pancakes


This Sunday at the Fairmount Neighborhood Farmers Market, stock up on pastured meats from Fair Valley Farm and Fog Hollow Farm and fresh produce from Camas Swale Farm, including plenty of greens and root vegetables, and winter squash.


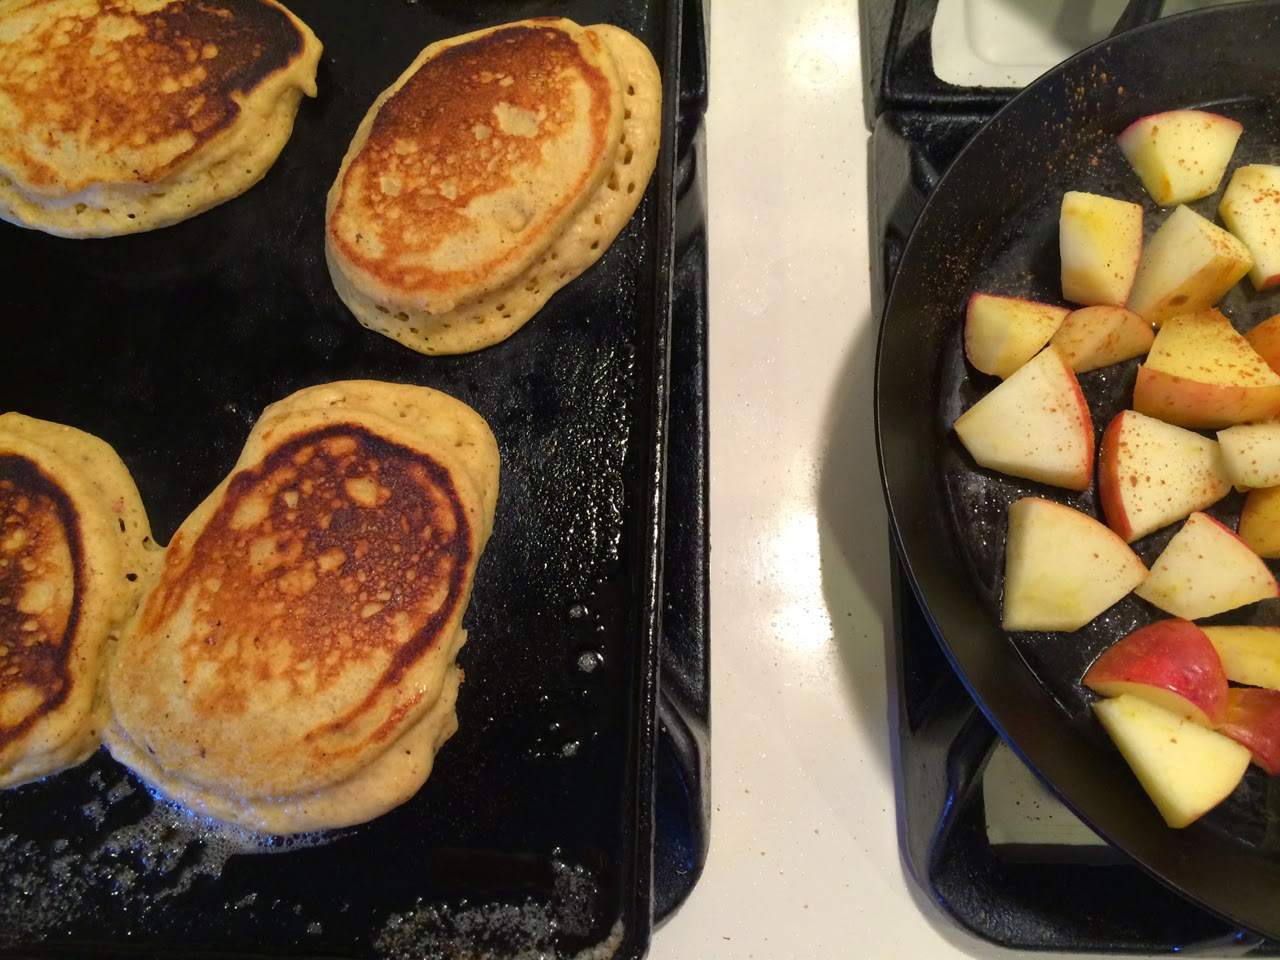
As soon as you get home, roast some winter squash and you will be that much closer to making this praline pumpkin pie for Thanksgiving (delicious made with traditional pie pumpkin or kabocha squash). You will also have plenty of squash puree left over for pumpkin pancakes for a special fall weekend breakfast. We devoured a batch this morning, served with dollops yogurt, sprinkles of flax seeds and maple syrup.


Pumpkin Pancakes
adapted from NYT Cooking, makes 16-20 small pancakes
1 ½ cups/192 grams all-purpose flour
2 tablespoons sugar
1 ½ teaspoons baking powder
¾ teaspoon baking soda
¾ teaspoon kosher salt
1 ½ teaspoons ground cinnamon
1 teaspoon ground ginger
1 ½ cups buttermilk
¾ cup pumpkin purée
2 eggs
3 tablespoons melted butter, plus more for greasing the skillet
1 teaspoon vanilla extract

1. In a large bowl, whisk the flour, sugar, baking powder, baking soda, salt and spices together until well combined.

2. In a medium bowl, whisk the buttermilk, pumpkin purée, eggs, melted butter and vanilla extract until well combined.

3. Add the wet ingredients to the dry ingredients and gently fold with a rubber spatula until just combined. (A few small lumps are O.K.)

4. Heat a lightly greased griddle or nonstick skillet over medium-low heat. Drop the pancakes into the pan using a heaping soup spoon, making sure to leave plenty of room in between for the batter to expand.

5. Cook for a minute or two, until the batter bubbles at the edges and browns on the bottom, then carefully flip. Cook another minute or two, until the batter is completely cooked through and the pancakes are puffy and deep golden brown. Repeat until all of the batter is used. Serve the pancakes as you make them or keep the pancakes warm as you cook them by setting them on a baking sheet in a 250-degree oven.

Saturday, May 12, 2018

Apple Sourdough Skillet Pancake


I've been culturing a sourdough starter again, and the pets know that they have competition. This mason jar of microbes can command a lot of my attention.


One of my biggest concerns is how to use up all the discarded starter from replenishing the jar with fresh flour and water. 


A New York Times recipe from Tejal Rao for Cast-Iron Sourdough Pancakes caught my eye. It is essentially a Dutch baby with a tart tartine apple layer. 


I tweaked the recipe based on a number of readers' suggestions, and added maple syrup to the batter rather than drowning it in syrup at the end. It proved to be a big hit and I was glad to have more batter for a second pancake. This is a perfect Mothers Day breakfast dish for anyone who is nurturing a sourdough starter.


Apple Sourdough Skillet Pancake
adapted from NYTimes Cooking Tejal Rao's Cast-Iron Sourdough Pancakes
makes two skillet pancakes

approximately 1  cup (225 g) sourdough starter, unfed
1 1/2  cups (180 g) all-purpose flour (or include some buckwheat or corn flour)
1 1/2 cups (368 g) buttermilk or a combination of milk and whey)
2  eggs
2  Tbsp (39 g) maple syrup 
1/2 tsp salt
1/2  tsp baking soda
2  apples, cut into slices
pinch of cinnamon (optional)

4  Tbsp butter, divided

1. The night before, in a large blow whisk together the unfed starter with the flour and buttermilk. Cover and leave to ferment overnight.

2. The next morning, put a 10 inch cast iron skillet in the oven and preheat at 450 degrees. Core and slice the apples. Transfer the pan from the oven to a medium high stovetop burner. Melt 2 Tbsp butter and put in half the apple slices, sprinkling them with a pinch of cinnamon if desired. Cook for a couple of minutes and then flip.

3. Meanwhile, finish the batter by whisking in the eggs, maple syrup, salt, and baking soda. Remove the skillet from the heat. Pour half batter over the apples and melted butter and transfer the skillet to the oven.

4. Bake for 15 minutes until the top is nicely browned. Remove the skillet from the oven. Place a large plate over it and invert the pancake onto the plate, apples side up. Return the skillet to the stovetop and make a second pancake. Slice the pancakes into wedges and serve warm.

Sunday, June 12, 2016

Fava Bean and Summer Squash Chickpea Flour Crepes


At last week's Fairmount Neighborhood Farmers Market, Camas Swale Farm brought a bounty of spring vegetables, including delicate summer squash and fat fave beans.


Fava beans are best when shelled from their pods


and then released from their slightly bitter and tough skins. Peeling fave beans  is a true labor of love, and after all that investment of work they should be treated with reverence.


I decided to pair them with lightly sautéed summer squash and fresh herbs as topping for chickpea flour crepes as a stovetop version of farinata


The batter is simply chickpea flour and water with a bit of salt and olive oil. I found that I needed to keep my crepe pan quite hot and use plenty of olive oil to prevent the crepes from sticking, but once I mastered this, the crepes proved to be the perfect canvas for the fava beans, and a delicious post-market treat.


Chickpea Flour Crepes with Fava Beans and Summer Squash
makes about 4 crepes
Crepe batter
1 cup chickpea flour
1 cup water
1/2 tsp salt
2 Tbsp olive oil for batter and more for cooking

Crepe toppings
handful of fave beans
1 or 3 small summer squash
1 Tbsp olive oil
salt to taste
aleppo pepper or red pepper flakes to taste
chopped fresh herbs such as chives and thyme

1. Whisk together the batter ingredients into smooth. Let rest for at least half an hour, or overnight in the refrigerator.

2. Prepare the fave beans. Boil a small pot of salted water. Remove the fave beans from the pods. Blanche the beans in the boiling water for 1 minute and then strain and run under cold water. For each blanched bean, use a paring knife to make a small incision in the outer skin and pop out the bean from the casing with your fingers.

3. Cut the summer squash into 1/4 inch thick half moons or other pieces. Heat a crepe pan or nonstick skillet over medium hight heat. Add one Tbsp olive oil, the summer squash, salt and aleppo or red pepper flakes to taste. Sauté until the summer squash has a bit of brown blistering on its surface but is not yet mushy. Transfer the squash to a bowl.

4. Return the crepe pan to medium high heat. Add a generous amount of olive oil. When the oil is shimmering, pour in about 1/2 cup crepe batter and tip the pan in a circular motion to spend out the batter. Allow the batter to cook until it darkens in color slightly. Then use a spatula to flit the crepe  and cook briefly on the second side. Cook the remaining crepes. 

5. Top the crepes with the sauteed summer squash and fave beans sprinkled with chopped fresh herbs.

Friday, July 24, 2015

Swiss Chard Fritters and Grilled Swiss Chard Stems


This promises to be a beautiful summer weekend, so plan in a trip to the Fairmount Neighborhood Farmers Market to pick up your week's groceries from a wide selection of summer produce from Good Food Easy at Sweetwater Farmpastured meats from Fair Valley Farm, and beautiful fresh cut flower bouquets from Tiger Lily Art Company. Be sure to grab a bunch of greens to work into your week's meals.


Last Sunday I picked up this lovely rainbow chard, along with onions, zucchini, peppers, eggplant, cucumbers, tomatoes and some ground lamb. Sunday evening we had grilled lamb burgers and I caramelized onions for a pot of mujaddaraTo accompany the lamb burgers, I made a tomato and cucumber salad and we grilled the chard stems for a simplified version of these recipe with anchovy vinaigrette. The stems are first quickly blanched, then marinated, charred on the grill, and tossed back into the marinate bowl. They were tender and pungent and made one regret ever having relegated a chard stem to the compost heap.


After blanching the stems, I also blanched the chard leaves for the following evening's dinner, and, while the grill was going, roasted extra zucchini, peppers and a whole eggplant wrapped in aluminum foil and nestled directly into the coals. 


Monday night's dinner was these Swiss chard fritters from Yotam Ottolenghi and Sami Tamimi's "Jerusalem: A Cookbook." They are delicate pancakes, held together with tangy feta cheese, and bursting with green flavors (I used chard, parsley  cilantro, and mint). They made a perfect meatless Monday meal, along with more mujaddara, grilled vegetables, and a roasted eggplant salad. Two delicious meals from a couple bunches of chard.


Grilled Swiss Chard Stems

Stems from 2 bunches Swiss chard (save greens for another use)
2 Tbsp extra virgin olive oil
2 anchovy fillets
1 garlic clove, finely chopped
Salt and freshly ground pepper
Splash sherry vinegar

1. Wash the chard stems, cut off any dark edges, and cut into 5 to 6-inch lengths.

2. Blanch stems in salted boiling water in batches till just tender, about 2 minutes per batch, then transfer to an ice bath. It is very important to follow all the rules of blanching and not overcrowd the pot. Any shortcuts here results in the color turning black.

3. Dry the blanched stems. In a pretty bowl large enough to hold the stems, combine the olive oil, garlic, and anchovy fillets and use the back of a fork to mash them into a paste. Toss the stems in the paste to coat.

4. Place the stems on the grill in a single layer. Grill long and slow until they become quite dark and charred but not burned. When they are done, transfer them back to the bowl with the anchovy paste, add a splash of sherry vinegar, some freshly ground pepper, and salt to taste. Serve warm or at room temperature.


Swiss Chard Fritters

14 ounces (2 bunches) Swiss chard leaves, stems removed
½ cup Italian parsley leaves
¼ cup cilantro leaves
¼ cup mint leaves
½ teaspoon granulated sugar
3 tablespoons all-purpose flour
2 cloves garlic, chopped
2 large eggs
3 ounces crumbled feta cheese (1/2 cup)
 Olive oil
 Lemon wedges, for serving (optional)

1. Bring a large pot of salted water to a boil, add chard and simmer for 5 minutes. Remove from pot and drain well, patting leaves dry with a paper or kitchen towel.

2. Place chard in food processor with herbs, sugar, flour, garlic and eggs. Pulse until well blended. Fold in feta by hand.

3. Heat 1 tablespoon oil in a large sauté pan over medium-high heat. When oil is hot, spoon in 1 heaping tablespoon of mixture for each fritter (you should be able to fit three fritters per batch). Press down gently on fritter to flatten. Cook 1 to 2 minutes per side, until golden brown. Transfer to a baking sheet lined with paper towels. Add another tablespoon oil to pan and repeat. Serve warm, with lemon wedges (optional).

Saturday, March 21, 2015

One Egg Omelette with Radish Microgreens


The official first day of spring has arrived after many spring-like winter days. Among our spring treats in our Good Food Easy CSA, we've been enjoying their various microgreens.  I've found that these delicate bites of spring are especially tasty in micro-omelettes: a single beaten egg cooked like a crepe, with some sharp cheese to complement the slightly spicy greens.


These make a perfect weekend lunch, individualized to each person's taste. I like to eat mine on a toasted, buttered multigrain bagel, with a dollop of harissa.


One Egg Omelette with Radish Microgreens

1 egg
1 pad butter
salt and pepper
1 slice sharp cheese
1 handful radish microgreens

1. Beat the egg and season with salt and pepper. 

2. Heat a 9 inch crepe pan or cast iron skillet over medium low heat. Put in a pad of butter and let it melt. Off the heat, pour in the beaten egg and tip the pan around so that the egg coats the bottom of the pan. Return the pan to a low heat and cover the egg "crepe" with cheese pieces. Allow the cheese to melt for a minute. Then place the radish greens in the center of the pan and fold over the edges of the omelette to make a square.

3. Serve the omelette immediately. It's very tasty sandwiched between the halves of a toasted, buttered bagel with a dollop of harissa. 

Saturday, February 14, 2015

Strawberry Pancakes


Orders were placed last night for heart shaped pancakes for Valentine's Day breakfast. I added a handful of frozen strawberries from this week's Good Food Easy CSA share, which gave the resulting cakes a faint pink hue and a pleasant berry flavor.


Freeform hearts didn't work so well (I am not a pancake art master), but an aluminum foil mold managed to produce a few passable hearts. While I wrestled with the pancakes, my husband prepared fruit toppings: sautéed cinnamon apples shaped in an onigiri mold and banana hearts. Breakfast served with love.


Strawberry Pancakes
makes about 20 small pancakes
2 cups buttermilk
2 eggs
1 handful strawberries, thawed if frozen, and mashed
2 Tbsp canola oil
1 1/2 cups flour (I used Lonesome Whistle Farm's soft white wheat)
1 tsp baking powered
1/4 tsp baking soda
butter for greasing the pan

1. Make the batter. In a large mixing bowl, beat together the wet ingredients. In a separate bowl, combine the dry ingredients. Stir the dry ingredients into the wet ingredients just to combine.

2. Heat a large griddle on medium low until the temperature is stable. Grease with a pad of butter. Spoon on the batter with a soup spoon to make silver dollar sized pancakes. To make heart shaped pancakes, you can form a mold out of aluminum foil folded several times into a strip and formed into a heart. Cook the pancakes until stable bubbles form in the batter and the edges take on a more yellowish hue. Flip and cook briefly on the second side. If using the aluminum mold, peal it away from the pancake after flipping. When both sides are nicely browned, transfer to a warm plate. Grease the pan again and cook the next round of pancakes. Serve with fruit and maple syrup.

Sunday, November 23, 2014

Pumpkin Cornmeal Pancakes


This weekend I roasted two heirloom pumpkins from Sweetwater Farm, and one of their acorn squashes for good measure. Of course this yielded more than enough pumpkin puree for pumpkin pecan praline pie, so at the suggestion of my son, I made some pumpkin pancakes for breakfast.


I paired the naturally sweet squash with the sweet flavor of corn flour (from Lonesome Whistle Farm). No fan of the cloying flavor of pumpkin pie spices, I restricted myself to a dash of ground cardamom in the batter. But for toppings, we made some cinnamon-spiked sautéed apples, that added just the right hint of Thanksgiving dessert. This could make a nice post-Thanksgiving breakfast, if your guests aren't too stuffed.   


Pumpkin Cornmeal Pancakes with Cinnamon Apples
makes about 24 small pancakes
pancake batter
1 cup pureed pumpkin
1/2 cup plain yogurt
2 eggs
1 tsp vanilla extract
1/2 cup white flour
1/2 cup fine ground cornmeal or corn flour
1 tsp baking powder
1/2 tsp baking soda
1/2 tsp ground cardamom
pinch of salt
butter for cooking pancakes

cinnamon apples
1 large or 2 small apples, cored and diced
2 Tbsp butter
1/2 tsp cinnamon
1 tsp turbinado sugar

1. Prepare the pancake batter. Mix together the wet ingredients (pumpkin, yogurt, eggs, vanilla extract) until smooth. In a separate bowl, mix together the remaining dry ingredients. Then gently combine the dry ingredients into the wet ingredients. If the batter seems too thick, add a little milk to thin it.

2. Prepare the apple topping. Warm a small skillet over medium low heat. Melt the butter, and stir in the chopped apples and cinnamon. Cook over low heat for about 15 minutes, stirring occasionally, until the apples are soft and fragrant. Stir in the sugar and cook for a minute longer. Reserve.

3. Heat a griddle and when it is warm, grease with a little butter. Use a soup spoon to spoon the batter into pancakes. When permanent bubbles form around the edge and the color of the batter lightens on top, flip the pancakes and cooked them for a couple of minutes on the second side until both sides are golden brown. 

4. Serve the pancakes hot off the griddle with the apple topping and a dribble of maple syrup.

Sunday, May 11, 2014

Bread Starter Crumpets


Bakers refer to their bread starters as their "mother", but I must admit to harboring maternal feelings towards mine. For the past few weeks, I've fed it when it's hungry, kept it warm, and celebrated its accomplishments. One of the greatest challenges has been to deal with its excessive productively, just like the endless onslaught of artwork that returns in my children's backpacks each day. Sourdough waffles could help, but I needed the moral equivalent of a magical 12 quart minestrone recipe made from macaroni and dried bean collages. 


This crumpet recipe from Chocolate and Zucchini, adapted from King Arthur Flour, is essentially straight fried bread starter. The first time I tried it, my starter was a bit too thick and the baking soda didn't get mixed in well. For my next batch, in a small stroke of frugal kitchen genius, I added some yogurt whey that I had strained out to make a thickened yogurt sauce, which gave it the right consistency and added to the tangy flavor.

Why would someone happen to own crumpet rings, you might ask. Mine were a birthday gift that I received from my future husband shortly after we started dating. Special occasions can be awkward early in a relationship, but he handled the situation charmingly, preparing me a lovely dinner followed by a scavenger hunt for my gift, complete with rhyming clues. At the last clue, I realized with a sudden shock that the gift was going to be a ring, and just as quickly I realized what my answer would be if it were an engagement ring. When I opened the gift, I was overcome with happy relief at knowing I'd met the man I wanted to marry, mischievous scavenger hunts and all, and also knowing that we were only at the crumpet ring stage. Now sixteen years later, we have two children who can help make crumpets for Mother's Day tea.


Bread Starter Crumpets
Yields eight 9-cm (3 1/2-inch) crumpets.*

270 grams (1 cup) bread starter (can use older starter that has been kept in the fridge for a few weeks
)
a little yogurt whey or buttermilk for thinning, if necessary
1 teaspoon sugar
1/2 teaspoon sea salt

1/2 teaspoon baking soda
butter or vegetable oil for greasing

1. Place the starter in a large bowl. Add the sugar and salt, and whisk to combine. The batter should be the consistency of a very thick pancake batter and pourable. If necessary, thin the batter a little with some yogurt whey or buttermilk.

2. Heat a skillet over medium low heat. Grease the crumpet rings well. When the griddle is hot, melt a pad of butter  or pour on a little vegetable oil and spread it around with a spatula. 

3. Just before you are ready to cook the batter, whisk in the baking soda. As the baking soda reacts with the acid in the starter, the batter will foam and rise. Using a measuring cup or a small ladle, pour about 1/4 cup of the batter into each crumpet ring.

4. Cook for a few minutes, until the top is set and the bottoms are lightly browned when you peek underneath by lifting with a spatula. As they cook, the crumpets will gradually shrink back from the rings. Use pliers or tongs to lift the crumpet rings off the crumpets (you may need to run a knife around the edge to help them loose), and flip the crumpets to brown lightly on the other side.

5. Eat the crumpets warm off the griddle or cool them for toasting later. They can also be frozen once cooled. Wipe down the crumpet rings if necessary, re-grease, and place them on the skillet to preheat again before repeating with the remaining batter.

*Note: Clotilde Dusoulier recommends that if you have multiple cups of starter to use up, you should mix the batter in batches with 1 cup of starter at a time, so that the crumpets are cooked shortly after the addition of the baking soda.

Saturday, July 13, 2013

Fresh Blueberry Pancakes


This Sunday at the Fairmount Neighborhood Farmers Market you can look forward to the following offerings from Sweetwater Farm and Fair Valley Farm:

summer berries! blueberries, marionberries, and strawberries
tomatoes (make a BLT for lunch)
celery and kohlrabi (try grilled with smoked trout)
squash blossoms, baby squash, zucchini, and fennel (make pickles)
cauliflower and broccoli (also nice grilled in a salad
lavender, Italian parsley, and 1 lb bags of basil (make some parsley pesto)
sugar snap peas (add some crunch to your salad)
cucumbers and carrots (make some spring rolls)
spring onions, fresh spring garlic, and lemon drop hot peppers
spinach, kale, chard, collards, braising greens mix, lettuce, and salad mix
dried beans and grains from Camus Country Mill
jams, salsa, and pickles from Sweet Creek Foods
pastured chickens (try chicken and saffron rice)


There are so many delicious things you can make with blueberries, like bucklescobblers and cakes, but my all time favorite is blueberries pancakes. And rather than tucking the blueberries inside (reserve this for winter pancakes you make with your frozen berry stores), I like to pile the fresh berries on top of my pancakes and chase them around my plate as they roll away from my fork. Blueberry pancakes were my father's specialty, and for summer vacations, when we would pack our tiny Datsun B210 with two parents, two kids, two dogs, sheets, towels, beach towels, and inner tubes, the entirety of the kitchen supplies were devoted to my father's breakfast preparation necessities: coffee mill and espresso maker, and a pristine pancake griddle that could not be used for any other purpose. He always made Bisquick pancakes, but in my adult life I've diversified to many types. Right now my favorite are chia seed and buckwheat pancakes, at the top of the list below, but all of these would be delicious with some of Sweetwater Farm's fresh berries. 


Breakfast Pancakes and Waffles
Chia Seed and Buckwheat Pancakes
Cottage Cheese Pancakes
Swedish Oatmeal Pancakes
Teff Grain and Ricotta Pancakes
Apple Flapjacks
Fresh Fruit Crepes
Easter Egg Aebleskiver
Aebleskiver Filled with Chocolate and Hazelnut Stuffed Figs
Yeasted Buckwheat Waffles
Rye Waffles
Gluten-Free Waffles

Saturday, March 2, 2013

Mung Bean Pancakes with Kimchi


With a large supply of kimchi from our Open Oak Farm cabbages, a recent New York Times recipe for kimchi mung bean pancakes caught my eye. 


The article was about cooking with kids (in this case the daughter of chefs Jean-Georges and Marja Vongerichten).  I was skeptical that our kids would try pancakes with kimchi (my jars of fermenting cabbage are a source of jokes for them right now, but someday they will see the light). However, I thought the basic principle (similar to falafel) of making a batter from soaked, raw legumes could be the starting point for all sorts of pancakes. So for my recipe I left out the kimchi juice from the batter and incorporated grated raw carrots and chopped mint into half for kid-friendly Korean style latkes. Both versions were delicious as appetizers for dinner, and the remaining batter made a tasty lunch of fritters on top of a green salad. 


Mung Bean Pancakes
adapted from “The Kimchi Chronicles,” by Marja Vongerichten and Julia Turshen
makes about 20 pancakes
batter
2 cups split mung beans
1/4 cup short grain rice, such as sweet rice
1 cup water
1 tsp fish sauce (optional)
1 tsp soy sauce
1 tsp sesame oil
pinch of salt
1 cup kimchi (or 1 cup grated carrots and chopped mint, plus more salt)
neutral oil, such as canola, for frying

dipping sauce
1/4 cup soy sauce
1 tsp sugar
1 Tbsp sesame oil
1 Tbsp rice vinegar
1/8 tsp red pepper flakes
2 scallions, green and white parts finely chopped

for serving
cilantro leaves
lime slices
sriracha sauce

1. Combine the mung beans and rice in a fine-meshed colander and rinse well with cold water. Transfer to a bowl and add 8 cups of lukewarm water. Cover the bowl and soak at room temperature for at least 6 hours and up to 24 hours, changing the water once or twice.

2. Prepare the pancake batter by draining the soaked beans and rice and transferring them to the jar of a blender. Add 1 cup water, the fish sauce (if using), sesame oil, soy sauce, and salt and blend into a slightly coarse paste. Do not overmix. Transfer to a large bowl, finely chop the kimchi and stir into the batter. You could also divide the batter into two bowls and incorporate 1/2 cup finely chopped kimchi into one and 1/2 cup grated carrots, chopped mint, and a pinch of salt into the other.

3. To fry the pancakes, heat a large skillet, such as cast iron, over medium heat and add 1 to 2 tablespoons of the vegetable oil. Heat until the oil shimmers. Using a 1/4 cup measure, ladle in the pancake batter, flattening each pancake to 1/3-inch thickness. Cook until crisp and browned on one side, about 4 minutes. Flip the pancakes and cook until browned on the other side, another 2 to 4 minutes. Transfer to a paper towel-lined plate.

4. While the pancakes are cooking, you can make the dipping sauce by combining the soy sauce, sesame oil, rice vinegar, red pepper, and scallions in a small bowl and mix until blended.

5. Serve the pancakes warm with the dipping sauce, cilantro leaves, lime slices, and sriracha.

Saturday, October 27, 2012

Chia Seed and Buckwheat Pancakes


Lately I've come across a number of recipes using chia seeds (the very same seeds that produce the green afros on chia pets), and I was curious to taste them. I found that they have a nutty, slightly smokey flavor that reminded me of buckwheat, which inspired me to pair the two together in these pancakes that have become a new family favorite.


If you get the impression from this blog that my family eats a lot of pancakes, you are correct. We like them hardy with oatmeal and pears, rich with cottage cheese, and pillowy with teff and ricotta. These chia seed and buckwheat ones are deliciously light and flavorful. The soaked chia seeds soften up and absorb liquid, like tapioca, binding together this buttermilk batter such that it needs just a minimum amount of flour, making for tender cakes. I've used half buckwheat and half white wheat flour, but I imagine one could use another flour, like sorghum or teff, instead of wheat for a gluten-free version. This morning we
 topped them with blackberry sauce and hardy kiwis from our garden. And, caught up in the spirit of Halloween, we had a few jack-o-lantern kiwis and pancake people with huckleberry smiles. 


Chia Seed and Buckwheat Pancakes
(makes about 32 pancakes)
1/4 cup chia seeds
2 cups buttermilk
2 eggs
3 Tbsp canola oil
1/2 cup buckwheat flour
1/2 cup white flour
1 tsp baking powder
1/4 tsp baking soda
pinch of salt
butter for cooking pancakes

1. In a large mixing bowl, combine the chia seeds with the buttermilk. If you'd like the seeds to be very soft, you can soak them in the buttermilk overnight, but they will soften up quite nicely in about ten minutes (about the time it takes from starting the batter to making your first pancakes). Mix in the eggs and canola oil.

2. In a separate bowl, mix together the remaining dry ingredients. Then gently mix the dry ingredients into the wet ingredients until they are just combined.

3. Heat a griddle or large skillet (I prefer cast iron) over medium heat. Melt a small pad of butter to grease the surface. Spoon out dollops of batter with a soup spoon and allow to cook until the batter loses some of its raw pale color and bubbles stay fixed. Flip with a spatula and cook for a minute on the other side. Both sides should be nicely browned. Transfer to a warm plate, and cook the rest of the batter. Enjoy with fruit toppings and maple syrup.