Showing posts with label bread. Show all posts

Friday, July 6, 2018

Grilled Vegetable and Stale Bread Tuna Salad


This Sunday at the Fairmount Neighborhood Farmers Market, you'll find pastured meats and eggs from Fair Valley Farm and Fog Hollow Farm, cut flowers from Tiger Lily Art Company, and fresh produce from Camas Swale Farm, including torpedo onions, summer squash, cherry tomatoes, and radicchio for grilling.


We grilled a large platter of vegetables for the 4th of July, to go along with our Fair Valley Farm beef burgers. My philosophy is that you can not have enough leftover grilled vegetables, which can be reincarnated in many guises such as on pizza or in grain salad.


When assessing the leftover situation for packing lunch this morning, I realized that we still had some grilled vegetables and a quarter of a stale baguette. In my family I am famous for my aversion to soggy sandwiches and I generally avoid packing any ladened bread that will have to sit from morning until noon. These ingredients, however, inspired me to throw together a lunch in which the intension was to hydrate the bread into an edible state by lunchtime. 


On top of cubed stale baguette I layer a can of tuna in olive oil and then the grilled vegetables with some balsamic vinegar and basil. By lunchtime the flavors had melded, the bread was softened but not soggy, and the whole mixture made a delicious meal mounded on top of fresh, crunchy lettuce leaves.


Grilled Vegetable and Stale Bread Tuna Salad
recipe for two servings
~8 slices stale baguette
~two cups of grilled vegetables such as zucchini, eggplant, peppers, onions, corn, mushrooms, and radicchio
1 can good tuna in olive oil
~1 Tbsp balsamic vinegar
~8 basil leaves
~12 lettuce leaves, washed

1. Chop the baguette slices into bite size pieces and layer on the bottom of a serving bowl or transportable lunch container.

2. Flake the tuna and layer it over the bread pieces, drizzling over the olive oil.

3. Cut the grilled vegetables into bite size pieces and layer over the bread and tuna. Drizzle with a little balsamic vinegar. Sprinkle with some torn basil leaves.

4. Allow the salad to marinate for several hours at room temperature so that the bread absorbs the dressing and flavors. To serve, tear the lettuce leaves and distribute over two plates. Toss the bread salad to mix and distribute it over the lettuce on the two plates. Enjoy.

Saturday, September 16, 2017

Wildflour Oven Bread at the Market


This Sunday at the Fairmount Neighborhood Farmers Market you will find fresh eggs and pastured chicken, beef, pork, and lamb from Fair Valley Farm and Fog Hollow Farmfresh cut flower bouquets from Tiger Lily Art Company, and plenty of fresh produce from Camas Swale Farm including lots of sweet peppers and collard greens (both so delicious roasted on toast or in tacos).

Also this Sunday we're happy to have a new addition to the Market of WildFlour Oven offering wild fermented breads with local whole grains.


If you are a bread enthusiast and were sad to see our local Eugene City Bakery close a couple years ago, now your Sunday market shopping can be completed with some home made loaves from Wildflour Oven. Last week we enjoyed a Sunday dinner of lamb burgers with Fair Valley Farm ground lamb on Wildfour Oven's challah topped with harissa, accompanied by Camas Swale Farm grilled eggplants and sweet peppers and fresh cucumbers and cherry tomatoes topped with lemon crème fraîche sauce. For the week we had delicious sandwiches of grilled vegetables and feta cheese on Wildflour Oven's whole wheat loaf bread. A source of fresh baked bread is a welcome addition to the neighborhood.

Sunday, December 6, 2015

Fresh Bread and French Onion Soup


It's been a busy fall, but with the term winding down, I finally turned my attention to my neglected bread starter and started coaxing it back to life with daily feedings. In a few days, it was bubbling  away happily and over the weekend it raised a fine loaf of rye and red fife flour. 


With the baking bread aromas filling the kitchen, and a steady drizzle outside, I decided to make some French onion soup for dinner. I caramelized a big pot of onions (saving some for a future mujaddara), and thawed a quart of chicken stock. The recipe I followed from the kitchn, based on Julia Child, called for an hour of cooking the broth with the onions, and another 20 minutes in the oven, but I admit to skimping on both, because we were all too hungry to wait. The resulting soup was deliciously decadent for a rainy day.


French Onion Soup
Makes 4 one-cup servings

3 large yellow onions (~1 pound)
1 tablespoon unsalted butter
2 tablespoons olive oil
1/2 teaspoon salt
freshly ground black pepper
1/4 teaspoon sugar
4 cups beef, chicken, or vegetable broth
1/2 cup white wine or white vermouth
4 bread slices, toasted
1 cup shredded Gruyere cheese

1. Peel and cut each onion into half moons: Slice each half of the onion into thin, evenly-sized half moons and cut the half moon slices in half. You will have at least 3 cups of chopped onions. But don't worry too much about quantities with this recipe; if you have an extra onion to use up, throw it in!

2. In a large pot, melt the butter with the oil over medium-low heat. After the butter foams up and then settles down, add the onions and stir to coat with the butter. Cover the pan and cook for 15 minutes on low heat. 

3. Remove the lid. The onions should have wilted down somewhat. Stir in 1/2 teaspoon salt, a generous amount of black pepper, and 1/2 teaspoon sugar (this helps the onions caramelize). Turn the heat up to medium and cook, uncovered and stirring every few minutes, until the onions are deeply browned. This will take 40 minutes to 1 hour. Turn down the heat if the onions scorch or stick to the pan; the browning doesn't come through burning, but through slow, even caramelization.

4. Heat the broth: As the onions approach a deep walnut color, heat the broth in a separate pot. Add the wine and allow to cook down. Then add the hot broth to the caramelized onions and bring to a boil. Cook gently over low heat for about 1 hour (I only did this for 20 minutes). Taste and season with additional salt and pepper if needed. 

5. Heat the oven to 350°F. Divide the soup between small but deep oven-safe bowls. Top each with a slice (or two) of toasted bread and sprinkle grated cheese in a thick layer over the bread and up to the edge of the bowl. Place the bowls on a baking sheet or in a casserole dish. Bake for about 20 minutes until the cheese is thoroughly melted (I did this for 5 minutes).

6. Broil until the cheese is browned: Turn the oven from bake to broil and broil the soup for 1 to 3 minutes or until the cheese is browned and bubbling. Remove carefully from the oven and let cool for a few minutes before serving on heatproof dishes or trivets.  

Saturday, April 4, 2015

Hot Cross Buns


This Easter I decided to try my hand at baking hot cross buns, mostly because I noticed that this recipe from Chocolate and Zucchini called for two ingredients I already had fermenting in my refrigerator, bread starter and creme fraiche. I combined these into a wet dough that greeted me in the morning with happy bubbles.


Traditional hot cross buns call for currents, which I knew my daughter wouldn't like (she diligently picks out all the raisons from her stollen slices), but I noticed this BBC Good Food recipe included diced apples and cinnamon, which are always a hit in our household, so I folded some into the dough in the morning.


After the buns had risen, I decorated them with the traditional flour paste cross, following these instructions for making a parchment paper piping cornet, which was remarkably simple. One could also use a sugar icing for the crosses after the buns are baked, but then they won't survive reheating.  


Instead of icing, to give the buns a little sweetness I glazed them with apricot jam. We sampled one to determine that they tasted as nice as they smelled, and are saving the rest for Easter breakfast.


Hot Cross Buns
(adapted from Chocolate and Zucchini, makes one dozen)

for the dough
120 grams (4 1/4 ounces) ripe 100% starter
340 grams (12 ounces) all-purpose flour [if you don't use a starter, use 400 grams (14 ounces)]
1/2 teaspoon dry yeast [if you don't use a starter, use 2 teaspoons]
175 ml (3/4 cup) milk, at room temperature [if you don't use a starter, use 225 ml (1 cup minus 1 tablespoon)], plus a little for brushing
125 grams (1/2 cup) crème fraîche (or equal parts sour cream and heavy cream)
1 tablespoon honey
1 1/2 teaspoons salt

for the apple filling
1/2 apple, cored and cut into small pieces
1 teaspoon ground cinnamon
1/2 teaspoon ground ginger

For the crosses:
2 tablespoons all-purpose flour
2 tablespoons water

For the glaze:
2 tablespoons apricot jam

Day one: Prepare the dough for overnight fermentation.
In a large mixing bowl, or in the bowl of a stand mixer, combine the flour, starter if using, yeast, milk, crème fraîche, and honey to form a shaggy mass, making sure all of the flour is incorporated. Let rest at room temperature for 30 minutes.

2. Mix in the salt. Fold  the dough for 4 minutes -- or set the stand mixer on low speed -- until the dough starts to get a little smoother.

3. Place a piece of plastic wrap directly on the surface of the dough, cover the bowl with a plate, and place in the fridge for 12 to 18 hours.

Day two: Divide and shape the buns for the second ferment, decorate, bake, and glaze.
4. The next day, remove the dough from the fridge, remove the plate, and let rest for 30 minutes; it should have risen moderately, not quite doubled. Line a baking sheet with parchment paper or a silicone baking mat.

5. Core and dice the apple into small pieces and toss with the cinnamon and ground ginger.

6. Turn the dough out onto a lightly floured working surface -- the dough will be fairly sticky, but if you work quickly while it is still cold from the fridge, you will be fine. Flatten it out, dump on the spiced apples, and fold the dough over itself. Fold it several more times until the apple pieces are incorporated. Divide the dough into 12 equal pieces (about 90 grams or 3 1/6 ounces each), and shape each piece into a squarish bun (the dough is a bit sticky, just do your best) and place them on the prepared baking sheet, leaving about 2.5 cm (1 inch) of space between them: you do want them to touch as they rise and bake.

7. Cover with a clean, floured towel and let rest for 2 1/2 hours, until they've risen to about 1.5 times their original size.

8. Preheat the oven to 350°F. Brush the buns lightly with milk (this will foster browning).

9. Prepare the flour paste for the crosses: in a small bowl, place the flour and water and whisk with a spoon until smooth; it should have a consistency a bit like face cream, spreadable but not too thick. Spoon this mixture into a small paper cone (a cornet) assembled from parchment paper as demonstrated here. Snip the tip of the cone to form a 3-mm (1/10-inch) opening and pipe the flour paste over the buns to form a cross.

10. Insert the baking sheet in the middle of the oven and bake for 35 to 40 minutes, until browned. Transfer to a cooling rack.

11. To prepare the glaze, heat the apricot jam carefully in the microwave, and add a tablespoon of water if it seems to thick. You can strain it if you like, or just avoid transferring apricot bits on your brush. Brush the buns with the glaze while they're still warm. Once cooled, hot cross buns should be split in two horizontally and toasted.

Saturday, January 24, 2015

A Satisfying Loaf of Bread


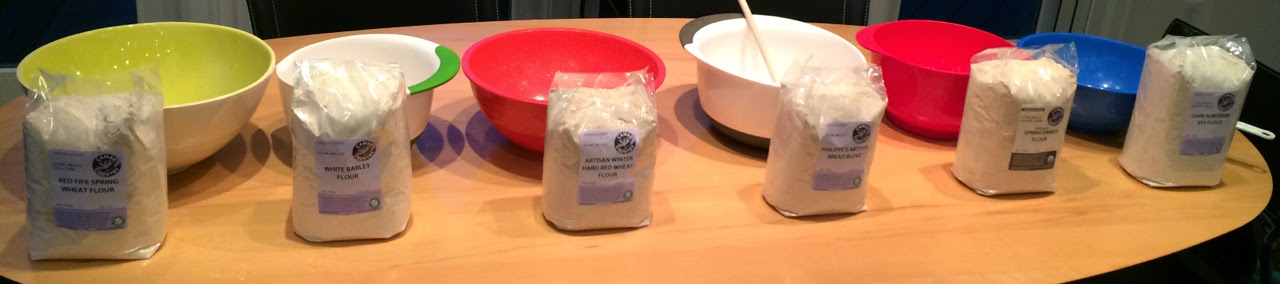
The winter break is now a distance memory, but I didn't want to let it slip away entirely without reporting on a triumphant reunion of the Bread 101 team. This past spring, we co-taught a course on the science and culture of bread. We’d learned alongside our students how to corral wild yeast into leaven and we’d experimented with different flours (establishing beyond any doubt that dough made with 100% barley flour is best used for construction). The following summer we’d had the privilege of visiting the Bread Lab, described by the New York Times as "a Wonka-esque wonderland for crusty, airy-crumbed experimentation",
where we’d had an immersive course in whole wheat bread baking from the master baker, Jonathan Bethony. Since then, we’d each been rousing our bread starters on occasion and attempting to recreate Jonathan’s loaves. With practice, I felt that I’d mastered his method for folding high hydration dough to build up its gluten network while trapping its flavorful fermentation fumes. But then once I’d achieved the pillowy mound of dough from the first ferment, I would be flummoxed as to how to proceed. The correct method for shaping the dough eluded me, and even after rereading the lengthy master recipe in Chad Robertson's Tartine 3 many times, I was uncertain. Then, inevitably after I had left my somewhat mangled packet of dough in a cloth-lined bowl for its second ferment, the final transfer to a searing hot Dutch oven would be a fiasco, with a deflating flop into the pot and sad tendrils left clinging to the cloth. The bread was still delicious, but only a pale mirage of Jonathan’s masterpieces.


When the bread coven gathered in my kitchen in early January, somehow our collective wisdom freed me from puzzling over cryptic instructions and allowed my hands to recall the feeling of shaping the dough. After the first ferment, the dough simply needed to be shaped by a circular rocking movement, lifting the back of the ball, rocking forward, and allowing gravity to pull the forward edge under the ball, then rotating and repeating to create a round dome with a taut top surface. Once our loaves had been shaped, the next steps seemed natural. There was no doubt that this domed surface would become the top of the final loaf, so clearly we needed to flip the dough to letter-fold it into a bundle. As for the cloths, my friend Judith confidently dumped on such copious amounts of rice flour and rubbed it in with such vigor that the transfer to the hot pots went without a hitch.


Because none of us can resist carrying out experiments, we tried various receptacles for baking our breads, including Dutch ovens and ceramic cloches. All worked well and produced loaves that were the closest any of us had come to the the Bread Lab's exemplars. Below is the recipe we followed. We each left, loaf in hand, emboldened to keep tinkering with this recipe.


Whole Wheat Sourdough Bread
recipe for 2 loaves (we made 4, I often make just 1 loaf)

1. First thing in the morning, mix together:
200 g leaven (fed the night before, mine is made with white flour)
800 g water (the leaven should float if actively fermenting)
700 g whole wheat flour
300 g while flour

2. Let the dough rest for 30 minutes to hydrate flour. Then add:
20 g salt
50 g water

3. Mix the dough well with your hands until it feels smooth and elastic. Cover to start the first ferment. Every approximately 30 minutes for the next 3-4 hours, fold the dough onto itself four times, once from each side, and then flip, following these instructions. For the last hour, we gave the dough a boost by transferring it to a slightly warm oven.

4. Once the dough has risen to about twice its starting volume, it is ready to shape for its second ferment. Lightly flour a clean work surface. Divide the dough into two with a dough scraper. Place one piece of dough on the floured surface and shape into a boule by gently but firmly lifting the back end up, rocking the ball forward, and letting the force of gravity tuck the front edge under as you rock the ball back, rotate it, and repeat again. Once you've rotated the boule 360 degrees, it should have a taut top surface. Leave it resting on the work surface (seam side down), to rest for 30 minutes.

5. Meanwhile, prepare your proofing baskets. Generously dust two muslim clothes or dish towels with rice flour and rub into the fabric. Drape the cloths over two round bowls or colanders. The cloths need not be washed between baking sessions and will become better with age.

6. Once the boules have rested, you can shape your loaves. Dusk a bit more flour on your surface. Flip the boules, seam side up. Fold each by first taking the edge farthest from you, pulling it up and over 2/3 of the rest of the dough. Repeat this with the bottom and then the left and right edges. Gently transfer each loaf, seam side up, into the prepared floured baskets. Cover with a floured cloth and let rise 3-4 hours. An hour into this second ferment, you can transfer one or both loaves to the refrigerator to bake the following day.

7. 30 minutes before you will bake your loaves, start preheating the oven to 500 degrees and place in two Dutch ovens.

8. Take one hot pot out of the oven, sprinkle the bottom with polenta, then gently flip the loaf from the proofing basket, seam side down, into the pot. Use a sharp razor or knife to slash several cuts across the top of the loaf. Cover and transfer to the oven. Repeat with the second loaf.

9. Bake for 20 minutes at 500 degrees. Turn down the temperature 450, bake another 15 minutes. Remove the top, then bake another approximately 15 minutes until the loaf is a very dark brown.

10. Transfer the baked loaf to a rack and allow to cool for as long as you can stand. Jonathan recommends 24 hours, but you will probably want to enjoy it with dinner.

Thursday, August 14, 2014

HLTs


This Sunday at at the Fairmount Neighborhood Farmers Market, you can look forward to a selection of pastured chicken, lamb, and pork cuts from Fair Valley Farm and handcrafted vegan hazelnut cheese from Avellana CreameryGood Food Easy at Sweetwater Farm will have the following offerings: 

Fresh
lots of tomatoes, including cherries and flats of roams (try roasted tomato fish soup)
sweet and hot peppers of all kinds  peppers and tomatillos (delicious pan seared in salsa)
Shiro plums and Gravenstein apples from SLO farm (make apple-topped teff pancakes
NW peaches and blackberries
fennel and eggplants (make fennel and sardine pasta)
baby beets and new potatoes
carrots and kohlrabi  (try this kohlrabi salad with lemon and capers)
crookneck squash, summer squash, and cucumbers
radicchio, chard, kale, and lettuce, including bagged mix (try corn and chard pudding)
garlic and fresh herbs (basil, oregano, sage, thyme) and home-grown lemon grass

Preserves, Beans, and Grains
From Sweet Creek Foods:
Dill Pickles, Chili Dill Pickles, Bread 'N Butter Pickles, Pickle Relish
Blueberry, Strawberry, Blackberry, and Raspberry Fruit Spreads
Enchilada Sauce and Salsa
From SLO Farm: Applesauce
Assorted beans and grains from Camas Country Mill


This past few months, I've been experimenting with bread making, culminating with a trip last month to the Bread Lab, where my co-instructors and I got to see the multitude of different wheat strains being bred by wheat geneticist Steven Jones,


a lab full of amazing devices for studying the physical properties of bread dough, like this bubble blowing machine,


and we were tutored by baker Jonathan McDowell, 


producing the most delicious loaves of bread I've ever tasted.


Back home, my next attempt at high hydration, naturally fermented, whole wheat dough was pretty much a disaster, and I had to resort to a loaf pan to bake it, but it was still delicious. This sour, complex whole grain bread I've been baking goes nicely with the smooth, mild creaminess of Avellana Creamery's vegan hazelnut cheese. Continuing in the spirit of experimentation, for my latest loaf I invented a new version of the BLT, which is a true classic but infinitely malleable. The HLT consists of whole wheat bread spread with hazelnut cheese, dotted with sweet cherry tomatoes, and topped with a tender leaf of lettuce.


Monday, June 9, 2014

Bread Starter Naan


The Bread 101 class I have been co-teaching all term finished up today with a plethora of home baked breads (this Chad Robertson recipe) from the starters that the students have nurtured all term. It was impressive to see the quality of bread produced and to hear about the students' resourcefulness in creating these loaves. A common theme was the challenge of fitting the demands of bread baking into a busy weekend preparing for final exams. Over the weekend, I experimented with using my starter to make naan, which proved to be a successful vehicle for sour, fermented flavors and a speedy enough bread to be able to mix the night before and serve for lunch the next day.


I started with a naan recipe from Neelam Batra and incorporated a portion of my sourdough starter, as well as a small amount of commercial yeast. The dough already contains yogurt (I used Nancy's with live cultures), which gives it a fermented sourness, so the grain-fermenting wild yeast and bacteria of my starter seemed right at home in the mix.  


A dough I started in the evening with an active culture (fed that morning) doubled in bulk overnight. A half hour before noon, I preheated my oven to 500 degrees with a cast iron griddle positioned below the heating element. Rolled out flats of dough placed on this hot griddle puffed up in a matter of minutes, and were eaten hot out of the oven, slathered with melted butter. In the meantime, my students were still busy building the gluten networks of their country loaves. The final results were well worth all the hours of work, but this naan is a good alternative when time is short.


Bread Starter Naan
makes 8 to 10 naan
1/3 cup active starter (90 g)
1/8 tsp yeast
1 tsp sugar
1/4 cup water (or yogurt whey)
1/2 cup yogurt (125 g)
2 cups flour (250 g) (I used 1 cup unbleached white and 1 cup red fife)
2 Tbsp vegetable oil (I used canola)
1/4 tsp salt or to taste (I used ~3/8 tsp)
more flour for dusting
melted butter or ghee for brushing on the cooked naan

1. Start with an actively growing culture that you've fed no more than 12 hours earlier. Mix together the starter, yeast, sugar, water, yogurt, oil, and flour until just incorporated. Allow to sit for half an hour (autolysis period). Then add the salt and kneed the dough until it is soft and elastic. Cover the dough in a clean bowl and let it rise for at least 6 hours to overnight, until it has doubled in size. 

2. Heat the oven to 500 degrees and place a cast iron skillet directly under the heating element. Divide the dough into 8 to 10 portions and roll into flat ovals about 6 inches in length. Place the dough flats onto the skillet and bake for about two minutes until they puff up. Flip and bake for another minute on the second side, until they are slightly browned. Remove from the oven and brush with melted butter as the next batch bakes. Eat warm.

Notes: there are a lot of ways to modulate the sourness of the final bread. For less sour naan, do one or more of the following: use a more recently fed culture, double the amount of commercial yeast, double the amount of sugar, use water instead of whey for the liquid, decrease the dough fermentation time.

Sunday, May 11, 2014

Bread Starter Crumpets


Bakers refer to their bread starters as their "mother", but I must admit to harboring maternal feelings towards mine. For the past few weeks, I've fed it when it's hungry, kept it warm, and celebrated its accomplishments. One of the greatest challenges has been to deal with its excessive productively, just like the endless onslaught of artwork that returns in my children's backpacks each day. Sourdough waffles could help, but I needed the moral equivalent of a magical 12 quart minestrone recipe made from macaroni and dried bean collages. 


This crumpet recipe from Chocolate and Zucchini, adapted from King Arthur Flour, is essentially straight fried bread starter. The first time I tried it, my starter was a bit too thick and the baking soda didn't get mixed in well. For my next batch, in a small stroke of frugal kitchen genius, I added some yogurt whey that I had strained out to make a thickened yogurt sauce, which gave it the right consistency and added to the tangy flavor.

Why would someone happen to own crumpet rings, you might ask. Mine were a birthday gift that I received from my future husband shortly after we started dating. Special occasions can be awkward early in a relationship, but he handled the situation charmingly, preparing me a lovely dinner followed by a scavenger hunt for my gift, complete with rhyming clues. At the last clue, I realized with a sudden shock that the gift was going to be a ring, and just as quickly I realized what my answer would be if it were an engagement ring. When I opened the gift, I was overcome with happy relief at knowing I'd met the man I wanted to marry, mischievous scavenger hunts and all, and also knowing that we were only at the crumpet ring stage. Now sixteen years later, we have two children who can help make crumpets for Mother's Day tea.


Bread Starter Crumpets
Yields eight 9-cm (3 1/2-inch) crumpets.*

270 grams (1 cup) bread starter (can use older starter that has been kept in the fridge for a few weeks
)
a little yogurt whey or buttermilk for thinning, if necessary
1 teaspoon sugar
1/2 teaspoon sea salt

1/2 teaspoon baking soda
butter or vegetable oil for greasing

1. Place the starter in a large bowl. Add the sugar and salt, and whisk to combine. The batter should be the consistency of a very thick pancake batter and pourable. If necessary, thin the batter a little with some yogurt whey or buttermilk.

2. Heat a skillet over medium low heat. Grease the crumpet rings well. When the griddle is hot, melt a pad of butter  or pour on a little vegetable oil and spread it around with a spatula. 

3. Just before you are ready to cook the batter, whisk in the baking soda. As the baking soda reacts with the acid in the starter, the batter will foam and rise. Using a measuring cup or a small ladle, pour about 1/4 cup of the batter into each crumpet ring.

4. Cook for a few minutes, until the top is set and the bottoms are lightly browned when you peek underneath by lifting with a spatula. As they cook, the crumpets will gradually shrink back from the rings. Use pliers or tongs to lift the crumpet rings off the crumpets (you may need to run a knife around the edge to help them loose), and flip the crumpets to brown lightly on the other side.

5. Eat the crumpets warm off the griddle or cool them for toasting later. They can also be frozen once cooled. Wipe down the crumpet rings if necessary, re-grease, and place them on the skillet to preheat again before repeating with the remaining batter.

*Note: Clotilde Dusoulier recommends that if you have multiple cups of starter to use up, you should mix the batter in batches with 1 cup of starter at a time, so that the crumpets are cooked shortly after the addition of the baking soda.

Wednesday, May 7, 2014

Bread Experimentation


For our Bread 101 class, the five instructors conducted a grand experiment in bread making, with decidedly mixed, but edifying results


Each of us has also been experimenting on our own, with more success. Two weekends ago I tried a natural starter bread from Clotilde Dusoulier, author of the blog Chocolate and ZucchiniDusoulier follows a 1:2:3 ratio of starter: water: flour, which produces a very moist, but manageable dough. For baking, the shaped loaf is placed into a cold Dutch oven, where it finishes proofing as the oven heats. Following this recipe, and using a 50/50 mixture of Red Fife and white flour, I produced a lovely round loaf with a crisp crust. However, in a flu-addled fever, I omitted the salt, which produced a rather tasteless bread (lesson learned: don't bake when under the influence of viruses).


Last weekend I followed the instructions from Bread Lab baker Jonathan McDowell. This time I used all whole grain flour (80% Red Fife and 20% mixture of soft white wheat and buckwheat), and I remembered the salt. This dough is much wetter (87% hydration versus Dusoulier's 67%), which makes it challenging to handle. The hardest step for me was inverting the shaped loaf from my proofing "basket" into a piping hot Dutch oven without deflating it. The final bread had a delicious flavor and lovely crumb, but was decidedly flat. For a beginning bread baker like myself, I would recommend starting with Dusoulier's recipe, but McDowell's offers a great next challenge. Both will produce bread that is well worth the effort of nurturing a bread starter for days on end.

Thursday, May 1, 2014

Seeded Emmer Pan Loaf


While the rest of the world may be striving to recreate Chad Robertson's cult status country bread, the breads that caught my attention when I first read through his Tartine Book No. 3 were his dense pan loaves, resembling my favorite German Volkornbrot. I adapted his toasted barley loaf recipe to my pantry supplies from Lonesome Whistle Farm and Camas Country Mill, using cooked emmer (instead of barley), flax seeds, sesame seeds, sunflower seeds, and Red Fife wheat flour instead of spelt and einkorn.  


Packed full with all this particulate matter, the dough felt like wet concrete, as the recipe describes. And although never destined to rise above the rims of the baking pan, it achieved the lofty goal of living up to my German bread memories. My starter and I will be moving on to attempt some airier levain breads, inspired by a recent visit from wheat breeder Stephen Jones, who runs what the New York Times describes as "a Wonka-esque wonderland for crusty, airy-crumbed experimentation," but I know I'll be returning to this seeded pan loaf recipe again for its dense delivery of flavor.


Seeded Emmer Pan Loaf
adapted from the Toasted Barley Loaf from Tartine Book No. 3

200 g emmer berries cooked in 400 g cold water
250 g Red Fife or other high protein whole grain flour
157 g buttermilk
10 g dark malt syrup
238 g water
155 g leaven (well fed bread starter, described here)
8 g fine sea salt
102 g flax seeds
52 g sesame seeds
45 g sunflower seeds

1. Two days before you will bake the bread, give your stater an extra feeding halfway through its 24 hour cycle to make it extra active. Also go ahead and cook your emmer berries, simmering and covered, for about 40 minutes, until they have absorbed all the liquid. If you like, you could toast the emmer berries on a baking sheet at 350 degrees for about 20 minutes before cooking. Cool completely before using.

2. Start the dough the morning of the day before you will bake the bread. In a large bowl, combine the leaven with the buttermilk, malt syrup, and water, and mix by hand to incorporate.  Add the flour and mix by hand until thoroughly combined, about 5 minutes. Let the dough rest, covered, in the bowl for 30 minutes (this is the autolysis step). Add the salt, cooked emmer, and seeds and continue mixing by hand until incorporated. The dough should have the feel of wet concrete. 

3. Cover the bowl with a clean kitchen fowl and let rise at warm room temperature for about 3 hours (this is the first proofing). Every 45 minutes or so, fold the dough to strengthen the gluten network, either with your hands as shown here, or if you are less ambitious, with a scraper as shown here.

4. Butter a loaf pan very well. Scoop the dough into the pan and smooth the top with wet hands. Let the dough rise in the pan, uncovered, at a warm room temperature. Cover the pan with a clean, dry kitchen towel and let rise overnight in the refrigerator (this is the second proofing). 

5. The next day, preheat the oven to 425 degrees C. Use a pair of scissors to make shallow cuts in the top of the loaf to score and brush with water. Bake for about 1 hour and 20 minutes or until the internal temperature has reached 210 degrees F. Let the loaf cool on a wire rack for at least half a day before cutting. The bread keeps well for up to one week properly wrapped.

Thursday, April 24, 2014

Baking Brioche and Cheater Bostock


Last weekend, in my continued adventures with baking with a bread starter, I attempted a recipe from Chad Robertson's Tartine Book No. 3 for golden brioche. "This is a very forgiving dough" he promises. But not simple. It calls for three forms of yeast: the starter or leaven, an overnight poolish (a sponge inoculated with a small amount of instant yeast), and some instant yeast added at the time of mixing. It also calls for flour from kamult, an ancient grain that is a relative of durum wheat; I substituted in Red Fife. Most importantly, it calls for an ingredient almost impossible to procure in our modern world: uninterrupted time. I tried to attend to my dough's various needs for risings, turnings, and shaping, but it was given short shrift to dance lessons, karate birthday parties, and soccer games. By the end of a long day, the dough had not reached its growth milestones, but I needed to stick it in the oven, just as I needed to send over-exhausted and sugar-ramped children to bed despite the unlikelihood of their falling asleep. Bread baking, I decided, is not unlike parenting and one can only do one's best.


The resulting bread was decided more squat than the lofty brioche loaves pictured in Robertson's book, but it had a beautiful crumb and delicious flavor. I was excited to try it in the recipe on the next page for Bostock, which Robertson explains is simply "twice-baked brioche." It looked easy enough when I scanned the recipe (making a mental note not to trim the crusts as instructed, because discarding even a millimeter of my hard labor would be too painful). But when I began to assemble the ingredients, my heart sank. Not only would I need to make an orange syrup, to be layered underneath marmalade and sliced almonds, but I'd failed to notice the additional ingredient of "Pistachio Frangipane (page 325)." Leaven and polish had been asking a lot, but this was the last straw. Instead, I simply slathered a brioche slice with apricot marmalade, sprinkled on some sliced almonds, and stuck it in the toaster oven. It was scrumptious. And so, below I give you the recipe for Cheater Bostock, made with brioche that you can bake or procure by whatever means possible, because unlimited time is even harder to source than ancient grains.


Cheater Bostock
slices of brioche
orange marmalade or apricot jam
sliced almonds

Slather your brioche with orange marmalade or apricot jam, sprinkle with sliced almonds, and toast in a toaster oven until the almonds are golden and fragrant. Enjoy and savor your free time.