Showing posts with label buckwheat. Show all posts

Saturday, September 21, 2019

Kale and Leek Buckwheat Crepes


UPDATE: The Market will be closed this Sunday September 22. Come visit next Sunday September 29 for all your fall produce.

At the Fairmount Neighborhood Farmers Market this Sunday, held between 10 am - 2 pm on the corner of Agate and 19th Ave., you'll find fresh produce from Camas Swale Farm and pastured meat and poultry from Fair Valley Farm and Fog Hollow Farm


The brilliant green kale and leeks inspired a quick post-market brunch of buckwheat crepes along side pan seared potatoes, onions, and peppers. If you prepare the batter ahead of time, this meal can come together as quickly as omelettes for a weeknight dinner. 


Kale and Leek Buckwheat Crepes
for the batter
1 cup unbleached all purpose flour
1 cup buckwheat flour
3 large eggs
2 cups milk
1 1/2 tablespoon unsalted butter, melted
a pinch of salt

for the filling
1 bunch kale
1 leek
2 Tbsp olive oil
1 Tbsp tomato paste
salt and pepper
1 Tbsp balsamic vinegar
several handfuls of grated cheese such as aged cheddar or gruyere.
butter

1. Prepare the batter. Combine the ingredients in a blender and mix until smooth. The batter should have the consistency of thick cream; add a little more milk if needed. It's best to let the batter rest for an hour or so before you use it. You can make it in the morning or even the night before your crepe dinner and if the butter separates out, just give it a quick mix.

2. Prepare the kale and leek filling. Rinse the kale leaves, strip the leaves from the stems, and roughly chop the leaves into 1/2 inch pieces. Cut the green part from the leeks (save for stock), trim off the root end, and slice the white part lengthwise. Rinse the white parts while separating the leaves to remove any dirt. Cut widthwise into 1/2 inch half moons. Heat a large skillet over medium heat and when the heat radiates to two inches above the pan, add the olive oil, the leeks, and a pinch of salt. Saute until glassy. Add the kale, season with salt and pepper, and continue cooking until the kale starts to soften and becomes bright green. Add the tomato paste and saute for a minute while it starts to caramelize. Remove from the heat and add the balsamic vinegar. Taste and season as needed.

3. Make the crepes. Heat a medium sized skillet over medium heat, melt a thin slice of butter and swirl to coat the pan. Pour in the crepe batter slowly while you swirl the pan so that it is just coated with batter. Cook until the batter loses its pale color and develops permanent bubbles. Secure a spatula under the crepe and flip with confidence. As the second side cooks, spoon a thin layer of the kale filling over half of the crepe and sprinkle over a thin layer of cheese. Flip the naked half over the filling half and slide onto a plate. Eat while hot.

Thursday, July 3, 2014

Soba Noodles with Lemon Grass Tofu and Roasted Broccoli


This Sunday at at the Fairmount Neighborhood Farmers Market, you can look forward to a selection of pastured chicken and grass-fed lamb cuts from Fair Valley Farm and beautiful fresh cut flower bouquets from Tiger Lily Art CompanyGood Food Easy at Sweetwater Farm will have the following offerings: 

Fresh
Blueberries (world's perfect pancake topping)
Lots of tomatoes (Romas and red, yellow, and orange slicers) 
Eggplants (try these grilled eggplant with tomatoes and mint)
Bell peppers, jalapeƱos, anaheim and poblano chile peppers
Artichokes, baby beets, new potatoes, and broccoli (try roasted, below)
Carrots, summer squash, and cucumbers
Chard, collard greens, and kale (try this chard and bacon tart with rye crust)
Garlic and fresh herbs (basil, oregano, sage, thyme) and home-grown lemon grass
Lettuce, including ready-to-eat bagged mix
Cherries and Blenheim apricots (from Washington)

Preserves, Beans, and Grains
From Sweet Creek Foods:
Dill Pickles, Chili Dill Pickles, Bread 'N Butter Pickles, Pickle Relish
Blueberry, Strawberry, Blackberry, and Raspberry Fruit Spreads
Enchilada Sauce and Salsa
From SLO Farm: Applesauce
Assorted beans and grains from Camas Country Mill


The farmers of Sweetwater Farm are always experimenting with new produce, and this season they lovingly raised their very own lemongrass for us. I used these tender stalks to infuse fragrant flavor into slabs of tofu (prefrozen to remove liquid). These were baked until firm and layered onto buckwheat soba noodles tossed with a lime vinaigrette.


For vegetables, I prepared these highly addictive roasted broccoli spears from America's test kitchen (similar in flavor to kale chips) and some seared cabbage with black Chinese vinegar. A satisfying summer meal that could be eaten warm or at room temperature if you are planning on picnicking over the 4th of July weekend.


Soba Noodles with Lemon Grass Tofu and Roasted Broccoli
serves four
marinated tofu
1 block firm tofu (sliced into 8 slabs, preferable frozen and then thawed to remove liquid)
2 to 3 stalks lemon grass
2 Tbsp soy sauce
2 Tbsp sesame oil
2 Tbsp maple syrup
zest of one lime

Remove excess liquid from the tofu either by freezing and thawing or by pressing between two cutting boards weighed down with cans and propped at a slant to let the liquid drain. Slice the bulbs of the lemon grass stalks into half lengthwise and slice thinly. Combine the lemon grass with the remaining ingredients. Place the tofu slabs into a single layer in a small baking dish and pour over the marinade. Let sit for at least 15 minutes or overnight in the refrigerator. Preheat the oven to 350 degrees. Bake for about 15 minutes, flip the slabs and bake for another 15 minutes. Scrape off most of the lemongrass slices, cut the slabs into bite sized cubes, and reserve.

roasted broccoli (from America's Test Kitchen)
1/2 lb broccoli florets
1/2 tsp sugar
1/2 tsp salt
2 Tbsp olive oil

1. Adjust oven rack to lowest position, place large rimmed baking sheet on rack, and heat oven to 500 degrees. Cut broccoli at juncture of florets and stems; remove outer peel from stalk. Cut stalk into 2- to 3-inch lengths and each length into 1/2-inch-thick pieces. Cut crowns into 4 wedges if 3-4 inches in diameter or 6 wedges if 4-5 inches in diameter. Place broccoli in large bowl; drizzle with oil and toss well until evenly coated. Sprinkle with salt, sugar, and pepper to taste and toss to combine.

2. Working quickly, remove baking sheet from oven. Carefully transfer broccoli to baking sheet and spread into even layer, placing flat sides down. Return baking sheet to oven and roast until stalks are well browned and tender and florets are lightly browned, 9 to 11 minutes.

roasted cabbage
1/2 head napa cabbage or a young green cabbage
2 Tbsp black Chinese vinegar or balsamic vinegar

While the oven is heating to 500 degrees for the broccoli, place a cast iron skillet on the middle rack of the oven. Cut the cabbage into 1 to 2 inch wide wedges and remove a triangle of the core at the base, but leave enough so that the wedges stay intact. Drizzle the wedges with a little vinegar. When the pan is hot, place the wedge into the pan to sear on one cut side for about 3 minutes, then flip and sear them on the second cut side for about 3 minutes, until the both sides are nicely chard and the interior cabbage is just cooked but still has some crunch. 

soba noodles
4 bundles soba noodles (360 g)
juice of one lime
1 Tbsp rice vinegar
1 tsp sesame oil
1 tsp sugar
1 tsp soy sauce

In a pot of boiling water, cook the soba noodles according to the directions. Meanwhile, mix together the dressing. When the noodles are cooked, drain and toss with the dressing in the bowl or platter you will use for serving. Garnish the sides with the roasted cabbage wedges, then the roasted broccoli, and then top with the tofu cubes. Serve warm or at room temperature.

Monday, April 21, 2014

Bread Starter Waffles


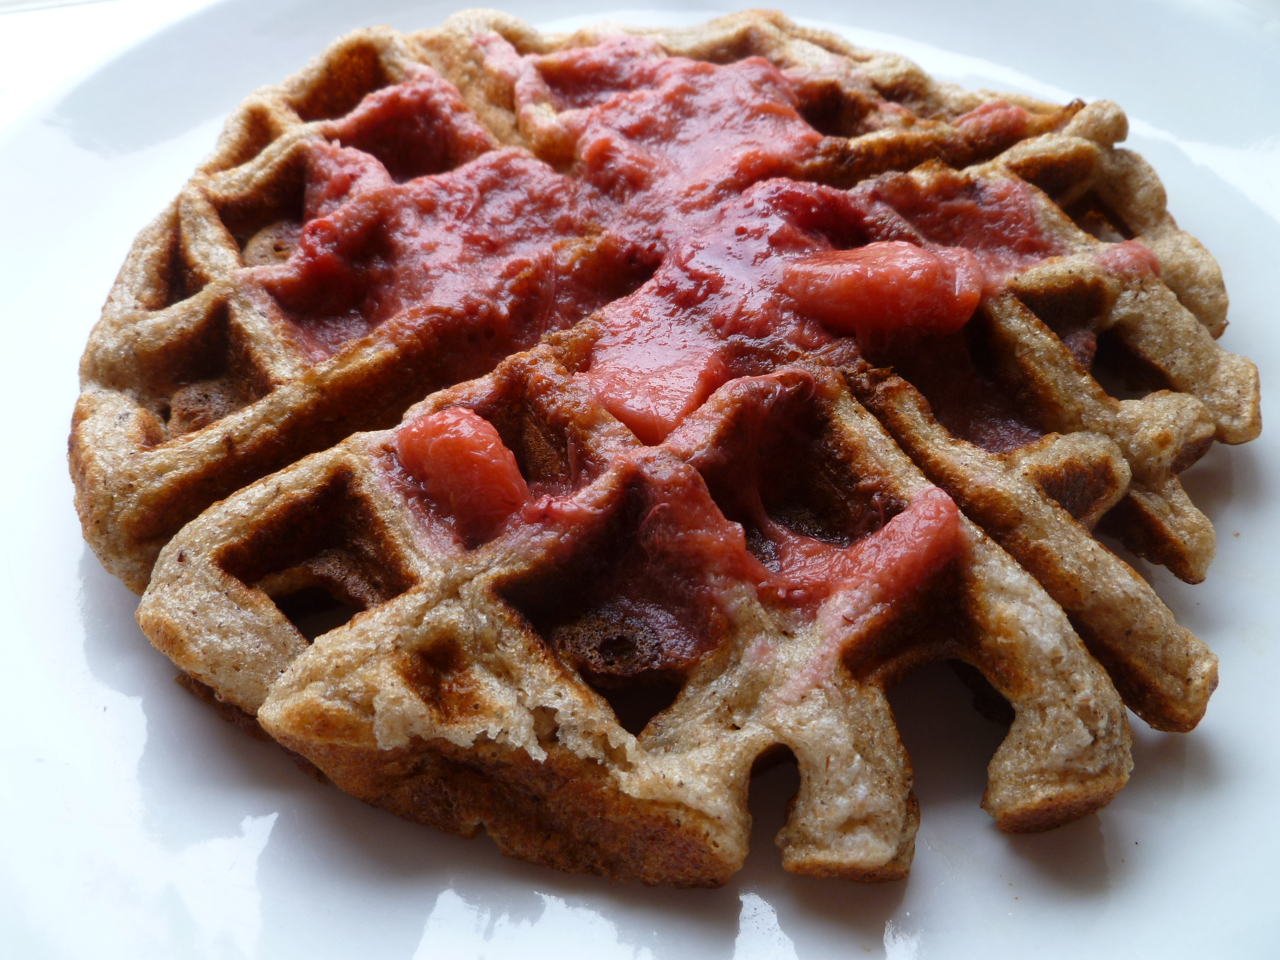
Like a microbial cultural anthropologist, I've continued to try to study the habits of my bread starter. And like my co-instructors, I've been wondering what to do with all the leftover starter generated by a regular regimen of diluting my culture into fresh flour paste. Great minds think alike and so, like them, I resorted to breakfast fare; in their cases pancakes of one kind and another, in my case waffles. I started with a sourdough waffles recipe from King Arthur Flour, which I melded with these yeasted buckwheat waffles from Deborah Madison. The dough made with the starter had significantly more integrity than those I had made with an overnight sponge from commercial yeast, and the waffles had a more complex, tangy taste that paired nicely with tart, stewed rhubarb and fresh strawberries. I'm thinking that it might work well to keep my culture growing slowly in the refrigerator during the week and revive it on the weekends for bouts of bread baking and breakfasts. The microbes in my culture are likely studying me as well and learning to understand the habits of their human cohabitants who dash out of the house five mornings a week and lounge around the other two.


Bread Starter Buckwheat Waffles
(makes about 6 waffles in a Belgian waffle iron)
overnight sponge
1 cup sourdough starter, unfed
1 cup unbleached all-purpose flour
1 cup buckwheat flour
1 tablespoon honey
2 cups buttermilk

waffle or pancake batter
all of the overnight sponge
2 large eggs
1/4 cup vegetable oil or melted butter
3/4 teaspoon salt
1 teaspoon baking soda

1. To make the overnight sponge, stir down your refrigerated starter, and remove 1 cup. In a large mixing bowl, stir together the 1 cup starter, flour, honey, and buttermilk. Cover and let rest at room temperature overnight.

2. The next morning, finish the bater. In a small bowl or mixing cup, beat together the eggs, and oil or butter. Add to the overnight sponge. Add the salt and baking soda, stirring to combine. The batter will bubble.

3. Pour batter onto your preheated, greased waffle iron, and bake according to the manufacturer's instructions.

Serving suggestion: a dollop of plain yogurt, a drizzle of stewed rhubarb, fresh strawberries, and maple syrup.

Sunday, May 26, 2013

Buckwheat Noodles with Fava Beans and Arugula


Major news alert: the fourth season of the Fairmount Neighborhood Farmers Market is scheduled to start on Sunday June 9th. The market will be held each Sunday during the summer from 10 AM to 2 PM at the Sun Automotive lot on the corner of Agate St. and 19th Ave. You can make the corner you one stop shopping for the week with a wide variety of fresh fruits and vegetables, as well as jams, sauces, and preserves from Sweetwater Farm, pastured meats from Fair Valley Farm, and baked goods from Eugene City Bakery


Despite the sometimes blustery weather we've been having, spring is really here, as evident by the increasing diversity of local produce available. Some of the earliest treats are gem-like fava beans that always seem so special to me that I feel compelled to pair them with homemade pasta. This year, I strayed from Italy toward Asia, inspired by a recipe for buckwheat pasta from The Greens Cookbook, which seemed like a perfect use for the last of my Lonesome Whistle Farm buckwheat flour. These homemade soba noodles were delicious tossed with plenty of peppery arugula and foraged fresh herbs (mint, fennel fronds, and chives) and served with baked salmon. Remember to mark your calendars for the June 9th and please spread the word by printing this poster and putting it up around the neighborhood.


Buckwheat Pasta with Fava Beans and Arugula
serves four

pasta
1 cup buckwheat flour
2 cups white flour
1/2 tsp salt
4 eggs
~1/4 cup water

toppings
1 lb fava bean pods (or as many as you can shell and peel)
2 large handfuls arugula 
plenty of fresh herbs, such as mint, fennel fronds, and chives
olive oil
zest and juice from one lemon
salt and fresh black pepper to taste

1. First prepare your pasta toppings. Remove the fava beans from the pods. If you are willing to do the extra work, blanch them for 1 minute in boiling water and then remove the inner green parts of the beans from the paler casing. Zest and then juice the lemon. Rinse and roughly chop the arugula and fresh herbs.

2. Set a large pot of salted water boiling on the stove for the pasta.

3. To make the pasta dough, combine the ingredients in a food processor and mix. The buckwheat flour absorbs liquid, so you will probably need to add a little water for the dough to just starts to come together in a ball. 

4. Pat the dough together into a log, cut into about 12 pieces, and pat flat. 

5. Use a hand crank pasta machine to roll out the dough, starting with the widest setting and narrowing it by increments of 2, ending on the second to last thinnest setting. Then cut the dough into fettucini.

6. Cook the pasta in rapidly boiling water until the noodles are just cooked but still have some bite, about 2 minutes. 

7. Drain the pasta and dump it into a large serving bowl. Pour over olive oil, lemon zest and juice, arugula and fresh herbs, and fava beans and toss well. Season with salt and pepper to taste. Enjoy.

Sunday, April 28, 2013

Yeasted Buckwheat Waffles with Rhubarb Compote


For my birthday this year, I received several wonderful cooking-related gifts, including Deborah Madison's new cookbook Vegetable Literacy. Not only is this book brimming with delicious recipes, but it's organized taxonomically, perfect for a biologist. This structure reveals some surprising kinships and ingredient affinities. I learned, for example, that sorrel, rhubarb, and buckwheat, are all members of the Polygonaceae or knotweed family. Suddenly a compote of new spring rhubarb and the end of last season's frozen strawberries seemed like the perfect topping for Madison's yeasted buckwheat waffles.


I'd never made yeasted waffles before because the timing seemed tricky for breakfast, but Madison's recipe recommends an overnight ferment, which produces a pillowy and flavorful base that is quickly finished while the waffle iron warms. The yeast's transformative power sweetens and lightens the whole grain batter, and the delicious yeasty smells that fill the kitchen while the waffles cook is itself worth the effort of a little mixing the night before. Also worth making ahead is a pot of rhubarb and strawberry compote. Draping this assertive pseudo fruit over its smoky pseudo grain cousin turns out to be a match of botanical and culinary harmony.


Yeasted Buckwheat Waffles
from Deborah Madison's Vegetable Literacy
(best started the night before)

1 package (2 1/4 tsp) active dry yeast
1/4 cup warm water
2 cups milk, just warmed (or use buttermilk)
1/2 tsp sea salt
1 1/2 cup white whole wheat pastry or spelt flour (I used Lonesome Whistle's red fife)
1 cup buckwheat flour (I used Lonesome Whistle's buckwheat)
2 Tbsp honey
5 Tbsp butter, melted, or sunflower seed oil
2 eggs, beaten
1/2 tsp baking soda

1. If proofing overnight, combine the yeast and warm water and let sit for 10 minutes. Put the milk and salt in a large bowl, add the yeast, then whisk in the flours. Cover and refrigerate overnight if the weather is warm, or leave out on the counter if it is cool. The next morning, stir in the honey, butter, eggs, and baking soda.

If proofing for two hours, combine all the ingredients in a large bowl, mixing well. Cover the bowl and leave in a warm spot for two hours. 

2. When ready to cook, give the batter a stir. Heat the waffle iron. When the iron is ready, spoon the batter onto the grid and close the lid. When the waffle is done remove it from the iron with a fork and serve right away with rhubarb strawberry compote (recipe below) and maple syrup.

Leftover batter will keep for several days in the refrigerator. This batter can also be used to make buckwheat blini.

Rhubarb Strawberry Compote
(can prepare the night before)
4 slender or 2 large stalks rhubarb
1/2 cup frozen strawberries
1/4 cup sugar, or to taste
1/4 cup water

Rinse and trim the rhubarb and chop into 1 inch pieces. Combine all the ingredients in a small saucepan over medium heat and simmer for about 30 minutes, stirring occasionally, until the fruit has cooked down to a soft consistency. Taste and add more sugar if desired. If made ahead, rewarm before serving.

Monday, January 14, 2013

Buckwheat and Jam Scones


I admit to being slightly obsessed with the smokey, nutty flavor of buckwheat flour and how it can transform cakes, cookies, and pancakes. So when I finally got to the top of the wait list for the Eugene Public Library's copy of Kim Boyce's cookbook Good to the Grain on baking with whole wheat flours, I was immediately drawn to her recipe for figgy buckwheat scones. Her fig butter sounded amazing, but also a lot of work and instead I decided to use up the last of a batch of hardy kiwi, quince, and raspberry jam that my husband had made in the fall. 


I followed Heidi Swanson's suggestion on this recipe and made the dough in a food processor. Then, perhaps with a bit too much confidence, I flattened it out (a little thinner than the specified 3/4 inch) and slathered it with jam (a little more than the specified 1 cup).


During the subsequent jelly roll step things got a little too messy to document (and I wouldn't advise letting the jam-covered dough warm up while you scour your house for a hole puncher that is needed at that very instant for a time-sensitive book binding project).


However, despite the slightly gory process involved in producing these spirals, the final scones baked up beautifully. The dough was tender and had that smoky buckwheat flavor I've grown to love. When figs are in season, I'll try Kim Boyce's butter, but in the meantime I look forward to pairing this scone dough with any of a variety of fillings. Hazelnuts and chocolate chips (as in these rugelach) might be next.


Buckwheat and Jam Scones
adapted from Kim Boyce's Good to the Grain

Dry mix:
1 cup (4.75 oz / 135 g) buckwheat flour
1 1/4 cups (5.5 oz / 160 g) all-purpose flour
1/2 cup (2.5 oz / 70 g) sugar
2 teaspoons baking powder
1/2 teaspoon kosher salt

Wet mix:
4 ounces (113 g) cold unsalted butter, cut into 1/4-inch pieces
1 1/4 cups (10 fl. oz / 300 ml) heavy cream

1 cup (8 oz) jam or jelly (such as Boyce's fig butter described here)

1. Sift the dry ingredients into a large bowl, pouring back into the bowl any bits of grain or other ingredients that may remain in the sifter.

2. Pour the dry ingredients into a food processor bowl and pulse to mix. Add the cubed butter and pulse until the butter is cut into pea-sized pieces. Add the cream and pulse a few more times, just until the dough is combined. You can also prepare the dough by hand, but work quickly so that the butter remains chilled.

3. Use a pastry scraper or a spatula to transfer the dough onto a well-floured surface. It will be sticky, so flour your hands and pat the dough into a rectangle. Grab a rolling pin and roll the dough into a rectangle that is 8 inches wide, 16 inches long, and 3/4 inch thick. If at any time the dough rolls off in a different direction, use your hands to square the corners and pat it back into shape. As you're rolling, periodically run a pastry scraper or spatula underneath to loosen the dough, flour the surface, and continue rolling. This keeps the dough from sticking. Flour the top of the dough if the rolling pin is sticking.

5. Spread the jam over the dough, leaving a couple of inches from one of the long edges that will be your final seam. From the other long edge, roll the the dough up, patting the dough as you roll so that it forms a neat log 16 inches long. Roll the finished log so that the seam is on the bottom and the weight of the roll seals the edge.

6. Use a sharp knife to slice the log in half. Wrap the logs in plastic wrap, place them on a baking sheet or plate, and chill in the refrigerator for 30 minutes. (The dough can be kept, covered, in the refrigerator for 2 days.) While the dough is chilling, preheat the oven to 350°F. Line two baking sheets with parchment paper.

7. After 30 minutes, take both logs out of the refrigerator and cut each half into 6 equal pieces about 11/4 inches wide. Place each scone flat, with the spiral of the jam facing up, on a parchment paper-covered baking sheet, 6 to a sheet. Give the scones a squeeze to shape them into rounds.

8. Bake for 38 to 42 minutes, rotating the sheets halfway through. The scones are ready to come out when their undersides are golden brown. They are best eaten warm from the oven or later that same day. (You can always save one of the logs to bake on a subsequent day).

Makes 12 scones.

Saturday, October 27, 2012

Chia Seed and Buckwheat Pancakes


Lately I've come across a number of recipes using chia seeds (the very same seeds that produce the green afros on chia pets), and I was curious to taste them. I found that they have a nutty, slightly smokey flavor that reminded me of buckwheat, which inspired me to pair the two together in these pancakes that have become a new family favorite.


If you get the impression from this blog that my family eats a lot of pancakes, you are correct. We like them hardy with oatmeal and pears, rich with cottage cheese, and pillowy with teff and ricotta. These chia seed and buckwheat ones are deliciously light and flavorful. The soaked chia seeds soften up and absorb liquid, like tapioca, binding together this buttermilk batter such that it needs just a minimum amount of flour, making for tender cakes. I've used half buckwheat and half white wheat flour, but I imagine one could use another flour, like sorghum or teff, instead of wheat for a gluten-free version. This morning we
 topped them with blackberry sauce and hardy kiwis from our garden. And, caught up in the spirit of Halloween, we had a few jack-o-lantern kiwis and pancake people with huckleberry smiles. 


Chia Seed and Buckwheat Pancakes
(makes about 32 pancakes)
1/4 cup chia seeds
2 cups buttermilk
2 eggs
3 Tbsp canola oil
1/2 cup buckwheat flour
1/2 cup white flour
1 tsp baking powder
1/4 tsp baking soda
pinch of salt
butter for cooking pancakes

1. In a large mixing bowl, combine the chia seeds with the buttermilk. If you'd like the seeds to be very soft, you can soak them in the buttermilk overnight, but they will soften up quite nicely in about ten minutes (about the time it takes from starting the batter to making your first pancakes). Mix in the eggs and canola oil.

2. In a separate bowl, mix together the remaining dry ingredients. Then gently mix the dry ingredients into the wet ingredients until they are just combined.

3. Heat a griddle or large skillet (I prefer cast iron) over medium heat. Melt a small pad of butter to grease the surface. Spoon out dollops of batter with a soup spoon and allow to cook until the batter loses some of its raw pale color and bubbles stay fixed. Flip with a spatula and cook for a minute on the other side. Both sides should be nicely browned. Transfer to a warm plate, and cook the rest of the batter. Enjoy with fruit toppings and maple syrup. 

Friday, June 29, 2012

Buckwheat Butter Cookies with Cocoa Nibs


Once you've tasted it, the combination of buckwheat and chocolate is kind of addictive. With some remaining buckwheat flour from Lonesome Whistle Farm, these buckwheat butter cookies with cocoa nibs caught my eye here and here. Cocoa nibs, I discovered, can be procured from the bulk spice section of the Market of Choice.


I don't have much patience for cookie cutters (unless baking for Santa), so I liked the option of rolling a log of buttery cookie dough and slicing it up. It felt like working with play dough, but the final product was downright sophisticated. The subtle nutty flavor of the buckwheat and the charming restraint of the cocoa nibs paired perfectly with a cup of tea and freshly picked strawberries. Enjoy these refined treats while fantasizing about the London Olympics, but by the end of the weekend our neighborhood will be back to normal and ready to host the world famous Fairmount Neighborhood Farmers Market, starting July 8.


Buckwheat Butter Cookies with Cocoa Nibs

1 ¼ cups unbleached all-purpose flour
¾ cup buckwheat flour
½ lb. (2 sticks) unsalted butter, softened
2/3 cup granulated sugar
¼ tsp. salt
1/3 cup cocoa nibs
1 ½ tsp. vanilla extract

1. In a medium bowl, whisk together the flours.

2. With a handheld or stand mixer, beat the butter with the sugar and salt until smooth and creamy but not fluffy, about 1 minute. Add the nibs and vanilla, and beat to incorporate. Add the flours all at once, and beat on low speed until just incorporated. The mixture will seem very dry and pebbly at first, but keep beating, and it will slowly moisten and darken (as the buckwheat flour is absorbed) and come together. The dough will be very thick. You can also make the dough in a food processor, but incorporate the nibs at the end by hand. 

3. Form the dough into a long (12” or 13”) log about 2 inches in diameter. Because the dough is so thick, I find it easiest to do this by pinching off hunks of dough from the bowl and lining them up on a large sheet of plastic wrap to form a log, then massaging and pressing them together to seal. Wrap well and refrigerate at least two hours, or overnight.

4. If you have refrigerated the dough overnight, remove it from the refrigerator about 30 minutes before you want to bake the cookies. Position racks in the upper and lower thirds of the oven, and preheat to 350 degrees Fahrenheit. Line two baking sheets with parchment paper or silicone liners.

5. When the dough feels slightly softened - it should have just a hint of give when you press it with a fingertip - unwrap it and place it on a cutting board. Using a thin, sharp knife, carefully cut the dough into ¼-inch-thick slices. Place slices on the prepared baking sheets, spacing each cookie about 1 ½ inches apart.

6. Bake until cookies just begin to color around the edges, about 12 to 14 minutes, rotating the sheet pans from top to bottom and front to back midway through. Transfer to wire racks, and cool the cookies on the baking sheets (or slide the parchment onto the rack to free up the pans). Cool completely before eating or storing. Repeat with remaining dough.

Store the cookies in an airtight container.

Yield: about 50-55 small cookies


Update: I experimenting with making a gluten-free version of these cookies using only buckwheat flour and I'm happy to report that they were extremely tasty.

Wednesday, May 23, 2012

Buckwheat Chocolate Cake


It is birthday season in our household. For her birthday party, my daughter considered offering her favorite meal of homemade pasta with pesto and rhubarb buckle, but was worried that not all of her friends would like this menu, so she decided instead on pizza and chocolate cake. Her thoughtfulness in this matter is exemplary of her gentle and generous nature, nascent nine years ago in her deep brown newborn eyes and more apparent with each passing year.


She is not a fan of flamboyant cakes and cloying icing. Instead she favors subtle, fresh flavors and (a girl after my own heart) bittersweet chocolate. Searching for a suitable birthday cake, this buckwheat chocolate one from Beatrice Peltre caught my eye, especially since we still have a sizable stash of buckwheat flour from our Lonesome Whistle Farm CSA. 


This is almost a flourless chocolate cake (and an entirely gluten-free one). The small amount of almond meal adds a rich texture and the buckwheat gives a hint of sourness that complements the bittersweet notes of the chocolate.


A decorative dusting of powdered sugar and a scoop of vanilla ice cream elevated this subtle cake into party fare suitable for celebrating a truly sweet daughter.


Buckwheat Chocolate Cake
adapted from Smitten Kitchen

7 Tbsp unsalted butter, plus extra for buttering pan
4 ounces bittersweet dark chocolate
4 large eggs at room temperature
1/2 cup granulated sugar
A good pinch of sea salt
1 tsp pure vanilla extract
1/4 cup buckwheat flour
scant 1/4 cup slivered almonds
Confectioners’ sugar to serve (optional)

1. Preheat oven to 350 degrees. Butter a 9-inch cake pan and line the bottom with a circle of parchment paper. Melt the butter and chocolate together in in short bursts in the microwave, stirring frequently. Set aside.


2. Prepare the almond meal by pulsing together the slivered almonds and buckwheat flour in a food processor until finely ground.

3. In the bowl of a stand mix or with a handheld mixer, beat the eggs and sugar with salt until light and pale and doubled in volume. Deb Perelman advises that one spend 5 to even 9 minutes on this to develop the cake's crumb, but with my little handheld mixer I didn't have quite the stamina for this and the cake still turned out nicely.

4. Gently fold in the vanilla and melted chocolate mixture. Sprinkle the buckwheat and almond mixture over the batter and fold gently to combine. Pour into prepared pan and bake for about 25 minutes until a tester inserted into the center of the cake comes out dry.

5. Let cool for five minutes on a rack then invert onto the rack, remove the parchment paper, and return upright on a serving plate. Serve in wedges, dusted with powdered sugar.


UPDATE: I made a Pacific Northwest version of this cake with ground hazelnuts instead of almonds and it was delicious.

Wednesday, November 9, 2011

Buckwheat Blini


This weekend the Southern Willamette Valley Bean and Grain Project is hosting two events for consumers to stock up on locally grown whole grains, fresh ground flours, dry beans, legumes, and storage crops (garlic, onions, roots and winter squash). SLO Farm will be at the Eugene event on Sunday.

Fill Your Pantry Farm Direct Community Bulk Buying Events

Linn County Fill Your Pantry (Shedd):
Saturday, November 12, 2011
2 to 6pm
At the former Methodist Church, 30090 Hwy 99E (approx 5 miles south of Tangent)
Deadline for pre-orders: Friday, Nov 4

Lane County Fill Your Pantry (Eugene):
Sunday, November 13, 2011
noon to 4pm
Hummingbird Wholesale's new building, 150 Shelton McMurphey Blvd.
Deadline for pre-orders for Eugene sale: Thursday, Nov 10, 5pm

For more information call (541) 341-1216, or email info@lanefood.org


One locally grown and milled grain is buckwheat, which will be available at these events from Camas Country Mill, Lonesome Whistle Farm, and Open Oak Farm. Buckwheat is a good cover crop, but has a limited market. It is an excellent flour to include in gluten-free waffles and is a traditional ingredient in French savory crepes.    


Another great use for buckwheat is in Russian blini, savory pancakes made with a yeast batter. In my family, these are considered the height of elegance, and we often serve them on New Year's Eve. These delicate disks are the perfect receptacle for any number of toppings. Start with a dollop of creme fraiche or sour cream and then layer on caviar, smoked salmon, bacon bits, chives, or use another of your local bulk purchases to whip up a lentil caviar.


Buckwheat Blini
2 1/4 teaspoons (1 package) yeast
1/2 cup warm water
1/4 teaspoon sugar
1 cup milk
3 eggs, separated into whites and yokes
3 tablespoons melted butter
1 1/2 cup buckwheat flour (or for lighter blini, you could use a mixture of buckwheat and white flour)
1/2 teaspoon salt
more butter for cooking the blini
Any of the following toppings: creme fraiche or sour cream, smoked fish, bacon bits, chopped chives, lentil caviar


1. Prepare the batter at least 2 1/2 hours before you want to serve the blini. Combine the yeast and sugar in the warm water and let sit until it foams, about 5 minutes.


2. Whisk together the milk and egg yokes, and reserve the egg whites for later. Whisk in the melted butter. Then mix in the yeast mixture, the flour, and the salt until smooth. Let the batter rest in a warm place for 2 hours or more as it expands.


3. When you are ready to make the blini, beat the egg whites with a pinch of salt until stiff and then fold into the batter.


4. Warm a griddle on medium low heat and grease it with butter. Spoon out the blini batter with a soup spoon to form pancakes approximately 2 1/2 inches in diameter. Cook until they form permanent bubbles and then flip and cook an additional couple of minutes on the second side. The blini should be lightly browned on both sides. Remove to a warm platter and rebutter the pan with each batch.


5. Serve the blini warm with a dollop of creme fraiche or sour cream and a sprinkle of any of the listed toppings.