Thursday, December 25, 2014

New England Spider Cake


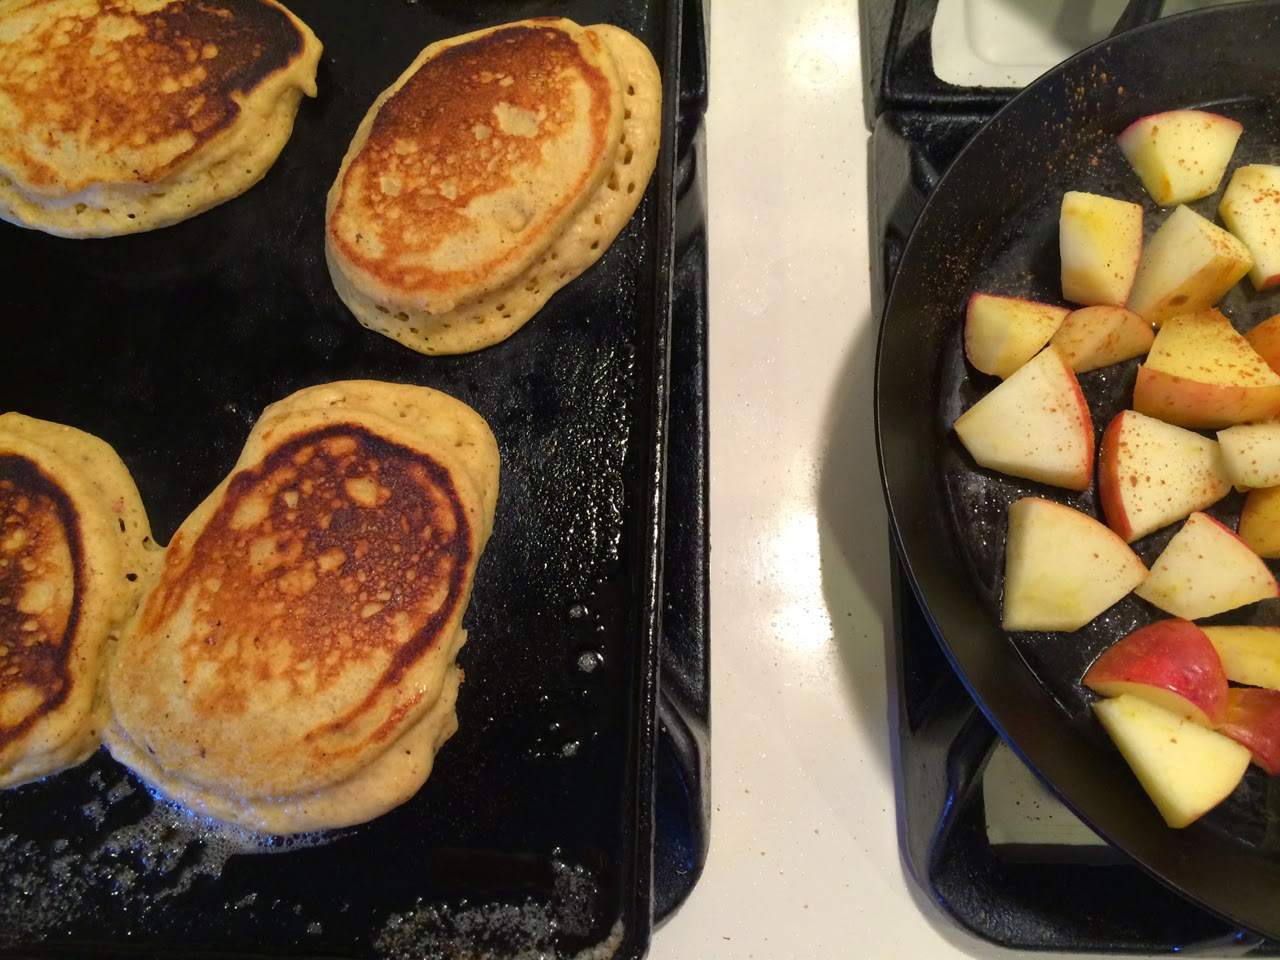
Christmas brought a few unexpected delights this year, including discovering this decorated tree during a stroll through Hendrick's Park. Another treat was this New England Spider Cake that we had for a late Christmas breakfast (after fortifying ourselves earlier with stollen). I adapted this recipeusing corn flour, polenta, and soft white flour from our newest CSA installment from Lonesome Whistle Farm, and we ate it topped with poached quince. This cake is just the thing to slip in the oven, along with a tray of bacon, to bake while opening presents. The final dish is a kind of cornmeal spoon bread, and apparently gets is name from the spidery cracks emanating from the center of cream, which is itself an unexpected custardy treat.


New England Spider Cake
1/2 cup corn flour (I used Lonesome Whistle Farm's corn flour)
1/2 cup coarse corn meal (I used Lonesome Whistle Farm's polenta)
3/4 cup all-purpose flour (I used Lonesome Whistle Farm's soft white wheat)
1/2 cup sugar
½ teaspoon baking soda
½ teaspoon salt
2 cups buttermilk
2 eggs
2 tablespoons butter
1 cup heavy cream

1. Preheat the oven to 350 degrees and place a 12-inch cast iron skillet in the oven to warm.  Combine corn flour, cornmeal, flour, sugar, baking soda and salt. Whisk eggs into the buttermilk. Stir into dry ingredients and set batter aside.

2. Remove the skillet from the oven and melt the butter in the hot skillet. Pour in the batter. Pour the cream into the center, slide the skillet into the oven and bake until golden brown on top, about 45 minutes. Slice into wedges and serve warm.

Sunday, December 21, 2014

Marbled Birthday Cupcakes


This year, my Winter Solstice seven-year-old son was eager to help bake his birthday cupcakes. We decided on chocolate and vanilla marbled ones (no need to give a bunch of bouncing seven year olds too many choices). We adapted this marble cake recipe from Chocolate and Zucchini, and my son laboriously transcribed the ingredient list, increased by 50% to ensure sufficient cupcakes for his party.


He distributed the first layer of vanilla batter,


helped mix in melted chocolate for the top layer,


and marbled the two with a skewer. 


The resulting cupcakes were just big enough to hold seven candles for the afternoon festivities, and just plentiful enough for a second afterdinner wish.


Marbled Cupcakes
adapted from Chocolate and Zucchini, makes 18-24 cupcakes

150 grams (7 ounces) good-quality bittersweet chocolate
6 eggs
330 grams (2 cup plus 4 tablespoons) sugar
3/4 cup yogurt or buttermilk
330 grams (3 1/3 cups) flour
3 teaspoons baking powder
180 grams (a little less than 13 Tbsp) unsalted butter, melted and cooled
pinch of salt
1 1/2 teaspoon pure vanilla extract

1. Preheat the oven to 330°F.

2. Melt the butter in the microwave, and set aside to cool. Melt the chocolate in the microwave, and set aside. 

3. Combine the flour with the baking powder and pinch of salt and set aside.

4. By hand or in a mixer, beat together the eggs and the sugar until frothy. Add in buttermilk and whisk to combine. Combine in the flour mixture and then incorporate the melted butter and the vanilla, without over mixing. 

5. Line 18 to 24 muffin tins with paper muffin cups. Scoop a soup spoon of batter into each cup, using half of the batter. Mix the melted chocolate into the remaining batter. Scoop a soup spoon of the chocolate batter into each cup. The cups should be about 3/4 full. Using a skewer, pierce each mound of dough and give it a quick swirl to create the marbling.

6. Bake for 25-28 minutes until a clean skewer comes out clean.

Note: we made 18 cupcakes (our household's muffin tin capacity) and had batter leftover for a mini cake, so I think one could stretch this recipe to 24 cupcakes. 

Saturday, December 13, 2014

Holiday Scents and Poached Quince


Our house smells like Christmas. It's making me giddy with anticipation for the holidays, and thoroughly distracted from all the end of term grading I should be doing. Last weekend my daughter and I visited Sweetwater Farm (home of the rusty dragon above), and learned how to make wreaths from a bounty of evergreen boughs twisted onto frames of poplar branches. When we brought home our masterpieces, the fresh pine smells of these wreaths enveloped the house and suddenly all I wanted to do was bake stollen and Christmas cookies.


The major baking projects will have to wait until I get my grading done, but today I poached a couple of lovely quince from our Good Food Easy CSA.


The fragrance that filled the house was heavenly, and I can't wait to savor these rosy gems on top of waffles tomorrow morning.


Poached quince
2 quince
1 1/2 cup water
2 Tbsp honey (or more to taste)
1/2 tsp vanilla

1. Combine the water, honey, and vanilla in a sauce pan and bring up to a simmer.

2. Meanwhile peel, core and slice the quince into eighths. They are much harder than apples, so be careful. I found it easiest to use a vegetable peeled on cored quarters. Slide them into the simmering poaching liquid as you slice them.

3. Cover the pan, turn to low, and cook at a very gentle simmer for an hour, until the quince are very soft and rosy. The quince can be stored in their poaching liquid in the refrigerator for a week or so. They make delicious toppings for waffles, pancakes, yogurt, or rice pudding. 

Friday, December 5, 2014

Turkey Mole Poblano


At this point Thanksgiving should be a distant memory. But if you still have some lingering turkey leftovers in your freezer, I can recommend a turkey mole poblano. The meditative process of roasting all the chiles, seeds, and nuts that go into this elaborate sauce can be an escape from the frenzy of the holiday season.


I always crave something spicy after the mild flavors of Thanksgiving fare, and we often make Mexican dishes with our turkey remains. This recipe for turkey mole poblano is from The Border Cookbook by Cheryl Alters Jamison and Bill Jamison. I also consulted Rick Bayless' recipe but wasn't quite up to all the straining involved. Instead I happily embraced the slight grittiness of the various purees (above from left to right: chocolate and corn tortillas, chiles and tomatoes, and nuts and seeds). The recipe made enough to freeze away a batch of sauce and still have plenty to drench our turkey leftovers. We dined on turkey mole tacos with a side salad of kale, roasted delicata squash, black beans, and avocado, as we started to discuss our Christmas wish lists. 


Turkey Mole Poblano
adapted from The Border Cookbook

Mole sauce (makes enough for two batches)
12 ounces whole dried red chiles (a combination of anchos and pasilla)
6 Tbsp sesame seeds
1 tsp fennel seeds
1 tsp cumin seeds
1/2 cup almonds
1/4 cup pepitas
3 Tbsp neutral oil such as canola
4 cups stock (turkey, chicken, or vegetable)
6 garlic cloves
14 ounce can of fire roasted tomatoes
1 medium onion, peeled and quartered
2 stale corn tortillas, torn into pieces
2 ounces unsweetened chocolate
2 ounces bittersweet chocolate (preferably Mexican)
1 tsp ground canela or other cinnamon
1/2 tsp salt

shredded cooked turkey (3 cups for half of the sauce recipe)

1. Break the stems off the chiles and remove the seeds. Toast the chiles until fragrant in a large, heavy skillet, turning frequently, and transfer to a bowl. Cover with two cups of boiling water and allow to rehydrate.

2. In turn, toast the fennel seeds, cumin seeds, pepitas, and almonds until fragrant and transfer them to a blender. Then toast the garlic cloves until soft. When cool enough to handle, peel them and add to the blender. Add one cup of stock to the blender and blend until smooth. Transfer the mixture to a large bowl.

3. Next add the rehydrated chiles to the blender, along with the fire roasted tomatoes, and 1 cup of the rehydration liquid from the chiles, strained through a strainer. Blend these until smooth and add them to the bowl with the nut and seed puree.

4. Add the quartered onion to the skillet and cook until slightly charred on all sides. Place these in the blender along with the corn tortilla, the chocolate, the cinnamon, and 1 cup broth. Blend until smooth and add to the bowl with the other purees.

5. Heat a deep Dutch oven over medium heat and add the oil. Spoon in the sauce and fry while stirring continuously (it will splatter) for about ten minutes. Add the remaining broth and continue to cook for about 30 minutes. Depending on how much turkey you have, at this point you could reserve a portion of the sauce to freeze for a rainy day.  Add the shredded turkey and allow to simmer for 15 minutes.

6. Serve the turkey mole with warm tortillas, over rice, or bake into enchiladas. Enjoy. 

Sunday, November 23, 2014

Pumpkin Cornmeal Pancakes


This weekend I roasted two heirloom pumpkins from Sweetwater Farm, and one of their acorn squashes for good measure. Of course this yielded more than enough pumpkin puree for pumpkin pecan praline pie, so at the suggestion of my son, I made some pumpkin pancakes for breakfast.


I paired the naturally sweet squash with the sweet flavor of corn flour (from Lonesome Whistle Farm). No fan of the cloying flavor of pumpkin pie spices, I restricted myself to a dash of ground cardamom in the batter. But for toppings, we made some cinnamon-spiked sautĆ©ed apples, that added just the right hint of Thanksgiving dessert. This could make a nice post-Thanksgiving breakfast, if your guests aren't too stuffed.   


Pumpkin Cornmeal Pancakes with Cinnamon Apples
makes about 24 small pancakes
pancake batter
1 cup pureed pumpkin
1/2 cup plain yogurt
2 eggs
1 tsp vanilla extract
1/2 cup white flour
1/2 cup fine ground cornmeal or corn flour
1 tsp baking powder
1/2 tsp baking soda
1/2 tsp ground cardamom
pinch of salt
butter for cooking pancakes

cinnamon apples
1 large or 2 small apples, cored and diced
2 Tbsp butter
1/2 tsp cinnamon
1 tsp turbinado sugar

1. Prepare the pancake batter. Mix together the wet ingredients (pumpkin, yogurt, eggs, vanilla extract) until smooth. In a separate bowl, mix together the remaining dry ingredients. Then gently combine the dry ingredients into the wet ingredients. If the batter seems too thick, add a little milk to thin it.

2. Prepare the apple topping. Warm a small skillet over medium low heat. Melt the butter, and stir in the chopped apples and cinnamon. Cook over low heat for about 15 minutes, stirring occasionally, until the apples are soft and fragrant. Stir in the sugar and cook for a minute longer. Reserve.

3. Heat a griddle and when it is warm, grease with a little butter. Use a soup spoon to spoon the batter into pancakes. When permanent bubbles form around the edge and the color of the batter lightens on top, flip the pancakes and cooked them for a couple of minutes on the second side until both sides are golden brown. 

4. Serve the pancakes hot off the griddle with the apple topping and a dribble of maple syrup.

Saturday, November 15, 2014

Fill Your Pantry...with Pumpkin


If you'd like to stock up on locally grown storage fruits and vegetables, beans and grains, don't miss the Fill Your Pantry event hosted by the Willamette Farm and Food Coalition this Sunday from 1:00 to 5:00 PM at the Lane Events Center at 796 W 13th Ave.


For inspiration, above is an heirloom pumpkin I picked up at Sweetwater Farm


destined for my favorite Thanksgiving dessert of pumpkin pecan praline pie, crust made with Lonesome Whistle Farm's Steven's soft white wheat flour. Happy stockpiling.

Tuesday, November 11, 2014

Roasted Beet and Radish Salad with Oranges


On a quick trip to Boston last weekend, I got to enjoy an unexpectedly sunny stroll with my father down to the Charles River, where the trees were still clinging stubbornly to the last of their famous fall foliage. We stopped at the farmers market, where my father lamented the passing of the sungold tomatoes that had garnished my parents'  salads all summer long. In response, I piled up our shopping bag with delicate squash, kohlrabi, beets, and baby turnips to demonstrate just how well these winter vegetables can top a salad. 


Back home in Eugene, I used the same philosophy to compose an impromptu salad with our remaining Sweetwater Farm beets and daikon radish.


Each vegetable got tossed with olive oil and roasted until sweet and soft. For good measure, I roasted some green onions and then tossed everything with some clementine sections, letting the oniony olive oil and citrus juice serve as the dressing. Piled onto fresh lettuce leaves, this mixture was just as sweet and satisfying as any summer tomato. 


Roasted Beet and Radish Salad with Oranges
serves four
4 small beets
1 medium daikon radish (or 8 baby turnips)
4 green onions
2 clementines
olive oil
salt
~8 lettuce leaves

1. Preheat the oven to 375 degrees. Remove the tops and tails of the beets and rinse well (for larger beets, remove their skin with a vegetable peeler). Cut into eighths. On a baking sheet, toss with ~1 Tbsp of olive oil and a pinch of salt. Trim and peel the daikon radish, cut into similar sized pieces, and on a separate baking sheet, toss with ~1 Tbsp olive oil and salt. 

2. Roast the beets and radish for about 30 minutes, stirring every 10 minutes or so, until a fork can pierce through the largest pieces easily and the radish have browned a bit. 

3. While the vegetables are roasting, trim the green onions and cut them into 1/2 inch rounds. In a small baking dish or oven safe skillet, toss them with ~1 Tbsp olive oil and a pinch of salt and stick them in the oven for about the last 10 minutes of roasting, removing them when they are soft and just starting to char. Wash and dry the lettuce leaves and tear into bite sized pieces. Peel the clementines, slice perpendicular to the sections, and separate the slices along the sections into triangles.

4. When the vegetables and green onions are done, toss them together in a bowl along with any oil from the pans. Toss in the clementine sections. Arrange the lettuce on a platter or individual plates and mound on the roasted vegetables. Enjoy.

Sunday, November 2, 2014

Rice Hot Pot


We've been eating a lot of rice hot pots lately, which are perfect for a drizzly midweek meal. Dolsot bibimbap is one of my favorite dishes to order in Korean restaurants, and I always feel so grateful to the chefs who prepare the selection of delectable toppings that are arranged so beautifully in the sizzling bowl of rice. Then I started playing around with heating up rice on the stovetop in stone bowls we'd bought for soup, and I realized that a rice hot pot can be infinitely flexible and an ingenious way to make the most of midweek leftovers and the bounty of our weekly Good Food Easy CSA share. 


The strategy is to cook up a big pot of brown rice or other grain over the weekend, or if you are really planning ahead, freeze meal-sized portions. Then search your pantry, refrigerator, and freezer and assemble a selection of topping ingredients loosely around the five elements below (realizing of course, that every formula was meant to be broken, and many ingredients fit into more than one category). The bowl above, for example, contained Sweetwater Farm kale, rehydrated shiitake mushrooms, and leftover Fair Valley Farm ham, with a side of kimchi. This is a short order chef type of meal with multiple burners going, but it can come together quickly. First rub a little sesame oil in individual stone bowls or a cast iron skillet, pack down a cup of rice for each serving, and start warming the bowls or skillet over low heat. Then prepare your toppings and pile them into the bowls or skillet as you go, ending with an egg on top.  

Some greens: quickly blanched, steamed, or sautƩed, then tossed with a splash of sesame oil, and perhaps some sesame seeds.

Some proteinleftover ham, steak, chicken, quickly sautĆ©ed and finished with a splash of soy sauce and rice wine; baked or caramelized tofu; edamame beans; fried or poached egg.

Something umami: mushrooms, such as rehydrated shiitakes, quickly sautĆ©ed with a splash of soy.

Fresh and crunchy vegetables: shredded carrot, sliced cucumber, sliced radish.

Pickled vegetableshomemade kimchi, pickled chard stems, fermented green beans, refrigerator pickles


Rice Hot Pots
serves four
4 cups cooked brown rice
sesame oil
1 bunch kale (or chard or spinach)
1 cup cubed ham (or other meat or tofu or edamame beans)
canola oil
8 large dried shiitake mushrooms
1-2 carrots shredded (or 1 cucumber cut lengthwise into quarters and thinly sliced)
4 eggs
for garnish: kimchi, pickled vegetables, dried seaweed, sesame seeds, gochujang or sriracha sauce 

1. For 4 cups of cooked rice, use 2 cup dried rice. Rinse in a small mesh sieve, then place in a pot with 3 cups water. Cover and bring to a boil. Turn the heat to low and cook, covered for about 30 minutes, until the water is absorbed. Fluff with a fork. You can cook this ahead of time.

2. Boil 1/2 cup water and pour over the dried shiitake mushrooms to rehydrate them.

3. I prepare a meal for four in two individual stone bowls (for the adults) and a cast iron skillet of toasted rice for the kids, who prefer their toppings separate, which leaves one burner for preparing the toppings. Rub about 1 tsp of sesame oil into each stone bowl or 2 tsp into the cast iron skillet. Start to warm the bowls and skillet over medium low flames. Pack one cup of rice per person into each bowl (two in the skillet). Keep them warming over low heat for about 15 minutes while you prepare the rest of the toppings, and a delicious toasted rice coating will form on the bottom. You should hear the rice sizzling and should smell it toasting. If you are nervous that it is burning, use a spatula to pry underneath and take a peak, and you can always turn it off, but not before you have a good layer of toasted rice.

4. Rinse and chop your greens. You could blanch them quickly in boiling water, steam them in the microwave with a splash of water, or quickly sautĆ© them in another skillet. When they are tender, but not wilted, toss them with a splash of sesame oil and a pinch of salt and layer them into one quadrant of the rice bowls or two opposite quadrants of the skillet. 

5. Cube the meat or tofu. In your working skillet, sautĆ© the cubes over medium high heat in a little canola oil , and when they are hot, add 1 tsp each of soy sauce and rice wine. Cook until these evaporate and then transfer to another quadrant of the rice bowls/skillet.

6. Slice the rehydrated mushroom. In your working skillet, sautĆ© the mushroom slices over medium high heat, allowing the moisture to cook off, add 1 tsp soy sauce, cook down, and then transfer to another quadrant of the rice bowls/skillet.

7. Turn the heat under your working skillet to low and crack in four eggs. While these are frying, prepare the crunchy fresh vegetable toppings and gather your pickled toppings. When the egg are cooked to the desired stage, transfer them to the top of each hot pot or skillet half and sprinkle with sesame seeds.

8. Carefully transfer the hot pots or skillet onto coasters on the table. Have people add desired crunchy fresh and pickled toppings and hot sauce. Enjoy.

Monday, October 20, 2014

Roasted Delicata Squash and Apple Rings


This past weekend, when the sun was still shining (a distant memory a day later), we had the pleasure of visiting Sweetwater Farm, the major vendor of the Fairmount Neighborhood Farmers Market and source of our Good Food Easy CSA. 


Farmers Erica and Tom had on display an explosion of colorful winter squash, along with rosy gala apples. We got to see their impressive operation of greenhouses that keep them harvesting year round, and their open field with a few remaining summer crops including this ghoulish kohlrabi, that could be easily mistaken for a mandrake


All this fall bounty inspired me to roast rings of delicata squash and apples, as a side for a Fair Valley Farm ham. The recipe below gives specific temperatures, but both the squash and apples could be roasted at a range of temperatures, to accommodate whatever else is in the oven, as long as you keep an eye on them.


We had this delicious fall meal along with and my latest attempt at sourdough bread. And as an extra treat, dainty roasted delicata squash seeds, which are a real delicacy as compared to your regular jumbo jack-o'-lantern seeds.


Roasted Delicata Squash and Apple Rings
1 delicata squash
3 apples
a drizzle of olive oil
a pinch of salt

1. Preheat your oven to 425 degrees. Slice the ends off the delicata squash and discard. Slice the squash into 1/2 inch rounds. Hold each round flat and use a spoon to run along the interior edges of each disc to dislodge the inner goop and seeds. Save this to roast the seeds. Drizzle some olive oil on a rimmed baking sheet. Slide the squash discs in the olive oil to coat lightly, and then flip them over to coat the second side. Sprinkle with a pinch of salt. Place in the preheated oven. Bake for 10 minutes.

2. Meanwhile, use a melon baller or paring knife to remove the stem and blossom ends of the apples. Slice each apple into 1/4 inch rounds crosswise across the core. Use the knife tip to flick away any seeds. Place the apple rounds on a second baking sheet.

3. Use a spatula to flip over the delicate squash discs. They should be golden brown and crisp on the bottom. Turn the oven down to 350 degrees and put in the baking sheet with the apple rounds. Check everything after another 10 minutes. Both the apples and squash should be soft and the squash should be golden on both sides. Cook for a little longer if needed. When both are done, move them to a platter and layer the apple slices on the delicata squash rings. Serve warm.


Roasted Delicata Squash Seeds
Use your fingers to pry the seeds away from the squash goop, but a little clinging goop is fine. Mix the seeds with a Tbsp of olive oil and a sprinkle of salt. Roast in a small pan at 350 degrees, stirring after 5 minutes, and checking again every couple of minutes until they are golden brown. Be careful not to forget them because they will burn quickly. Enjoy.

Sunday, October 12, 2014

Cornmeal Plum Scones


We'll have to get used to a different Sunday morning routine now that the Fairmount Neighborhood Farmers Market is done for the season. As my sister-in-law taught me this summer, making scones is a manageable morning task for a late breakfast, so my son and I whipped up these tasty scones from Melissa Clark, with plums from Sweetwater Farm and corn flour from Lonesome Whistle Farm.


For this recipe, you make a quick plum jam with caramelized honey and a bay leaf, and then layer this right into your scone dough triangles, resulting in some nice caramelized plum pieces on the top of your scones when they come out of the oven. 


To be enjoyed with extra plum jam, a second cup of tea, and another section of the Sunday newspaper as the morning fog burns off.


Cornmeal Plum Scones
3 tablespoons/45 milliliters honey
1 bay leaf
¾ pound plums/1/3 kilogram (~20 small), halved, pitted and then cut into 1-inch cubes
¾ cup/175 milliliters heavy cream, more as needed
1 large egg, at room temperature
1 ⅔ cups/275 grams all-purpose flour
⅓ cup/60 grams fine cornmeal
3 tablespoons/35 grams sugar
2 teaspoons/7 grams baking powder
½ teaspoon/2 grams kosher salt
6 tablespoons/85 grams unsalted butter at room temperature, cubed, plus more for serving if you like

1. Put honey and bay leaf in a medium skillet over medium heat. Simmer until honey is bubbling and turns a shade darker, about 2 minutes.

2. Place plums in honey. Cook, without moving, until undersides are golden brown, about 5 minutes. Stir plums and cook 1 to 2 minutes longer, until tender but not falling completely apart. If the caramel starts to get too brown, stir in a teaspoon or two of water and lower the heat. Scrape plums and syrup into a bowl and chill for at least 1 hour. (Plum compote can be made up to a week ahead.)

3. Heat oven to 400 degrees. Line a baking sheet with parchment.

4. In a small bowl or measuring cup, mix together the cream and egg.

5. In a large bowl, whisk together flour, cornmeal, sugar, baking powder and salt (or you can do this in a food processor). Using a fork, pastry cutter or your fingertips, cut butter into flour until the mixture forms coarse crumbs (or pulse in a food processor). Drizzle in as much of the cream mixture as you need to make a smooth, moist but not wet dough. Save remaining cream-egg mixture for brushing.

6. Turn dough out onto prepared baking sheet. Pat into a 1 1/4-inch thick round. Using a paring knife, cut 8 wedge-shaped scones (as though you were cutting slices of pie) and push them apart on the baking sheet to separate them 1/2 inch apart. Brush dough with remaining cream-egg mixture, or use more cream if you’ve run out of the mixture.

7. Using your fingertips, make a deep indentation about 1 inch in diameter in the center of each scone. Tuck some plum into the hole. Transfer pan to oven and bake until uniformly golden brown, 15 to 17 minutes. Cool 5 minutes on the pan, then transfer to a wire rack to cool completely. Serve scones with extra plum compote and butter on the side if you like.

Friday, October 3, 2014

Fish-Fragrant Eggplant


This Sunday October 5th will be the last day of the fifth season of the Fairmount Neighborhood Farmers Market, so be sure to stock up on pastured chicken, lamb, and pork cuts from Fair Valley Farm and fresh produce and preserves from Good Food Easy at Sweetwater Farm. Once the season is over, consider signing up for CSAs with our market venders. This final market Sunday you can expect to find:

Fresh
winter squash: turkish turban, acorn, delicata, and pumpkins (delicious in salads)
Gravenstein apples, Asian pears and bartlett pears from SLO farm (make apple sauce)
watermelon and cantaloupes
eggplants (try the addictive fish-fragrant eggplant dish below)
tomatoes and sweet and hot peppers (make and end of the season pasta primavera)
corn and tomatillos (make salsa) 
green and yellow beans (put away some green bean pickles)
potatoes, baby beets, and broccoli (delicious roasted)
fennel, cucumbers, kohlrabi, carrots, and radish (make sushi rolls)
crookneck squash, summer squash, and zucchini (make ratatouille)
cabbage (green, red, savoy) (make some barley and bean soup)
radicchio, chard, kale, lettuce, including bagged mix (make some kale pesto pizza)
garlic and fresh herbs (basil, oregano, sage, thyme) and home-grown lemon grass

Preserves, Beans, and Grains
From Sweet Creek Foods:
Dill Pickles, Chili Dill Pickles, Bread 'N Butter Pickles, Pickle Relish
Blueberry, Strawberry, Blackberry, and Raspberry Fruit Spreads
Enchilada Sauce and Salsa
From SLO Farm: Applesauce
Assorted beans and grains from Camas Country Mill


Here's a guest post from my husband, who shares his secrets for making one of my favorite Sichuan 
dishes, fish-fragrant eggplant. 


We have been buying lots of eggplant this summer, and almost all of it is for making "fish-fragrant eggplant" or yu xiang qie zi. This dish doesn't actually contain fish, but gets its name because the same flavorings are often used in Sichuan fish dishes.


The recipe I make is adapted from Fuchsia Dunlap's Every Grain of RiceIt makes a very satisfying meal eaten over rice, along with some some Sichuan dry-fried green beans and spicy cucumber salad


Fish Fragrant Eggplant
Adapted from Fuchsia Dunlap's Every Grain of Rice

2 long eggplants or 4 small eggplants
Salt
Cooking oil, for pan-frying
1 tablespoons Sichuan broad bean paste (also called ma po paste, or Doubanjiang)
1 tsp Sichuan peppercorn
1 spicy fresh pepper such as a cherry bomb (optional)
1 tablespoon finely chopped ginger
1 tablespoon finely chopped garlic
2/3 cup (150ml) chicken stock
2 teaspoons sugar
1 teaspoon potato or tapioca flour mixed with one tablespoon cold water
2 teaspoons Chinkiang vinegar
4 tablespoons finely sliced spring onion greens

First, slice the eggplants into 2 inch sections, then split the sections into 4-8 pieces. Place in a colander and salt while turning. This helps release liquid which makes for a better frying. Let sit for 15 minutes. 

While the eggplant is sitting, slice the ginger and garlic. Cover the bottom of a wok with canola or other high-heat oil and heat on high. Add the eggplant (it may take two batches) and cook. Don't turn too frequently since you want them to get a nice golden brown sear.  Remove to drain on paper towels (cook the second batch if needed), pour off all but 1 Tbsp oil, and turn the heat down. 

Next, stir in the broad bean paste. I sprinkle in some Sichuan peppercorn at this point as well. Once they become fragrant, turn off the heat and add the garlic and ginger and optional fresh pepper. It is important not to burn these! If the heat looks under control, turn in back on to medium low until the ginger and garlic are cooked. 

Then pour in the chicken stock and add the sugar, add back the eggplant so it draws in the sauce. Add the potato or tapioca flour to thicken, stirring gently. Splash in the vinegar and the sliced green onion and enjoy!

Saturday, September 27, 2014

Broccoli, Chickpea, and Lamb Chorizo Orecchiette


This Sunday at at the Fairmount Neighborhood Farmers Market, you can look forward to a selection of pastured chicken, lamb, and pork cuts from Fair Valley Farm and beautiful fresh cut flower bouquets from Tiger Lily Art CompanyGood Food Easy at Sweetwater Farm will have the following offerings:  

Fresh
winter squash: turkish turban, acorn, delicata, and pumpkins (time for fall soup)
Gravenstein apples, Asian pears and bartlett pears from SLO farm (make apple sauce)
watermelon and cantaloupes
corn and tomatillos (make salsa) 
tomatoes, including cherries and romas (make tomato soup)
eggplants and sweet and hot peppers of all kinds (roast some for romesco sauce)
green and yellow beans (make a green bean salad with almonds and apricots)
potatoes and baby beets (grill in bundles)
broccoli (make this pasta)
fennel, cucumbers, kohlrabi, carrots, and radish (make sushi rolls)
crookneck squash, summer squash, and zucchini (try Erica's recipe published in the RG)
cabbage (green, red, savoy) (stir fry with seeds)
radicchio, chard, kale, lettuce, including bagged mix (make a chard and bacon tart)
turnips and delicata squash (saute in a salad, below)
garlic and fresh herbs (basil, oregano, sage, thyme) and home-grown lemon grass

Preserves, Beans, and Grains
From Sweet Creek Foods:
Dill Pickles, Chili Dill Pickles, Bread 'N Butter Pickles, Pickle Relish
Blueberry, Strawberry, Blackberry, and Raspberry Fruit Spreads
Enchilada Sauce and Salsa
From SLO Farm: Applesauce
Assorted beans and grains from Camas Country Mill


The chillier fall weather that arrived last week demanded heartier fare for dinner. The Fairmount Neighborhood Farmers Market provides one stop shopping for this one pot meal of Fair Valley Farm's lamb chorizo, Camas Country Mill's chickpeas, and Sweetwater Farm's sprouted broccoli.


If you plan ahead, cooking the chickpeas provides a flavorful broth for the sauce, and the chorizo provides all the seasoning you need for a satisfying meal for fall.


Broccoli Rabe, Chickpea, and Lamb Chorizo Orecchiette
serves four
1 cup cooked chickpeas
1/2 lb lamb chorizo
4 cloves garlic
1 lb sprouted or regular broccoli
2 Tbsp olive oil
1 lb orecchiette
1 cup reserved cooking water from the chickpeas or the pasta
parmesan cheese for serving

1. It's best to used dried chickpeas for this recipe and reserve some of the cooking liquid for the sauce, but you could also use a can of chickpeas (rinsed) and reserve some of the pasta water for the sauce. To cook the chickpeas, rinse and soak overnight if you have time. In a heavy pan, cover add the drained chickpeas and enough fresh water to cover them by an inch, and a bay leaf. Bring to a boil and simmer over very low heat, partially covered, until the beans are cooked through, about 90 minutes. Stir occasionally and add more water if needed to keep them completely submerged. When the chickpeas are cooked, salt the water generously and allow them to sit for at least 10 minutes. Strain the chickpeas and reserve the cooking liquid to be used in the pasta sauce and for future soup stock or risottos. 1 cup of dried chickpeas will yield about 2 cups of cooked chickpeas. You might as well treat yourself to a bag of Camas Country Mill chickpeas and cook up the whole lot. They freeze well, and you will thank yourself later.

2. Set a pot of salted water to boil for the pasta. 

3. Heat a large skillet over medium heat. Add the lamb chorizo and cook as you break into pieces (you can cook the whole pound portion and save half for another meal), until the meat is cooked through. 

4. While the meat is cooking, cut the broccoli into bite sized pieces and mince the garlic. 

5. Put in the pasta once the water comes to a boil.

6. Once the sausage is cooked, remove it with a slotted spoon to a bowl and pour off all but 1 Tbsp of the fat. Add the olive oil to the pan along with the garlic and cook for a minute until it is fragrant. Then add the broccoli and cook for about five minutes. Add the drained chickpeas and roll in the oil to coat. Now add some cooking liquid from the chickpeas (or use some pasta water) and simmer it for a few more minutes until the broccoli is cooked through but still firm. Stir in the cooked sausage. Taste and add salt if needed.

7. Drain the pasta when it is done. In a large serving bowl, toss the pasta with the sausage, broccoli, and chickpeas, and add a little more cooking liquid if it seems dry. Serve with plenty of freshly grated parmesan cheese.