Showing posts with label kimchi. Show all posts

Wednesday, March 30, 2016

Leftovers Bibimbap


This year, my solution for using up Easter eggs was bibimbap. This dish also served the purpose of using up leftover Easter ham, leftover roasted asparagus, and leftover collard greens, and made a dent in my latest batch of kimchi.


I took inspiration from the bibimbap sauce here and the miso lentils here. Once we got over the pain of peeling favorite eggs, this meal was a hit with enough different toppings to please everyone, including sesame carrots for bunnies.


Bibimbap from Easter leftovers

bibimbap sauce
1/2 cup gochujang
2 tbsp sesame oil
1 1/2 tbsp soy sauce
1 1/2 tbsp sugar or honey
1 tbsp sesame seeds
Mix together all of the ingredients and thin with 1-2 tsp water if it seems too thick.

eggs
hard boiled if you have ones to use up, or cooked for 6 minutes in boiling water.

ham
1 cup diced ham, sautéd in a hot skillet in 1 Tbsp canola oil and 1/2 tsp soy sauce until brown on edges. Add 1 tsp miring, cook down, and remove from heat.

cooked greens
1 bunch greens blanched and quickly sautéed in a little sesame oil, or use pot roasted collards, sauté with a chopped onion in olive oil and then roasted in a closed Dutch oven for one hour at 325 degrees.

roasted broccoli or asparagus
1 small broccoli head cut into spears, tossed with oil and salt, and roasted on a preheated baking sheet at 475 degrees for about 12 minutes. Alternatively roast trimmed asparagus similarly but for about 7 minutes.

sesame carrots
1 carrot julienned and sautéed in a hot skillet in 1 Tbsp canola oil with 1/2 tsp sugar until soften. Add 1 tsp soy sauce and 1 tsp mirin, cook down, remove from heat and toss with 1 tsp sesame seeds.

miso lentils
3/4 cup puy lentils cooked in boiling water until soft (~18 minutes) and drained. Transfer to a bowl and mix in 2 tsp miso paste, 1 tsp sesame oil, a small pinch of sugar and black pepper.

toasted sesame rice
Coat the bottom of a large skillet with 1 Tbsp sesame oil and heat over medium low. Add 4 cups of cooked rice (I like to use a mixture of brown and white rice) and pack down. Cook for about 5-7 minutes until the bottom has developed a toasted crust (peek with a spatula).   

kimchi and sesame seeds to garnish

To serve, scoop out a serving of toasted rice, layer on all desired toppings, and drizzle with bibimbap sauce.

Sunday, November 2, 2014

Rice Hot Pot


We've been eating a lot of rice hot pots lately, which are perfect for a drizzly midweek meal. Dolsot bibimbap is one of my favorite dishes to order in Korean restaurants, and I always feel so grateful to the chefs who prepare the selection of delectable toppings that are arranged so beautifully in the sizzling bowl of rice. Then I started playing around with heating up rice on the stovetop in stone bowls we'd bought for soup, and I realized that a rice hot pot can be infinitely flexible and an ingenious way to make the most of midweek leftovers and the bounty of our weekly Good Food Easy CSA share. 


The strategy is to cook up a big pot of brown rice or other grain over the weekend, or if you are really planning ahead, freeze meal-sized portions. Then search your pantry, refrigerator, and freezer and assemble a selection of topping ingredients loosely around the five elements below (realizing of course, that every formula was meant to be broken, and many ingredients fit into more than one category). The bowl above, for example, contained Sweetwater Farm kale, rehydrated shiitake mushrooms, and leftover Fair Valley Farm ham, with a side of kimchi. This is a short order chef type of meal with multiple burners going, but it can come together quickly. First rub a little sesame oil in individual stone bowls or a cast iron skillet, pack down a cup of rice for each serving, and start warming the bowls or skillet over low heat. Then prepare your toppings and pile them into the bowls or skillet as you go, ending with an egg on top.  

Some greens: quickly blanched, steamed, or sautéed, then tossed with a splash of sesame oil, and perhaps some sesame seeds.

Some protein: leftover ham, steak, chicken, quickly sautéed and finished with a splash of soy sauce and rice wine; baked or caramelized tofu; edamame beans; fried or poached egg.

Something umami: mushrooms, such as rehydrated shiitakes, quickly sautéed with a splash of soy.

Fresh and crunchy vegetables: shredded carrot, sliced cucumber, sliced radish.

Pickled vegetables: homemade kimchi, pickled chard stems, fermented green beans, refrigerator pickles. 


Rice Hot Pots
serves four
4 cups cooked brown rice
sesame oil
1 bunch kale (or chard or spinach)
1 cup cubed ham (or other meat or tofu or edamame beans)
canola oil
8 large dried shiitake mushrooms
1-2 carrots shredded (or 1 cucumber cut lengthwise into quarters and thinly sliced)
4 eggs
for garnish: kimchi, pickled vegetables, dried seaweed, sesame seeds, gochujang or sriracha sauce 

1. For 4 cups of cooked rice, use 2 cup dried rice. Rinse in a small mesh sieve, then place in a pot with 3 cups water. Cover and bring to a boil. Turn the heat to low and cook, covered for about 30 minutes, until the water is absorbed. Fluff with a fork. You can cook this ahead of time.

2. Boil 1/2 cup water and pour over the dried shiitake mushrooms to rehydrate them.

3. I prepare a meal for four in two individual stone bowls (for the adults) and a cast iron skillet of toasted rice for the kids, who prefer their toppings separate, which leaves one burner for preparing the toppings. Rub about 1 tsp of sesame oil into each stone bowl or 2 tsp into the cast iron skillet. Start to warm the bowls and skillet over medium low flames. Pack one cup of rice per person into each bowl (two in the skillet). Keep them warming over low heat for about 15 minutes while you prepare the rest of the toppings, and a delicious toasted rice coating will form on the bottom. You should hear the rice sizzling and should smell it toasting. If you are nervous that it is burning, use a spatula to pry underneath and take a peak, and you can always turn it off, but not before you have a good layer of toasted rice.

4. Rinse and chop your greens. You could blanch them quickly in boiling water, steam them in the microwave with a splash of water, or quickly sauté them in another skillet. When they are tender, but not wilted, toss them with a splash of sesame oil and a pinch of salt and layer them into one quadrant of the rice bowls or two opposite quadrants of the skillet. 

5. Cube the meat or tofu. In your working skillet, sauté the cubes over medium high heat in a little canola oil , and when they are hot, add 1 tsp each of soy sauce and rice wine. Cook until these evaporate and then transfer to another quadrant of the rice bowls/skillet.

6. Slice the rehydrated mushroom. In your working skillet, sauté the mushroom slices over medium high heat, allowing the moisture to cook off, add 1 tsp soy sauce, cook down, and then transfer to another quadrant of the rice bowls/skillet.

7. Turn the heat under your working skillet to low and crack in four eggs. While these are frying, prepare the crunchy fresh vegetable toppings and gather your pickled toppings. When the egg are cooked to the desired stage, transfer them to the top of each hot pot or skillet half and sprinkle with sesame seeds.

8. Carefully transfer the hot pots or skillet onto coasters on the table. Have people add desired crunchy fresh and pickled toppings and hot sauce. Enjoy.

Friday, February 28, 2014

Roasted Rice Cakes with Scallion Oil


Last November my husband and I visited Shanghai, the fastest growing city in the world. In the midst of this mind bogglingly immensity, we nibbled a bowl of noodle that had an arresting, deep flavor that I thought must have come from with some exotic mushrooms, but was merely caramelized green onions.  


Back home, the taste of those noodles lingered with me. I consulted Fuchsia Dunlap's Every Grain of Rice: Simple Chinese Home Cooking, and found her Shanghai Noodles with Dried Shrimp and Spring Onion Oil, which she describes as "a southern Chinese equivalent of the Italian spaghetti all'aglio, olio e peperoncino." As I read more, I realized that caramelized onions of all types are an integral condiment in many Asian cuisines, adding a deep umami layer of flavor. Thus started my obsession with crispy fried alliums. 


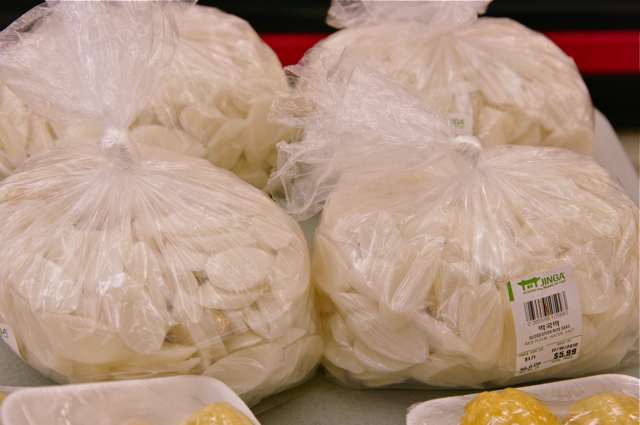
These spring onions and their fragrant oil make a wonderful topping for a bowl of noodles, but they can also transform Korean rice cakes, which I recently found fresh, rather than frozen, at the Sunrise Asian Market in Eugene. 


I'd read about fried, rather than braised rice cake in David Chang's 
recipe from Momofuku, and indeed this method of cooking them makes the cakes puff up into delectable treats with a toasty exterior and soft, chewy inside. These are delicious as a snack (perfect for an Oscars party) topped with sriracha sauce and the fried scallions.


These roasted rice cakes also make a wonderful base for a riff on kimichi fried rice, tossed with kimchi (my latest batch was made with red cabbage) and topped with a fried egg. And of course, sprinkled with the fried scallions.


Roasted Rice Cakes with Scallion Oil
1 bunch scallions
1/4 cup canola oil
1 lb fresh rice cakes

serving suggestions
sriracha sauce
kimchi
fried egg

1. Trim the scallions. With the flat side of a chef's knife, smash the white parts of the onions and then cut them into 2 inch sections. 

2. Heat the oil in a wok over medium high heat. Add the scallions, lower the heat slightly, and cook, stirring off and on, until they turn a deep golden brown, but be careful not to burn them. When they are done, remove them from the oil with a slotted spoon and reserve in a bowl.

3. Return the wok with the oil to a medium high heat and add the rice cakes. Cook, stirring off and on, until they become browned and puff up in size. You can eat them like this, sprinkled with a pinch of salt, a drizzle of sriracha sauce, and the crispy scallions. Or, stir in a couple of spoonfuls of kimchi into the wok and cook until heated through. Serve with a fried egg on top, along with the fried scallions.

Saturday, March 2, 2013

Mung Bean Pancakes with Kimchi


With a large supply of kimchi from our Open Oak Farm cabbages, a recent New York Times recipe for kimchi mung bean pancakes caught my eye. 


The article was about cooking with kids (in this case the daughter of chefs Jean-Georges and Marja Vongerichten).  I was skeptical that our kids would try pancakes with kimchi (my jars of fermenting cabbage are a source of jokes for them right now, but someday they will see the light). However, I thought the basic principle (similar to falafel) of making a batter from soaked, raw legumes could be the starting point for all sorts of pancakes. So for my recipe I left out the kimchi juice from the batter and incorporated grated raw carrots and chopped mint into half for kid-friendly Korean style latkes. Both versions were delicious as appetizers for dinner, and the remaining batter made a tasty lunch of fritters on top of a green salad. 


Mung Bean Pancakes
adapted from “The Kimchi Chronicles,” by Marja Vongerichten and Julia Turshen
makes about 20 pancakes
batter
2 cups split mung beans
1/4 cup short grain rice, such as sweet rice
1 cup water
1 tsp fish sauce (optional)
1 tsp soy sauce
1 tsp sesame oil
pinch of salt
1 cup kimchi (or 1 cup grated carrots and chopped mint, plus more salt)
neutral oil, such as canola, for frying

dipping sauce
1/4 cup soy sauce
1 tsp sugar
1 Tbsp sesame oil
1 Tbsp rice vinegar
1/8 tsp red pepper flakes
2 scallions, green and white parts finely chopped

for serving
cilantro leaves
lime slices
sriracha sauce

1. Combine the mung beans and rice in a fine-meshed colander and rinse well with cold water. Transfer to a bowl and add 8 cups of lukewarm water. Cover the bowl and soak at room temperature for at least 6 hours and up to 24 hours, changing the water once or twice.

2. Prepare the pancake batter by draining the soaked beans and rice and transferring them to the jar of a blender. Add 1 cup water, the fish sauce (if using), sesame oil, soy sauce, and salt and blend into a slightly coarse paste. Do not overmix. Transfer to a large bowl, finely chop the kimchi and stir into the batter. You could also divide the batter into two bowls and incorporate 1/2 cup finely chopped kimchi into one and 1/2 cup grated carrots, chopped mint, and a pinch of salt into the other.

3. To fry the pancakes, heat a large skillet, such as cast iron, over medium heat and add 1 to 2 tablespoons of the vegetable oil. Heat until the oil shimmers. Using a 1/4 cup measure, ladle in the pancake batter, flattening each pancake to 1/3-inch thickness. Cook until crisp and browned on one side, about 4 minutes. Flip the pancakes and cook until browned on the other side, another 2 to 4 minutes. Transfer to a paper towel-lined plate.

4. While the pancakes are cooking, you can make the dipping sauce by combining the soy sauce, sesame oil, rice vinegar, red pepper, and scallions in a small bowl and mix until blended.

5. Serve the pancakes warm with the dipping sauce, cilantro leaves, lime slices, and sriracha.

Sunday, January 20, 2013

Soft Tofu Hotpot (Soondubu Jjigae)


Our latest favorite use for homemade kimchi is in Korean stews cooked with soft tofu. Here is my husband's guest post about this winter treat.


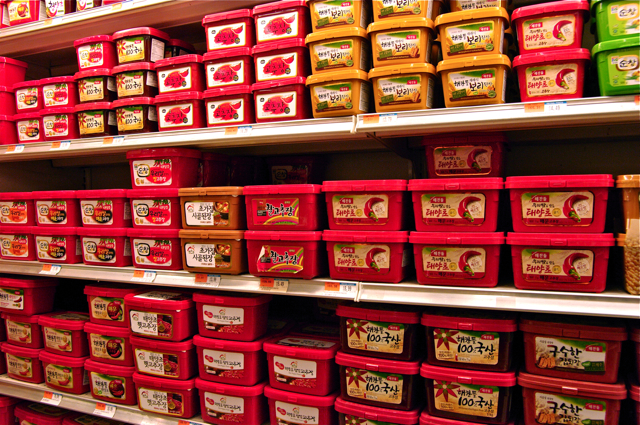
In the winter a young man's fancy lightly turns to thoughts of soondubu jjigae, or Korean soft tofu hotpot. This easy dish is perfect for cold evenings, and the combination of a broth overloaded with richness and custard-soft tofu gives a great framework for adding whatever is handy around the kitchen. It does take a few specialty items and ingredients, but it is well worth a trip to an Asian grocery to pick them up. The first is the hotpot, a stone pot coated in enamel. In Eugene, Sunrise market carries these in the back corner. Other specialty items (also available at Sunrise) are soon tofu, which is even softer than soft or silken tofu, and Korean chili paste, Gochujang (this comes in a tub or as a sweeter condiment in a ketchup-style bottle, get the tub).


Soft Tofu Hotpot (Soondubu Jjigae)
serves two (split ingredients between two hot pots)
1 tablespoon vegetable oil
1/3 lb top sirloin, sliced thin against the grain (or try a seafood version, adding clams and mussels to the broth)
3 garlic cloves, minced
3 green onions, sliced into rounds.
1 tablespoon fish sauce
1/2 tablespoon soy sauce
2 tablespoons Gochujang
vegetables -- beet greens, kale, carrot, zucchini, whatever.
1/2 cup sliced rice cake (optional)
2 cups good stock (I used homemade chicken stock)
1/4 cup diced shiitake mushrooms
4 tablespoons kimchi
1 small package soon tofu

for serving
dried kelp
2 eggs
cooked white rice

1. Set the hot pots directly on the stove top and heat with a medium low heat. Then set some rice cooking, so it will be ready along with everything else. Next, slice the sirloin, mince the garlic and cut the green onion. Then prep the vegetables (slicing carrots or washing greens). 

2. Turn the heat up to medium, and add the oil to the hot pots. Add the sliced sirloin, letting it sear a bit on one side (around a minute). Give the meat a stir, then add the minced garlic and the white part of the chopped green onion. Stir for another minute. Add the fish sauce, soy sauce and Gochujang. Stir a bit, then add the stock, fresh vegetables that need more cooking time, such as carrots, shiitake mushrooms, and rice cakes, if using. At this point I turn the heat up a bit more, to get the broth boiling. As it all heats up, add the kimchi. After heating for several minutes, the soon tofu can be gently spooned into the broth, taking care not to break it up. You can add other things as well, such as greens and zucchini. Don't overfill the hot pot though, or else you may end up severely burned transporting it to the table!

3. Get the table ready, bringing out the rice, kelp sheets, green onion greens, and an egg for each person. Also put out a heat-resistant pad for each hot pot! At this point, the hot pot should be at a good simmer, so put on oven mitts and carefully carry each hot pot out to the table. As soon as it is served, each diner should crack an egg into the hotpot and immediately break the egg yolk with a fork, giving it a good stir so the egg dissipates into the broth. Tear in some kelp, sprinkle on green onion, and then add rice as you eat, which slowly thickens the broth over time. The richness of the broth comes from the seared beef, fish sauce, mushroom, stock, kelp and stirred-in egg, all of which add to the incredible umami flavor. The hot pot keeps the contents searingly hot until the end, and the Gochujang gives a spiciness that adds to the overall warming sensation.

Thursday, January 10, 2013

Fun With Fermentation


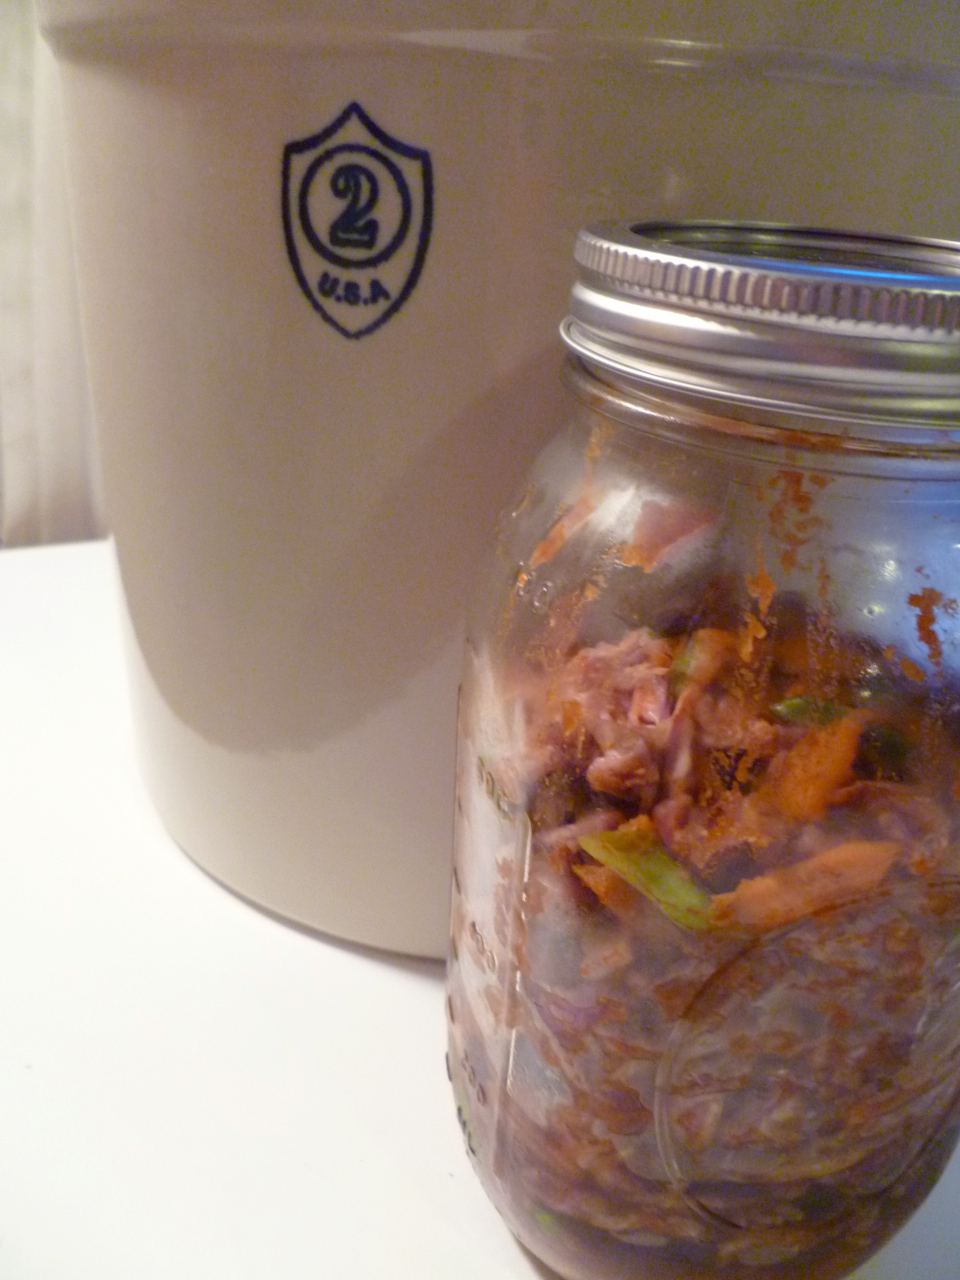
Here's my latest batch of kimchi, made with purple savoy cabbage, turnips, carrots, and green onions. The quart jar is dwarfed by my new sauerkraut crock, a Christmas present from my sister-in-law. In my family, plentiful sauerkraut consumption around the New Year is equated with wealth, so I'm feeling like a billionaire. And for instructions on how best to nurture a happily fermenting culture of lactic acid bacteria in my crock, I'm planning on going to the Fun With Fermentation Festival this Saturday January 12 from 11:00 - 4:00 at the WOW Hall. For those of you who miss the Fairmount Neighborhood Farmers Market supply of delicious sauerkraut, John Karlik from Sweetwater Farm will be demonstrating how to make your own.

Monday, May 7, 2012

Homemade Kimchi


Right now in the microbiology course I'm teaching we're considering all the different ways that microbes make a living, eking out energy from the most unlikely sources and in the most unlikely settings. It's hard not to feel a little superior as humans, knowing that we have the luxury of aerobic respiration, popping out dozens of ATPs for every sugar molecule we ingest, while the slow fermenting microbes toil away to make a couple of ATPs from the same starting material. But, while dashing to class after frantic mornings getting the kids off to school, I've been thinking that there's a lot to be said for those fermenters' slower paced lifestyle. It's not all about the ATP. I'm certainly grateful for those fermentation byproducts, especially when they result in a delicious and easy kimchi stir fry supper at the end of a long day.


This kimchi recipe is based on David Chang's from Momofuku. It is easy to prepare once you locate the Korean chili powder, called kochukara, which I grabbed while racing through Sunrise Asian Food Market on a mission to find roasted black sesame seeds, although I forgot the jarred salted shrimp called for in this recipe. The chili powder went into a gingery, garlicy, salty, sweet paste that I tossed with cabbage, daikon radish, carrots, and green onions. Then I left the cabbage-affiliated microbes to their leisurely fermenting as we dashed off to a Saturday soccer game. Later that evening I tucked my jars in the refrigerator, instructed to let the kimchi continue fermenting for a couple of weeks, but we couldn't resist sampling it the next day. It was already delicious, with a strong kick of ginger.


A stash of kimchi is a readymade stir fry in a jar: a bounty of precut vegetables, softened but still with plenty of crunch, in a delicious sauce, that just needs heating up with some starch and protein. We're particularly fond of this kimchi fried rice recipe for a quick weeknight meal. A new favorite is kimichi fried rice cakes, topped with strips of cooked egg and a sprinkle of those sesame seeds. Given our speedy rate of kimichi consumption, our diligent cabbage fermenting microbes barely made it to their two week mark before we had gobbled them up. 


Cabbage Kimchi
adapted from Momofuku
makes 1 to 1 1/2 quarts

1 small to medium head cabbage, discolored outer leaves discarded
2 tablespoons kosher or coarse sea salt
2 tablespoons sugar
1 bunch scallions, trimmed and cut into 1/2 inch pieces (greens and whites)
1-2 julienned carrots
1 small daikon radish, peeled and julienned
20 garlic cloves
1 1/2 inch piece of fresh ginger 
1/4 cup sugar
1/4 cup kochukaru (Korean chile powder)
1/4 cup fish sauce
1/4 cup usukuchi (light soy sauce)
2 teaspoons jarred salted shrimp (optional)

1. Cut the cabbage lengthwise in quarters, slice out the cores, then cut the quarters crosswise into 1-inch-wide pieces. Toss the cabbage with the salt and 2 tablespoons of the sugar in a bowl. Let sit for a few hours at room temperature or overnight in the refrigerator. 

2. Combine the garlic, ginger, kochukaru, fish sauce, soy sauce, shrimp, and 1/4 cup sugar in a large bowl. If it is very thick, add water 1/4 cup at a time until the brine is just thicker than a creamy salad dressing but no longer a sludge. 

3. Julienne the carrots and daikon and slice the green onions. Drain the cabbage. In a large bowl, combine the vegetables and the brine.

4. Transfer the kimchi to clean glass jars. Pack the kimchi down so that the vegetables are submerged in the red spicy brine (the goal here is to have the vegetables in an aqueous, oxygen-depleted environment that promotes fermentation of lactic acid bacteria and prevents the growth of other bacteria). You can leave the kimchi to ferment in a cool place for a day or refrigerate directly. Though the kimchi will be tasty after 24 hours, it will be better in a week and at its prime in 2 weeks. It will still be good for another couple weeks after that, though it will grow stronger and funkier.

Tuesday, September 6, 2011

Kimchi Fried Rice


With the school year starting up, I've been feeling in need of inspiration for more quick weeknight dinners. A while ago I'd bookmarked a recipe for kimchi fried rice from the food blog Orangette, but hadn't had any kimchi on hand. Luckily the newest addition to the Fairmount Neighborhood Farmers Market, Sweetwater Farm, sells an assortment of homemade fermented cabbages, including sauerkraut and kimchi. I picked up a pint of kimchi, along with some fresh eggs, hefty scallions, and Swiss chard from Songbird Farm. To accompany the fried rice, I sauteed the Swiss chard with fresh ginger and Chinese black bean and chili paste. 


The fried rice recipe started with chopped bacon into which the kimchi is fried, along with cooked rice, which is then topped with fried eggs, toasted sesame seeds, and scallions. The final dish was a delicious mixture of salty pork and spicy pickled cabbage, a sort of Asian choucroute garnie, and it was also easily modified for kimchi-averse family members because who doesn't like eggs and bacon for dinner? It met all the criteria for a weeknight meal: quick, satisfying, and easy to pull together now that we have a good local source of fresh kimchi from Sweetwater Farm.


Kimchi Fried Rice
serves two


1 half pint kimchi
2 cups cooked rice
2 slices of bacon, cut into 1/2 inch pieces
1 large or 2 regular scallions, sliced into 1/4 inch disks
1 Tbsp sesame seeds
2-4 eggs
2 Tbsp canola oil
1 tsp sesame oil
salt to taste


1. Cook the bacon pieces in a large skillet over medium heat until the fat is rendered and the bacon has started to crisp.  


2. Add the white parts of the scallions and saute for a minute.  Then add the kimchi and cook, stirring occasionally, until it has softened and most of the liquid has reduced. Add the rice, stir well, and cook until the rice starts to brown.


3. Meanwhile heat a small skillet. Toast the sesame seeds for a minute and remove to a bowl. Add the canola and sesame oil and when hot, crack in the desired number of eggs. Cook until the whites are set but the yoke is still runny. 


4. Scoop the kimchi rice onto two plates. Top with the fried eggs and sprinkle with toasted sesame seed and the green parts of the scallions. 


Ginger Chard Stir Fry


1 bunch Swiss chard, stems chopped finely and leaves sliced
1 inch ginger root, peeled and diced
2 Tbsp canola oil
1 heaping tsp Chinese black bean and chili paste
1 glug (~3 Tbsp) rice wine


Heat a skillet or wok over medium high heat and add the oil. When hot, add the chard stems and ginger and saute for a couple of minutes. Add the black bean and chili paste and cook another minute. Add the chard leaves and saute until they start to cook down. Add the rice wine and cook for a couple more minutes until the rice wine boils off. Transfer to a bowl and serve immediately.