Showing posts with label preserves. Show all posts

Friday, September 9, 2016

Honey Stewed Asian Pear Preserves


There is a nip in the air these days that is a reminder to put away some of the summer's produce for colder days. Camas Swale Farm has had some beautiful Asian pears, which inspired me to share this canning project from last fall. We've been enjoying these honey stewed Asian Pears all year long, drizzled over waffles and pancakes, and we're just about ready for a new batch.


For a recipe for preserving Asian pears I turned to Linda Ziedrich's The Joy of Jams, Jellies, and Other Sweet Preserves recommended by a trusted authority.


The recipe included quite a bit of lemon juice, because Asian pears are not very acidic, but the honey tempers the lemons'  sourness. The instructions worked beautifully, except that I ended up with 3 extra pints of quartered pears which required an additional half recipe of stewing liquid.


Diedrich suggests adding anise seeds, coriander seeds, or fresh ginger slices to the jars. I tried the fresh ginger. I liked it, but I thought it overpowered the pears a little and I think I will leave it out the next time.


Once all the pear peeling is complete, the actual preserving just involves a quick 5 minute stewing in the honey syrup without any of the anxiety about jams jelling, making this a great recipe for a beginning canner. And once you've processed your cans of stewed pears, you can enjoy your handiwork all winter long.


Linda Diedrich's Asian pears stewed in honey
makes about 6 pints


8.5 lb Asian pears (for me, this was 16 pears, which filled 9 pint jars when cut into quarters, requiring another half recipe of the stewing liquid)

1 1/4 cups (420 g) honey
3 1/4 cup water
grated zest of one lemon
1/2 cup (118 g) lemon juice (I used about 6 small lemons)
3/4 teaspoon anise seeds or coriander seeds or 6 slices of ginger (optional)

1. Peel and core the Asian pears, slice them in quarters. 

2. In a preserving pan, combine the honey, water, lemon zest, and lemon juice. Bring the mixture to a simmer, stirring a bit to dissolve the honey.

3. Immediately drop the pear quarters into the hot syrup. Simmer the fruit for 5 minutes, skimming off any foam.

4. While the fruit simmers, divide the spices, if using them, among sterilized quart or pint mason jars.

5. After the fruit has simmer for 5 minutes, remove it from the syrup with a slotted spoon and add it to the jars. Pour the hot syrup over the fruit, leaving 1/2 inc headspace in each jar. Add lids and rings, and process the jars in a boiling-water bath— pints for 20 minutes, quarts for 25 minutes.

Sunday, March 23, 2014

Marcella Hazan's Bolognese Meat Sauce


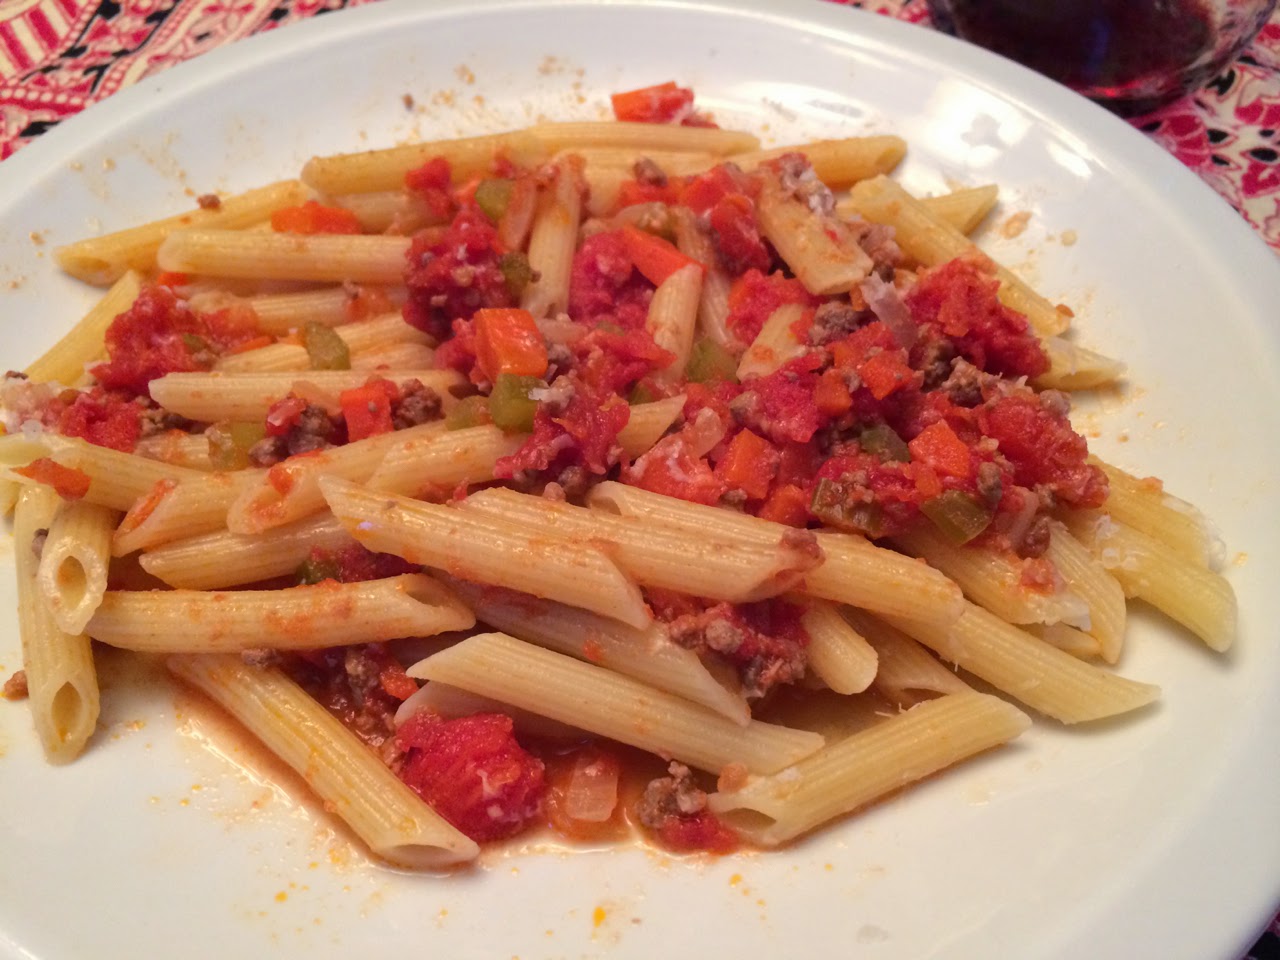
The arrival of spring break, after the neighborhood's buffeting with last month's ice storms and recent scary events, offers a welcome chance to decompress. For myself this took the form of slowly simmering a pot of Marcella Hazan's incomparable ragu alla bolognese.


Ragu recipes can elicit strong feelings and even commentary for beyond the grave, but for me this is unquestionably the quintessential version. Over the years, I've tweaked Hazan's recipe to accommodate a pound of ground beef and scaled up slightly the proportion of tomatoes (a convenient two large cans) and vegetables. This produces a plentiful pot of sauce with ample supplies to freeze for later, well worth doing after all of the hours of simmering down first the beef's milky bath and then its winey digestif. For this batch I used ground beef from Fair Valley Farm and a couple of quarts of frozen Sweetwater Farm tomatoes. With ingredients this good, the resulting ragu was particularly delicious, and the process of preparing it imbued the house with comforting smells and a sense of balance.


Marcella Hazan's Bolagnese Meat Sauce
(adapted slightly; makes about 5 pints of sauce, which can be frozen)

1 Tbsp olive oil
3 Tbsp butter
1 medium onion, chopped
3 stalks celery, trimmed and chopped
3 carrots, chopped
1 lb ground beef chuck
salt and freshly ground black pepper
1 cup milk
1 cup dry white wine (I use 1/2 cup dry vermouth)
2 28 ounce cans whole peeled tomatoes with their juices (or 2-3 quarts frozen peeled tomatoes)

1. Put the oil, butter, and chopped onion in a large heavy pot, such as a Dutch oven, and turn the heat on medium. Cook and stir the onion until it has become translucent, then add the chopped celery and carrot. Cook for about 2 minutes, stirring the vegetables to coat them well.

2. Add the ground beef, a large pinch of salt, and a few grindings of pepper. Crumble the meat with a fork, stir well, and cook until the beef has lost its raw, red color.

3. Add the milk, and let it simmer gently, stirring frequently, until it has bubbled away completely. At this point Hazan adds a tiny grating of nutmeg, but I omit this step because of my nutmeg aversion.

4.  Add the wine, let it simmer until it has evaporated, then add the tomatoes and stir thoroughly to coat all the ingredients well. When the tomatoes begin to bubble, turn the heat down so that the sauce cooks at the laziest of simmers, with just an intermittent bubble breaking through to the surface. Cook, uncovered, for 3 hours or more, stirring from time to time. Add 1/2 cup water at a time if it begins to dry out (I've never had this problem). At the end, however, no water at all must be left and rye fat must separate from the sauce. Taste and correct for salt.

5. Toss with cooked drained pasta and serve with freshly grated Parmesan on the side.

Saturday, October 13, 2012

Kimchi and Bo Ssam


It's official: the Fairmount Neighborhood Farmers Market is over for the season. You can catch some culinary action on the corner of Agate and 19th this evening at the Dia de los Muertos Festival from 4 to 9 PM. If you are suffering from a sense of loss over the end of your summer Sunday routine and the passing of the sunny days, here is my prescription: be sure to preserve some of the last of fall's harvest for the rainy days ahead.


With a final collection of Sweetwater Farm's produce -- arrowhead cabbage, kohlrabi, carrots, celery, green onions, and garlic -- I made a delicious version of this kimchi. 


We turned on the oven for the slow roasting of a sweet and salty slathered pork shoulder, following this Bo Ssam recipe from David Chang's Momofuku. 


And we enjoyed these delicious lettuce leaf packets of tender pork and rice topped with a little bit of preserved harvest.


Kimchi and Bo Ssam
Kimchi
follow this recipe from Momofuku, using the following vegetables:
1/2 small cabbage, cored and chopped into small strips
1 kohlrabi, peeled generously and cut into matchsticks
2 big or 4 small carrots, scrubbed and cut into matchsticks
2 big or 4 small celery stalks, sliced into 1/4 inch slices

Bo Ssam
follow this recipe from Momofuku. We used a smaller pork shoulder, but cooked it for almost as long to achieve the "souffle effect" when the meat is falling apart and the fat starts to bubble.

Serve on tender lettuce leaves with a scoop of white rice, a couple forkfuls of pork, and a generous dollop of kimchi.

Thursday, September 13, 2012

Putting Away Tomatoes


This Sunday's Fairmount Neighborhood Farmers Market you can look forward to the following offerings from Sweetwater Farm and Fair Valley Farm:
  • bargain tomatoes (20 lb for $20 for many varieties, 10 lb for $15 San Marzano romas)
  • Akane apples and Asian pears from SLO Farm (add to a salad)
  • Italian prune plums (bake a galette)
  • cantaloupe and honeydew mellons
  • kohlrabi, baby carrots, and celery
  • kale and collards (try this kale pesto pizza)
  • eggplants and broccoli (try a roasted salad)
  • cucumbers and corn 
  • peppers both sweet and spicy (make a roasted vegetable barley risotto)
  • baby lettuce salad mix
  • zucchini and summer squash
  • red, white, and blue potatoes (make a frittata)
  • sweet onions, garlic, leeks, and fennel (make some pickles)
  • fresh herbs, including basil, cilantro, dill, thyme, oregano, and sage
  • tomato sauce and pesto
  • naturally fermented pickles, dilly beans, and sauerkraut
  • homemade jams (delicious in crepes)
  • Scottish oats (make this teff oatmeal)
  • a selection of dried beans and grains from Camas Country Mill
  • pastured chicken (try it spatchcocked)
  • pastured pork: bacon, ground pork, pork chops, shoulder roasts, ham roasts, spare ribs, and the best sausage for hash
  • pastured lamb: ground, stew meat, leg roast, rib chops, loin chops (try in gozleme)
A stop at the Market will be part of a busy day for University of Oregon students participating in the Office of Sustainability's Project Tomato. They will spend the week harvesting tomatoes at nearby farms and processing them into pizza sauce to be consumed in the University dining halls by their lucky classmates.


I did my own tomato processing last week, having snatched up a 10 pound flat of Sweetwater Farm's brilliant red romas. I followed these instructions for processing whole tomatoes, but rather than canning them, I took the easier route of freezing them in Ball plastic freezer jars. My flat of romas yielded four quart containers of whole tomatoes (each held about a dozen romas), plus a batch of tomato sauce and two sheets of slow roasted tomatoes. The whole ritual of coring and scoring, blanching and peeling, roasting and simmering, gave me immense satisfaction, and I can't wait to savor summer's flavors in soups, sauces and chilis over the winter.


Freezing Whole Tomatoes

Fresh, ripe tomatoes
Glass or plastic freezer jars (I packed ~12 romas per quart (32 fluid ounce) jar)

1. Boil water in a large pot.

2. Remove the tomato cores and score an X on the opposite end.

3. Set up a big bowl of ice water.

4. In batches of about a dozen, blanch the tomatoes in the boiling water for 1-2 minutes and then transfer them to the ice bath.

5. Remove the skins, which will have blistered, and pack them into the jars up to the fill line (leave some room to allow for them to expand when frozen).

6. Close the lids loosely and label. When the tomatoes are completely cooled, tighten the lids and freeze.

Monday, May 7, 2012

Homemade Kimchi


Right now in the microbiology course I'm teaching we're considering all the different ways that microbes make a living, eking out energy from the most unlikely sources and in the most unlikely settings. It's hard not to feel a little superior as humans, knowing that we have the luxury of aerobic respiration, popping out dozens of ATPs for every sugar molecule we ingest, while the slow fermenting microbes toil away to make a couple of ATPs from the same starting material. But, while dashing to class after frantic mornings getting the kids off to school, I've been thinking that there's a lot to be said for those fermenters' slower paced lifestyle. It's not all about the ATP. I'm certainly grateful for those fermentation byproducts, especially when they result in a delicious and easy kimchi stir fry supper at the end of a long day.


This kimchi recipe is based on David Chang's from Momofuku. It is easy to prepare once you locate the Korean chili powder, called kochukara, which I grabbed while racing through Sunrise Asian Food Market on a mission to find roasted black sesame seeds, although I forgot the jarred salted shrimp called for in this recipe. The chili powder went into a gingery, garlicy, salty, sweet paste that I tossed with cabbage, daikon radish, carrots, and green onions. Then I left the cabbage-affiliated microbes to their leisurely fermenting as we dashed off to a Saturday soccer game. Later that evening I tucked my jars in the refrigerator, instructed to let the kimchi continue fermenting for a couple of weeks, but we couldn't resist sampling it the next day. It was already delicious, with a strong kick of ginger.


A stash of kimchi is a readymade stir fry in a jar: a bounty of precut vegetables, softened but still with plenty of crunch, in a delicious sauce, that just needs heating up with some starch and protein. We're particularly fond of this kimchi fried rice recipe for a quick weeknight meal. A new favorite is kimichi fried rice cakes, topped with strips of cooked egg and a sprinkle of those sesame seeds. Given our speedy rate of kimichi consumption, our diligent cabbage fermenting microbes barely made it to their two week mark before we had gobbled them up. 


Cabbage Kimchi
adapted from Momofuku
makes 1 to 1 1/2 quarts

1 small to medium head cabbage, discolored outer leaves discarded
2 tablespoons kosher or coarse sea salt
2 tablespoons sugar
1 bunch scallions, trimmed and cut into 1/2 inch pieces (greens and whites)
1-2 julienned carrots
1 small daikon radish, peeled and julienned
20 garlic cloves
1 1/2 inch piece of fresh ginger 
1/4 cup sugar
1/4 cup kochukaru (Korean chile powder)
1/4 cup fish sauce
1/4 cup usukuchi (light soy sauce)
2 teaspoons jarred salted shrimp (optional)

1. Cut the cabbage lengthwise in quarters, slice out the cores, then cut the quarters crosswise into 1-inch-wide pieces. Toss the cabbage with the salt and 2 tablespoons of the sugar in a bowl. Let sit for a few hours at room temperature or overnight in the refrigerator. 

2. Combine the garlic, ginger, kochukaru, fish sauce, soy sauce, shrimp, and 1/4 cup sugar in a large bowl. If it is very thick, add water 1/4 cup at a time until the brine is just thicker than a creamy salad dressing but no longer a sludge. 

3. Julienne the carrots and daikon and slice the green onions. Drain the cabbage. In a large bowl, combine the vegetables and the brine.

4. Transfer the kimchi to clean glass jars. Pack the kimchi down so that the vegetables are submerged in the red spicy brine (the goal here is to have the vegetables in an aqueous, oxygen-depleted environment that promotes fermentation of lactic acid bacteria and prevents the growth of other bacteria). You can leave the kimchi to ferment in a cool place for a day or refrigerate directly. Though the kimchi will be tasty after 24 hours, it will be better in a week and at its prime in 2 weeks. It will still be good for another couple weeks after that, though it will grow stronger and funkier.