Friday, May 31, 2013

Traveling Companion Bread


Last weekend we retreated to the coast to celebrate a couple of family birthdays and marvel at the vastness of the Pacific Ocean. While packing, our luggage, as always, became densely populated with co-traveling stuffed animals, because you never know when makka pakka or totoro will be needed (and in fact they came in handy as a Bludger and Snitch, respectively, in an impromptu game of Quidditch).


This trip, I sneaked in my own traveling companion of a batch of no knead bread dough, made with Lonesome Whistle Farm red fife and rye flour. The slowly fermenting culture rode along happily in a large tupperware container, basking in the faint warmth of sun breaks as we played in the marbled sand. 


When we arrived at Yachats in the late afternoon, I plopped my friend into a loaf pan to rest as we explored the cottage and discovered a newt in a backyard stream. By dinnertime, the fragrance of yeasty bread enveloped our cottage, and even though the loaf was a bit mangled by the sticky pan and dull bread knife, it tasted delicious. Replete with the virtues of patience, adaptability, and ultimately good taste, this dough makes the perfect traveling companion.


Traveling Companion Bread
1 cup rye flour
2 cups whole wheat flour (such as Lonesome Whistle Farm red fife flour)
1 1/2 tsp salt
1/4 tsp yeast
1 1/2 cups water
coarse corn meal for coating the dough

1. The evening before your trip, or early that morning, combine the flour, yeast and salt in a large bowl. Add 1 1/2 cups water and stir until blended (a dough whisk is handy for this). Dust a large tupperware container with corn meal, put the dough in, and seal loosely. Let the dough rest at least 12 hours, preferably about 18, and preferably at about 70 degrees, but don't worry too much about temperature fluctuations during your trip.

2. Hopefully when you arrive at your destination, your dough will have doubled in size and become speckled with bubbles. Check whether there is a 6- to 8-quart heavy covered pot (cast iron, enamel, Pyrex or ceramic) available for baking your bread according to Jim Lahey's method. Otherwise, locate a loaf pan or baking sheet.

Lightly flour a work surface and place the dough on it; sprinkle it with a little more flour and fold it over on itself once or twice. Place it in an oiled loaf pan, shape it into a loaf on a baking sheet, or form it into a ball on a floured cotton towel. Cover with another cotton towel and let rise again, ideally for about 2 hours, but it will still be delicious if given less time.

3. About an hour before dinner, start heating your oven to 450 degrees. If using, put your heavy pot in the oven to preheat. When the oven is hot, put your bread in to bake. If using a preheated pot, carefully slide your hand under the towel and turn the dough over into pot; it may look like a mess, but that is O.K. Shake the pan once or twice if the dough is unevenly distributed; it will straighten out as it bakes. Cover with a lid and bake 30 minutes, then remove the lid and bake another 15 to 30 minutes, until the loaf is beautifully browned. When you tap it with your fingernail it should sound hollow. Cool on a rack or devour immediately.

Sunday, May 26, 2013

Buckwheat Noodles with Fava Beans and Arugula


Major news alert: the fourth season of the Fairmount Neighborhood Farmers Market is scheduled to start on Sunday June 9th. The market will be held each Sunday during the summer from 10 AM to 2 PM at the Sun Automotive lot on the corner of Agate St. and 19th Ave. You can make the corner you one stop shopping for the week with a wide variety of fresh fruits and vegetables, as well as jams, sauces, and preserves from Sweetwater Farm, pastured meats from Fair Valley Farm, and baked goods from Eugene City Bakery. 


Despite the sometimes blustery weather we've been having, spring is really here, as evident by the increasing diversity of local produce available. Some of the earliest treats are gem-like fava beans that always seem so special to me that I feel compelled to pair them with homemade pasta. This year, I strayed from Italy toward Asia, inspired by a recipe for buckwheat pasta from The Greens Cookbook, which seemed like a perfect use for the last of my Lonesome Whistle Farm buckwheat flour. These homemade soba noodles were delicious tossed with plenty of peppery arugula and foraged fresh herbs (mint, fennel fronds, and chives) and served with baked salmon. Remember to mark your calendars for the June 9th and please spread the word by printing this poster and putting it up around the neighborhood.


Buckwheat Pasta with Fava Beans and Arugula
serves four

pasta
1 cup buckwheat flour
2 cups white flour
1/2 tsp salt
4 eggs
~1/4 cup water

toppings
1 lb fava bean pods (or as many as you can shell and peel)
2 large handfuls arugula 
plenty of fresh herbs, such as mint, fennel fronds, and chives
olive oil
zest and juice from one lemon
salt and fresh black pepper to taste

1. First prepare your pasta toppings. Remove the fava beans from the pods. If you are willing to do the extra work, blanch them for 1 minute in boiling water and then remove the inner green parts of the beans from the paler casing. Zest and then juice the lemon. Rinse and roughly chop the arugula and fresh herbs.

2. Set a large pot of salted water boiling on the stove for the pasta.

3. To make the pasta dough, combine the ingredients in a food processor and mix. The buckwheat flour absorbs liquid, so you will probably need to add a little water for the dough to just starts to come together in a ball. 

4. Pat the dough together into a log, cut into about 12 pieces, and pat flat. 

5. Use a hand crank pasta machine to roll out the dough, starting with the widest setting and narrowing it by increments of 2, ending on the second to last thinnest setting. Then cut the dough into fettucini.

6. Cook the pasta in rapidly boiling water until the noodles are just cooked but still have some bite, about 2 minutes. 

7. Drain the pasta and dump it into a large serving bowl. Pour over olive oil, lemon zest and juice, arugula and fresh herbs, and fava beans and toss well. Season with salt and pepper to taste. Enjoy.

Saturday, May 18, 2013

Kohlrabi Poriyal


Kohlrabi are not a common sighting at our markers or dinner tables, especially ones with full leafy plumage like these fine specimens from Sweet Water Farm, available for a couple of weeks through Eugene Local Foods. However, during childhood visits to my grandmother's home in Germany as a child, we often ate tender cubes of a root vegetable in cream sauce, a dish simply called "gemüse" (vegetable), that only years later I realized was kohlrabi. Today its distinctive taste still has a Proustian effect on me. 


Recently, a friend shared his favorite childhood recipe for kohlrabi, prepared in the style of a South Indian dry curry, or poriyal. Recreating it required a trip to Vishnu Indian Imports for urad dal (small lentils that are fried in hot oil with mustard seeds at the beginning) and vangibath powder (a spice mix with ground lentils and chilies that coats the cubed vegetables at the end). The final dish was delicious. And for a nose to tail approach to these unshorn kohlrabi, I cooked the leaves like cabbage in this Madhur Jaffrey recipe with fennel seeds, along with masooar dal and kale with paneer. Even in its South Indian guise, the kohlrabi tasted a little bit like childhood summers. 


Kohlrabi Poriyal

3-4 smallish kohlrabi (or use turnips, parsnips, potatoes or other hard vegetables)
2 Tbsp neutral oil (such as canola)
1 tsp urad dal
1 tsp black mustard seeds
pinch of asafoetida (optional)
1 1/2 tsp vangibath (vangi bhath) powder, MTR brand recommended 
1/2 tsp turmeric
salt to taste

1. Peel the kohlrabi generously with a paring knife to remove any woody bits, leaving just the smooth white interior. Cut into 3/8 inch cubes.

2. Heat a large, shallow frying pan over medium heat. Add the oil and when it is hot, add the urad dal. Cook the dal, stirring, until it is a toasted brown. Add the black mustard seeds and a pinch of asafoetida, if using, and cook for a few seconds until the seeds start to pop. Add the kohlrabi pieces and season with salt.

3. Saute the kohlrabi, stirring occasionally, until it is almost tender. When the kohlrabi is close to done, stir in the vangibath powder and turmeric. Cook for a couple more minutes until the kohlrabi is tender. Enjoy. 

Saturday, May 11, 2013

Rhubarb Cornmeal Scones


The lovely rhubarb in the markets these days had got me thinking about rhubarb scones, and Mother's Day seemed like a good occasion to make some. We still have plenty of corn flour from our Lonesome Whistle Farm CSA, so I decided to experiment with a rhubarb cornmeal scone, inspired from here and here.


The rhubarb got a dousing of sugar while I made a buttery dough in the food processor, and then mixed in the fruit at the end.


The dough was soft and a bit sticky on our unusually warm May day, but it didn't need much handling: just a gentle pat into two disks that I sliced into sixths and popped into the oven. The resulting corn-flavored scones, studded with tart rhubarb, were such a hit that I was barely able to save some for Sunday morning.  


Rhubarb Cornmeal Scones
makes 12
4 small rhubarb stalks, trimmed and cut into 1/4 inch slices (1 cup)
1/2 cup sugar (divided)
1/2 tsp vanilla extract
1 cup corn flour or fine corn meal (I used Lonesome Whistle Farm corn flour)
1 cup whole wheat white flour (I used Lonesome Whistle Farm Stephen's White)
1 tsp baking powder 
1/4 tsp baking soda
1/2 tsp salt
8 Tbsp (1 stick) butter, cut into 1/2 inch cubes
1/2 cup buttermilk

1. Preheat the oven to 375 degrees (unless you plan to freeze the scones and bake later). 

2. Rinse, trim, and cut the rhubarb into 1/4 inch slices (yielding 1 cup). Sprinkle over 1/4 cup sugar and the vanilla extract and stir.

3. In a food processor, combine the corn flour, wheat flour, 1/4 cup sugar, baking powder, baking soda, and salt. Add the cubed butter and pulse into pea-sized pieces. Transfer to a mixing bowl (you can also incorporate the butter into the flour by hand or using a pastry knife). Pour in the buttermilk and incorporate it into the dough. Add the sugared rhubarb and stir gently to incorporate.

4. Cover a baking sheet with a silicone mat or parchment paper. Transfer the dough onto a floured surface, such as a silicone mat, and divide into two. Gently form into two disks, about 1 1/2 inches tall, dusting with flour as necessary. If the dough seems too sticky to handle, chill it at this point for 15 minutes in the freezer or longer in the refrigerator. Cut each disk into 6 pie slice wedges. Transfer the wedges to the baking sheet. 
Note: You can freeze the scone wedges at this point and bake them later (add an extra 5 minutes to the baking time).

5. Bake at 375 degrees for about 25 minutes, rotating the pans 180 degrees half way through the baking. The scones are done when they are a golden all over the top. Cool before eating.

Saturday, May 4, 2013

Bok Choy and Pork Dumplings


After we had children, we had to scale back on certain culinary undertakings, such as staging elaborate dinner parties. But as our children have grown (our youngest just attended his kindergarden orientation on Friday), it's become clear that certain ambitious cooking tasks are easier with children. In our household, making fresh pasta is entirely accomplished through child labor, and even birthday cake baking has been delegated. Recently my sister-in-law pointed out that dumpling making is another such child-friendly task, if you invest in a dumpling press.


Dumpling making is not a task I would take on single handed, but armed with our new gadget, I cooked up a recipe of pork and cabbage filling from Fuchsia Dunlop's Land of Plenty, using tender baby bok choy from the Farmers Market, and let my sous chefs go to town.


The end results may not have been quite as pretty as expertly hand-pinched pot stickers, but they tasted delicious and our little assembly line was so productive that we had enough dumplings to freeze for a rainy day.  


Bok Choy and Pork Dumplings
adapted from Fuchsia Dunlop's Land of Plenty
makes 25-30 dumplings
1/4 pound tender leaves of baby bok choy or cabbage
3 Tbsp neutral oil such as canola
1/2 lb ground pork
2 tsp rice wine
1 tsp light soy sauce
1 tsp darl soy sauce
1/2 tsp salt
1 tsp sesame oil
6-8 turns of a black pepper mill

1 package of frozen thin dumpling wrappers
more neutral oil for frying

1. Start thawing the dumpling wrappers about 30 minutes before, or microwave them briefly on low power.

2. Blanch the vegetable leaves briefly in boiling water, and then refresh immediately in cold water. Chop finely and squeeze to get rid of any excess water.

3. Heat 3 Tbsp oil in a wok or skillet. Add the pork and stir-fry for a minute or two, adding the wine, soy sauce, and salt as you go, until cooked through. Tip the pork into a bowl, add the chopped leaves, sesame oil, and pepper, and mix well.

4. To assembly the dumplings, gather a large platter or baking sheet, a small bowl of water, your filling, and the dumpling wrappers covered with a moist towel. Spoon a teaspoon of filling into the center of a dumpling wrapper, use your finger to wet around the circumference, and seal the dumpling with a dumpling press or by pressing closed with your fingers. Place the completed dumplings on the platter.

5. Heat a larger skillet with a cover over medium heat. Add enough oil to coat the bottom generously. When the oil is hot, arrange the dumplings in the pan and cook until crisp and golden on one side (a minute or two). Then add 2 Tbsp water for every 10 dumplings in the pan, cover and steam for 2-3 minutes. Uncover and allow the water to evaporate away. Remove the dumplings to a serving platter and serve at once with a dipping sauce of soy sauce, black Chinese vinegar, and hot oil combined to your taste.

Note: freeze extra dumplings on a baking sheet and then transfer them to a zip lock bag. To cook, add the frozen dumplings to the pan as above, but increase the frying and steaming times by a couple of minutes.

Sunday, April 28, 2013

Yeasted Buckwheat Waffles with Rhubarb Compote


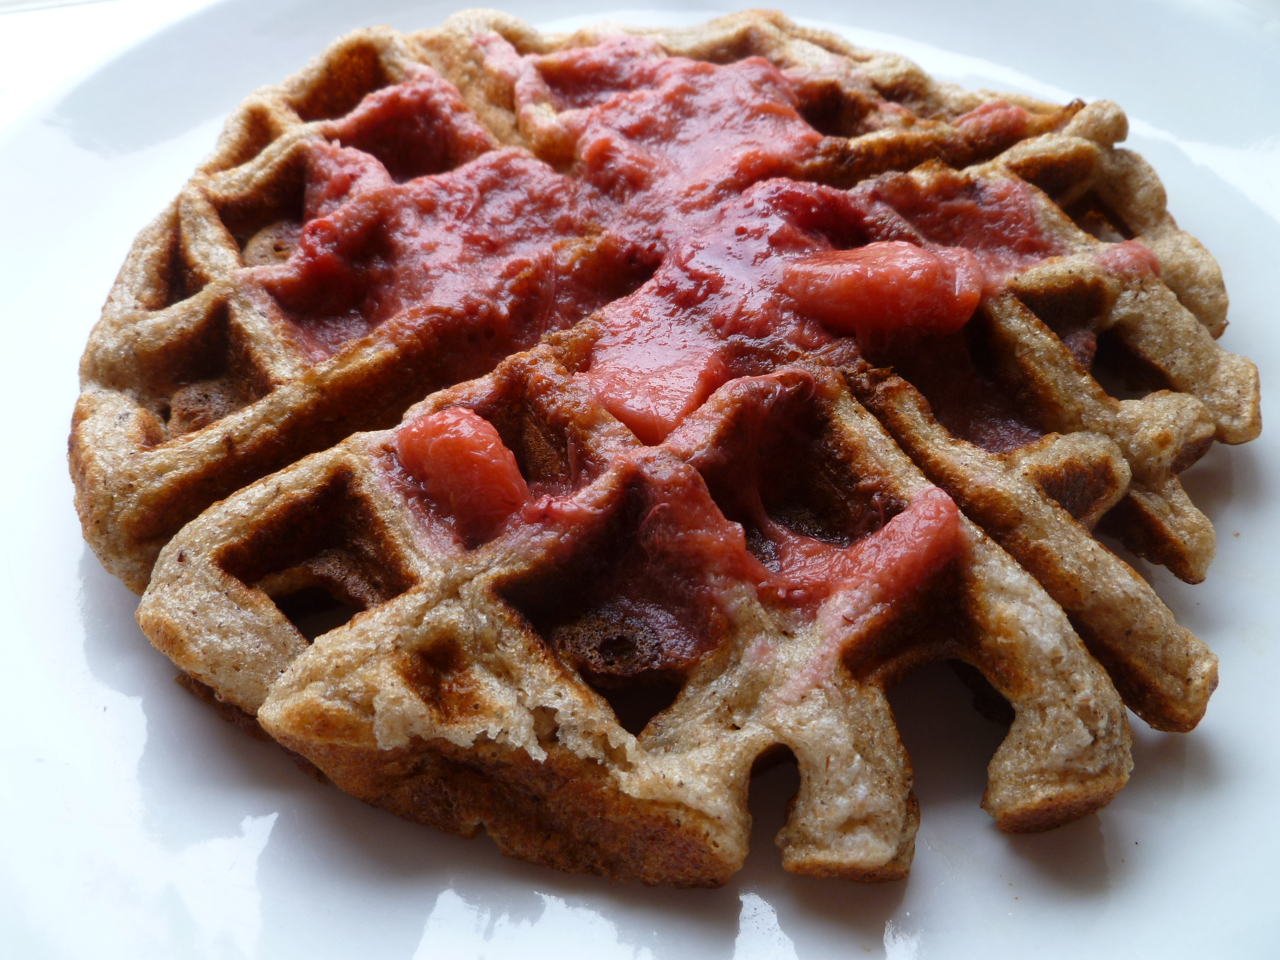
For my birthday this year, I received several wonderful cooking-related gifts, including Deborah Madison's new cookbook Vegetable Literacy. Not only is this book brimming with delicious recipes, but it's organized taxonomically, perfect for a biologist. This structure reveals some surprising kinships and ingredient affinities. I learned, for example, that sorrel, rhubarb, and buckwheat, are all members of the Polygonaceae or knotweed family. Suddenly a compote of new spring rhubarb and the end of last season's frozen strawberries seemed like the perfect topping for Madison's yeasted buckwheat waffles.


I'd never made yeasted waffles before because the timing seemed tricky for breakfast, but Madison's recipe recommends an overnight ferment, which produces a pillowy and flavorful base that is quickly finished while the waffle iron warms. The yeast's transformative power sweetens and lightens the whole grain batter, and the delicious yeasty smells that fill the kitchen while the waffles cook is itself worth the effort of a little mixing the night before. Also worth making ahead is a pot of rhubarb and strawberry compote. Draping this assertive pseudo fruit over its smoky pseudo grain cousin turns out to be a match of botanical and culinary harmony.


Yeasted Buckwheat Waffles
from Deborah Madison's Vegetable Literacy
(best started the night before)

1 package (2 1/4 tsp) active dry yeast
1/4 cup warm water
2 cups milk, just warmed (or use buttermilk)
1/2 tsp sea salt
1 1/2 cup white whole wheat pastry or spelt flour (I used Lonesome Whistle's red fife)
1 cup buckwheat flour (I used Lonesome Whistle's buckwheat)
2 Tbsp honey
5 Tbsp butter, melted, or sunflower seed oil
2 eggs, beaten
1/2 tsp baking soda

1. If proofing overnight, combine the yeast and warm water and let sit for 10 minutes. Put the milk and salt in a large bowl, add the yeast, then whisk in the flours. Cover and refrigerate overnight if the weather is warm, or leave out on the counter if it is cool. The next morning, stir in the honey, butter, eggs, and baking soda.

If proofing for two hours, combine all the ingredients in a large bowl, mixing well. Cover the bowl and leave in a warm spot for two hours. 

2. When ready to cook, give the batter a stir. Heat the waffle iron. When the iron is ready, spoon the batter onto the grid and close the lid. When the waffle is done remove it from the iron with a fork and serve right away with rhubarb strawberry compote (recipe below) and maple syrup.

Leftover batter will keep for several days in the refrigerator. This batter can also be used to make buckwheat blini.

Rhubarb Strawberry Compote
(can prepare the night before)
4 slender or 2 large stalks rhubarb
1/2 cup frozen strawberries
1/4 cup sugar, or to taste
1/4 cup water

Rinse and trim the rhubarb and chop into 1 inch pieces. Combine all the ingredients in a small saucepan over medium heat and simmer for about 30 minutes, stirring occasionally, until the fruit has cooked down to a soft consistency. Taste and add more sugar if desired. If made ahead, rewarm before serving.

Saturday, April 20, 2013

Elkdream Bars


Last week my daughter and I needed to come up with a snack for her girl scout troop meeting. It had to be healthy, transportable, peanut and nut-free, and fun. I knew just the thing: Elkdream bars from Elin England's forthcoming book "Beans, Grains, Nuts and Seeds: Further Adventures in Eating Close to Home", a sequel to "Eating Close to Home: A Guide to Local Seasonal Sustenance in the Pacific Northwest", which I described here. 


The best thing about these bars is that they are extremely accommodating. We omitted the hazelnuts and used sunflower butter to make them nut free, we didn't have pumpkin or sunflower seeds on hand, so we increased the sesame seeds and flax seeds, and added some chia seeds for good measure (on hand for favorite sauce, porridge, and pancakes), we'd run out of honey, so we used maple syrup, and we added some chopped apricots along with the cranberries. The end result after all this tampering was so delicious that it was completely devoured by the troop. This weekend I'll make another batch to pack for school snacks. After all the harrowing news from Boston this past week, from which I've assiduously shielded my children despite anxious phone calls with their grandparents in lockdown, because how can one begin to explain such senseless destruction, it is somehow comforting to laden their lunch boxes with homemade treats when sending them out into the world. 


Elkdream Bars
from Elin England's forthcoming book 
"Beans, Grains, Nuts and Seeds: Further Adventures Eating Close to Home"

In a large mixing bowl, stir together:

2 1/2 cups rolled oats (not quick-cook oats)
1/2 cup pumpkin seeds
1/4 cup flax seeds
1/4 cup sesame seeds
1/2 cup sunflower seeds
1/2 cup chopped hazelnuts

Spread on a rimmed cookie sheet and toast at 325 degrees for 15 minutes. Pour back into the bowl. Leave the oven on, as you'll use it again in a few minutes.

Meanwhile, combine in a small saucepan:

1/2 tsp ground ginger, or substitute cinnamon or cardamom (optional)
1 tsp vanilla extract
1/2 cup honey
1/4 cup peanut butter, or substitute sunflower butter, almond butter, or hazelnut butter
1/4 cup brown sugar
2 to 3 Tbsp butter

Heat over medium-low heat, stirring until dissolved, then remove from the heat (so it doesn't burn). This is the glue that holds the bars together.

Pour the glue mixture over the oat/nut mix and add:

1 cup dried cranberries (or your choice of chopped, dried fruit)

Mix the oat/nut mix, the glue, and the dried fruit together very well.

Line a 9x12 baking pan with parchment paper (you can oil the pan to help the parchment stick down). Cut the paper long enough that it comes up all 4 sides of the pan (you can pleat the corners). Plop the mixture into the pan and press down HARD all over. A good way to do this is to spread a piece of waxed paper over the top and press down with your hands.

Bake for 15 minutes at 325 degrees. Let cool COMPLETELY (this part is really important). Lift the whole arrangement out of the pan onto a cutting board, using the overhanging parchment paper as a handle. Cut whatever sized bars you like, and store in an air tight container, using waxed paper to separate layers. Save any crumbs that accumulate to sprinkle over yogurt. 

Saturday, April 13, 2013

Peanut Sauce Noodles with Kale Rabe


The Lane County Farmers Market is now in full swing. Today I found the tenderest baby radishes and carrots and this vibrant green kale rabe. The name is inspired by broccoli rabe, but really just refers to bolting kale. One of my husband's specialties is peanut sauce noodles, which we usually serve with broccoli rabe and crunchy cucumber sticks. For this evening's version we used blanched kale rabe (cooked in a separate pot from the noodles to accommodate picky eaters) with spring radishes and carrots for crunch. A delicious spring meal.


Peanut Sauce Noodles
(serves four)

for the sauce
1 inch ginger
1 shallot
2 garlic cloves
2 Tbsp canola oil
drizzle of hot chili oil
1/4 cup peanut butter (preferably from ground peanuts)
1/4 cup tahini
1 Tbsp sugar
1 Tbsp Chinese black vinegar
2 Tbsp rice wine
2 tsp soy sauce
~1 cup water to thin the sauce
a drizzle of sesame oil
Sichuan pepper corns, freshly ground

1 package udon noodles
1 bunch broccoli rabe or kale rabe

for garnish
cilantro
bean sprouts
lime wedges
cucumber sticks
other crunchy vegetables such as radishes or carrots
peanuts
Sriracha sauce

1. Set a pot of salted water to boil for the noodles. If cooking separately, also set a pot of salted water to boil for the greens. Rinse the greens, trim off the thickest part of the stems and cut the rest of the stems into 1 inch sticks and rough chop the leaves.

2. Peel and finely mince the ginger, shallots, and garlic. You can do this quickly in a mini food processor. Heat a large skillet over medium heat. Add the canola oil and chili oil and saute the minced aromatics until soft. Add the peanut butter and tahini, sugar, black vinegar, rice wine, and soy sauce. Mix and simmer over medium low heat, stirring occasionally, for about 15 minutes. Add water as needed to thin to the desired consistency. Taste and add more soy, sugar, or vinegar as needed. When the sauce is ready, add a drizzle of sesame oil and freshly ground Sichuan pepper corns to taste, and remove from heat. 

3. When the water is boiling, add the noodles and cook according to the package directions. You can add the greens to the pot when there are five minutes remaining for the noodles. Or blanch the greens in a separate pot for about five minutes. 

4. Toss the cooked noodles (and greens if combining) with the peanut sauce. Serve the noodles with all the garnishes for people to add to their plates as they like.

Tuesday, April 9, 2013

Arikara Beans with Greens, Egg, and Ham


I realize that there's been a steady egg theme here recently, but I wanted to share this delicious amalgam of greens and beans with eggs I made recently with the-all important ingredient of a ham hock from Fair Valley Farm. Dr. Seuss was on to something pairing green eggs and ham. And although this dish may seem as elaborate as a fox in a box in a car in a tree, it actually came together in several easy steps. One afternoon I simmered the beans and ham hock in a slow cooker. That evening I let the kids shuck the tomatillos, which I halved and seared to make Rick Bayless' pan-roasted tomatillo salasa. The next day, I shredded the ham into the bean pot, sauteed greens in a big pan and then warmed the beans with the greens (reserving some for green-averse children). Then it was just a matter of heating the griddle for toasting tortillas with a sprinkle of cheese and a fried egg on top. Say, I like these huevos verdes y jamón. 


Arikara Beans with Greens, Egg, and Ham
Beans
2 cups Arikara beans (heirloom variety from Lonesome Whistle), or substitute navy beans
1 ham hock
~5 cups water

Pick over the beans to remove any pebbles. Rinse, and if you have time, soak for several hours to overnight. Drain, and combine the beans, ham hock, and water in a slow cooker or a large pot. Cook on high in the slow cooker for about 4 hours or on a low simmer on the stovetop for about 3 hours until the beans are soft. Remove the ham hock, shred the ham from the bone, and add this back to the pot. 

Greens
Bunch of greens such as chard
2 garlic cloves
2 Tbsp canola oil
salt to taste

Rinse and chop the greens. Mince the garlic. Heat a large skillet over medium heat, add the oil and saute the garlic until soft but not browned. Add the greens and saute until partially wilted. Use a slotted spoon to transfer the beans with shredded ham to the pan with the greens (use as many beans to achieve your desired beans to greens ratio. Reserve the bean liquid for soup stock). Warm the beans through.

Smoky Chipotle Salsa with Pan-Roasted Tomatillos 
from Rick Bayless' Mexican Everyday

1 pound tomatillos
3 garlic cloves, peeled
1 Tbsp canola oil
1 chipotle chili in adobe sauce
salt to taste

Remove the husks from the tomatillos, rinse and halve. Heat a large skillet, add a thin layer of canola oil, and place the tomatillos cut side down along with the garlic cloves. Cook until the tomatillos are charred, then flip and cook a few more minutes until they are soft throughout. Cook the garlic cloves until they are soft and slightly charred. Scoop everything into a blender jar and add a chipotle pepper and generous pinch of salt. Blend into a smooth salsa.

Eggs on Tortillas
tortillas
eggs

salt and pepper
grated cheddar cheese
beans with greens (recipe above)
Tamatillo salsa (recipe above)

Heat a griddle. Place on two tortillas, cook until lightly toasted, flip and turn the heat to low. Sprinkle a handful of grated cheese on each tortilla, making an indentation in the center to trap the egg. Crack an egg into each cheese nest. Sprinkle with salt and pepper. Cook for a couple of minutes until the white starts to harden and the cheese melts. Flip each tortilla and cook on the second side until the yoke just starts to set. Serve the tortilla and eggs with the beans and greens and a generous drizzle of tomatillo  salsa. Enjoy.

Tuesday, April 2, 2013

Sundry Uses for Easter Eggs


Here are the Easter eggs we colored with natural dyes. I think my favorites are the sauerkraut speckled ones on the right, but I also like the beet and turmeric one in front with flower petal patterns. If you are looking for inspiration for using up hard boiled eggs,


try a salad with these lentils on sauteed greens with ham,


or use them as garnish for this Moroccan beef and chickpea stew,


or enjoy a perfect egg salad sandwich with arugula and a sprinkle of dukkah, a nutty Egyptian spice mix. 


Egg Salad Sandwich
makes 2 modest or 1 heaping sandwich

2 hardboiled eggs
1 Tbsp mayonnaise
1 tsp dijon mustard
salt and pepper to taste
pinch of dukkah
good sandwich bread, lightly toasted
arugula leaves

In a wide bowl, combine the mayonnaise and mustard. Peel the eggs, season with salt and pepper, and mash them into the mayonnaise mixture with an potato masher or fork, until there are just small pieces of egg white. Spread the egg salad on a toasted piece of bread, top with a generous sprinkle of dukkah, plenty of arugula leaves, and a second piece of toasted bread, and enjoy.

Note about dukkah: I was inspired to try it on egg salad by this recipe from AntoniaJames of food52. She provides a recipe for dukkah, as does Heide Swanson of 101 Cookbooks. I picked some up at Trader Joe's, but I think I'll try making some of my own next with less fennel.

Saturday, March 30, 2013

Sundry Uses for Homemade Sauerkraut


After attending the standing room only sauerkraut class by John Karlik from Sweetwater Farm, packed with eager hipsters taking copious notes, I recently tried my hand at sauerkraut making. At his demonstration, John had an impressive handmade mandolin about the size of a fruit crate that easily shredded a dozen cabbages in a matter of minutes, which got pounded down in a large tub by a couple of enthusiastic aughts using a large wooden paddle resembling a cricket bat. I started smaller scale with a single head of cabbage, a kitchen knife, and a five year old wielding a meat tenderizer. It worked.


After about twenty-four hours, the pounded, salted cabbage released enough of its own liquid to become submerged underneath the weight of a clean plate and gallon bag of water, allowing the inoculum of cabbage-associated Lactobacilli bacteria to flourish in the salty, oxygen-depleted brine and get busy fermenting. The recipe I followed from Karlik is essentially the same as this detailed one from Sandor Katz. The one difference is that rather than checking on it every couple of days, I left my crock rather neglected in the basement for about six weeks. When I finally remembered to take a peek, it had developed a skim of mold (Karlik had explained that he has a dedicated shop-vac for this), but once that was scraped off, the underlying kraut was delicious. One large cabbage produced two quarts. 


"What are those hipsters going to do with all that sauerkraut?" my sister wondered after I told her about Karlik's demo. I can highly recommend Karlik's vegetarian reuben sandwich with kraut piled on melted cheese and a generous slather of mustard. A less conventional use presented itself when it occurred to me that red cabbage sauerkraut is packed with pigments and lightly acidified: perfect for dying Easter eggs. 


Vegetarian Reuben with Homemade Sauerkraut
2 slices of sandwich bread 
several slices of sharp cheddar or swiss cheese 
homemade sauerkraut (follow this recipe from Sandor Katz)
dijon mustard

In a toaster oven or skillet, toast the bread lightly. Then layer on the cheese on one slice and continue toasting until the cheese is melted. Slather mustard on the other slice, heap on some sauerkraut, slap the two slices together, and enjoy.


Dyeing Easter eggs
For a lovely mottled blue pattern, submerge hard boiled white eggs in some red cabbage sauerkraut and wait a couple of hours. For a more even blue color, decant some sauerkraut juice into a small bowl and submerge your eggs in this. If you don't have red sauerkraut on hand, you can boil some red cabbage leaves in water and put in a splash of vinegar. Other natural dyes can be made with turmeric (yellow) and beets (pink).