Showing posts with label greens. Show all posts

Friday, June 29, 2018

Chicken with Cardamom Rice and Blistered Purple Beans


This Sunday at the Fairmount Neighborhood Farmers Market you'll find plenty of summer produce from Camas Swale Farm as well as pastured meats and eggs from Fair Valley Farm and Fog Hollow Farm.


Fog Hollow offers chicken parts, which is convenient if you don't have the time to break down a whole bird. I was happy to pick up a pack of legs to try out a chicken and rice dish that I've long been eyeing from the cookbook Jerusalem by Yotam Ottolenghi and Sami Tamimi. I had always stalled at the second ingredient of barberries, however, which seemed unattainable until I happened to run across them at Sunrise Market. The dish was well worth the wait, especially with Fog Hollow's fresh chicken legs. The rice is enhanced with plenty of caramelized onions, similar to a family favorite, mujaddara, and the barberries add tart bursts of flavor.


To accompany the chicken and rice, I'd picked up some beautiful purple beans. Because I wanted to preserve some of their deep color, with fades with cooking, I decided to blister them quickly in a hot griddle pan. And because I think beans go well with mustard, and mustard reminded me of other brassica family members, and I had a bunch of turnips with fresh leaves, I made a bright green garnish of blanched and chopped turnip greens in a mustard vinaigrette. It was another Farmers Market summer feast. 


Chicken with Caramelized Onion and Cardamom Rice
from Jerusalem A Cookbook by Yotam Ottolenghi and Sami Tamimi

3  tablespoons sugar (40 grams)
2 ½  tablespoons barberries, or use currants (25 grams)
4  tablespoons olive oil
2  medium onions, thinly sliced (2 cups, or 250 grams)
2 ¼  pounds skin-on, bone-in chicken thighs (1 kilogram), or 1 whole chicken, quartered
 Salt and freshly ground black pepper
10  cardamom pods
 Rounded 1/4 teaspoon whole cloves
2  long cinnamon sticks, broken in two
1 ⅔  cups basmati rice (300 grams)
2 ¼  cups boiling water (550 milliliters)
1 ½  tablespoons flat-leaf parsley leaves (5 grams), chopped
½  cup dill leaves (5 grams), chopped
¼  cup cilantro leaves (5 grams), chopped

⅓  cup Greek yogurt (100 grams), mixed with 2 tablespoons olive oil (optional)

1. Put the sugar and scant 3 tablespoons water in a small saucepan and heat until the sugar dissolves. Remove from the heat, add the barberries, and set aside to soak. If using currants, you do not need to soak them in this way.

2. Meanwhile, heat half the olive oil in a large sauté pan for which you have a lid over medium heat. Add the onion, and cook for 10 to 15 minutes, stirring occasionally, until the onion has turned a deep golden brown. Transfer the onion to a small bowl and wipe the pan clean.

3. Place the chicken in a large mixing bowl and season with 1½ teaspoons each salt and black pepper. Add the remaining olive oil, cardamom, cloves and cinnamon and use your hands to mix everything together well. Heat the frying pan again and place the chicken and spices in it. Sear chicken for 5 minutes on each side and remove from the pan (this is important as it part-cooks the chicken). The spices can stay in the pan, but don’t worry if they stick to the chicken. Remove most of the remaining oil as well, leaving just a thin film at the bottom. Add the rice, caramelized onion, 1 teaspoon salt and plenty of black pepper. Drain the barberries and add them as well. Stir well and return the seared chicken to the pan, pushing it into the rice.

4. Pour the boiling water over the rice and chicken, cover the pan, and cook over very low heat for 30 minutes. Take the pan off the heat, remove the lid, quickly place a clean tea towel over the pan, and seal again with the lid. Leave the dish undisturbed for another 10 minutes. Finally, add the herbs and use a fork to stir them in and fluff up the rice. Taste and add more salt and pepper if needed. Serve hot or warm with yogurt mixture if you like.

Blistered Purple Beans with Mustardy Turnip Greens
blistered purple beans
4 handfuls of purple beans
1 Tbsp olive oil
salt

Wash and trim the beans. Toss the beans in a bowl with olive oil and a generous pinch of salt. Heat a grill pan or skillet over high heat. When the pan is very hot, put on the beans. Allow them to blister, flipping occasionally, for about 4 minutes until they start to lose some of their purple color but are still quite crunch. Remove to a serving plate.

turnip greens with mustard vinaigrette
1 bunch turnip greens
1 tsp mustard
1/2 tsp honey
2 Tbsp sherry vinegar

Set a medium pot of well salted water to boil. Wash the turnip greens and trim off the bare stems. In a medium bowl, whisk together the mustard, honey, and sherry vinegar. When the water is boiling, throw in the turnip greens and blanch for 45 seconds. Drain and run under cold water to stop them from cooking. Squeeze out the water and chop the leaves into 1/2 inch slices. Toss in the vinaigrette. Taste and add more salt, honey, or vinegar as needed.  Serve along side the blistered beans.

Saturday, June 16, 2018

Radish Leaf Chimichurri Sauce


Make this Sunday a special Fathers Day with a trip to the Fairmount Neighborhood Farmers Market. You'll find all the fixings for a Fathers Day feast including pastured meats and eggs from Fair Valley Farm and Fog Hollow Farm, cut flowers from Tiger Lily Art Company, and fresh produce from Camas Swale Farm.


With Camas Swale's produce fresh from the fields, you can use all parts of the vegetables. Last week I used this gorgeous rosy radishes for some quick pickles as a side for white bean and carnitas tacos (here's a carnitas recipe for slow cooking in the oven and a faster one for a pressure cooker).


The greens from the radish bunch were so fresh that I decided to make them into a quick chimichurri sauce, incorporating some seared Camas Swale green onions. The sharp radish greens, charred onions, and kick of red wine vinegar were a perfect pairing for the mild white beans and crispy pork. Try some out on a dad tomorrow.


Radish Leaf Chimichurri
greens from 1 bunch radishes
6 green onions
1 Tbsp olive oil
1 pinch salt
red pepper flakes to taste
1 Tbsp vinegar

1. Rinse leaves from 1 bunch radish and reserve. Rinse the green onions, trim off the root ends, and cut the whites from the greens. Cut the whites into 1/4 inch rings. Separately cut the greens into 1/2 inch rings. 

2. Heat a cast iron skillet over high heat. When the skillet is very hot, add 1 Tbsp olive oil, swirl to coat, and then add the white onion pieces, a pinch of salt, and red pepper flakes to taste, and let them sear for a few minutes, shaking the pan occasionally. When some of the onions are charred, add the green onion pieces and sear for one more minute. 

3. Transfer the seared green onions to a bowl. Stir in one tablespoon of red wine vinegar. Chop the radish leaves finely and stir into bowl. Taste and add more salt, pepper or vinegar as desired. Serve with meat such as carnitas. 

Thursday, May 7, 2015

Kohlrabi Green Tart with Polenta Crust


A recent Good Food Easy CSA installment came with a hefty stack of kohlrabi leaves, an ingredient uncommon enough to render the internet at rather a loss for recipe recommendations. I decided to treat them like greens, but respect their cabbage-ness by pairing them with sweet cooked onions (like this favorite cabbage dish), and to nestle the whole mixture into a tart.


And because we have plenty of polenta from our Lonesome Whistle Farm CSA, I decided to make a polenta crust from this recipe from Maria Speck's Ancient Grains for Modern Meals. The tart crust is basically cooked polenta, with some grated parmesan cheese and an egg for extra integrity. The recipe calls for cooking the polenta in broth, so I made a quick broth with some leek greens and the kohlrabi leaf stems, but I think water would be fine as well. 


I made a couple of mini tarts for the kohlrabi leaf doubters in the house, one of whom opted for a parsley pesto topping while the other went with a take on the classic tomato and cheese pizza. For the rest of us, the kohlrabi green tart was a big hit, and I'm certain I will be making variants with other greens throughout the spring.


Kohlrabi Green Tart with Polenta Crust
Make one 10-inch tart

Crust from 
Maria Speck's Artichoke Tart with Polenta Crust
1 1/2 cups low-sodium vegetable broth
1 1/4 cups water
1/2 teaspoon sea salt
1 1/4 cups polenta
1/2 cup (about 2.5 ounces) grated Parmesan cheese 
1 large egg, room temperature
1/4 teaspoon freshly ground black pepper

1. Bring the broth and water to a boil in a heavy-bottomed saucepan over medium-high heat. Add the salt. Slowly add the polenta in a thin stream, whisking constantly, and continue whisking for 30 seconds. Decrease the heat to low and cover. Cook for 10 minutes, stirring with a wooden spoon every few minutes to keep the polenta from sticking to the bottom of the pot. Remove the saucepan from the heat and let sit, covered, for 10 minutes, stirring a few times. Stir in the cheese, egg and pepper.

2. Grease a 10-inch tart pan or cake pan with olive oil. Have a glass of cold water ready. Spoon the polenta into the pan and press it out, pushing it up the sides. Dip a wooden spoon or your hands in the cold water to help the polenta along. Set aside for 15 minutes while you preheat the oven to 375 F. Then form an even rim about 3/4 of an inch thick with moist fingers, pressing firmly. Don't worry if the crust looks rustic.

3. Prebake the crust for 20 minutes until it has started to brown on the edges. Meanwhile, prepare the filling


Kohlrabi green filling

6-8 kohlrabi leaves (or substitute collard greens or chard)
1 medium onion
2 tablespoons olive oil
1 cup ricotta (or use Greek yogurt like Maria Speck's original recipe)
2 large eggs
1/2 cup shredded swiss cheese
salt to taste and plenty of freshly ground pepper

1. Cut the center rib from each kohlrabi leaf and cut the leaves into 1 inch ribbons. Peel and dice the onion. Heat a large skillet over medium low heat, then heat the oil and sauté the onions with a pinch of salt, until they are very soft and glassy, about 10 minutes. Add the kohlrabi greens and sauté with another pinch of salt for about 5 minutes until they have turned a darker green and started to soften. Remove from heat.

1. In a large bowl, whisk together the ricotta, eggs, a good pinch of salt and pepper until well-combined. Fold in the sautéed greens. Pour the filling into the prepared polenta tart and spread evenly. Sprinkle with the swiss cheese.


2. Bake the tart until the top turns golden brown and the filling is set, about 40 minutes. Transfer the pan to a wire rack and let cool for at least 20 minutes. The tart can be prepared up to one day ahead.

Saturday, March 21, 2015

One Egg Omelette with Radish Microgreens


The official first day of spring has arrived after many spring-like winter days. Among our spring treats in our Good Food Easy CSA, we've been enjoying their various microgreens.  I've found that these delicate bites of spring are especially tasty in micro-omelettes: a single beaten egg cooked like a crepe, with some sharp cheese to complement the slightly spicy greens.


These make a perfect weekend lunch, individualized to each person's taste. I like to eat mine on a toasted, buttered multigrain bagel, with a dollop of harissa.


One Egg Omelette with Radish Microgreens

1 egg
1 pad butter
salt and pepper
1 slice sharp cheese
1 handful radish microgreens

1. Beat the egg and season with salt and pepper. 

2. Heat a 9 inch crepe pan or cast iron skillet over medium low heat. Put in a pad of butter and let it melt. Off the heat, pour in the beaten egg and tip the pan around so that the egg coats the bottom of the pan. Return the pan to a low heat and cover the egg "crepe" with cheese pieces. Allow the cheese to melt for a minute. Then place the radish greens in the center of the pan and fold over the edges of the omelette to make a square.

3. Serve the omelette immediately. It's very tasty sandwiched between the halves of a toasted, buttered bagel with a dollop of harissa. 

Tuesday, April 9, 2013

Arikara Beans with Greens, Egg, and Ham


I realize that there's been a steady egg theme here recently, but I wanted to share this delicious amalgam of greens and beans with eggs I made recently with the-all important ingredient of a ham hock from Fair Valley Farm. Dr. Seuss was on to something pairing green eggs and ham. And although this dish may seem as elaborate as a fox in a box in a car in a tree, it actually came together in several easy steps. One afternoon I simmered the beans and ham hock in a slow cooker. That evening I let the kids shuck the tomatillos, which I halved and seared to make Rick Bayless' pan-roasted tomatillo salasa. The next day, I shredded the ham into the bean pot, sauteed greens in a big pan and then warmed the beans with the greens (reserving some for green-averse children). Then it was just a matter of heating the griddle for toasting tortillas with a sprinkle of cheese and a fried egg on top. Say, I like these huevos verdes y jamón. 


Arikara Beans with Greens, Egg, and Ham
Beans
2 cups Arikara beans (heirloom variety from Lonesome Whistle), or substitute navy beans
1 ham hock
~5 cups water

Pick over the beans to remove any pebbles. Rinse, and if you have time, soak for several hours to overnight. Drain, and combine the beans, ham hock, and water in a slow cooker or a large pot. Cook on high in the slow cooker for about 4 hours or on a low simmer on the stovetop for about 3 hours until the beans are soft. Remove the ham hock, shred the ham from the bone, and add this back to the pot. 

Greens
Bunch of greens such as chard
2 garlic cloves
2 Tbsp canola oil
salt to taste

Rinse and chop the greens. Mince the garlic. Heat a large skillet over medium heat, add the oil and saute the garlic until soft but not browned. Add the greens and saute until partially wilted. Use a slotted spoon to transfer the beans with shredded ham to the pan with the greens (use as many beans to achieve your desired beans to greens ratio. Reserve the bean liquid for soup stock). Warm the beans through.

Smoky Chipotle Salsa with Pan-Roasted Tomatillos 
from Rick Bayless' Mexican Everyday

1 pound tomatillos
3 garlic cloves, peeled
1 Tbsp canola oil
1 chipotle chili in adobe sauce
salt to taste

Remove the husks from the tomatillos, rinse and halve. Heat a large skillet, add a thin layer of canola oil, and place the tomatillos cut side down along with the garlic cloves. Cook until the tomatillos are charred, then flip and cook a few more minutes until they are soft throughout. Cook the garlic cloves until they are soft and slightly charred. Scoop everything into a blender jar and add a chipotle pepper and generous pinch of salt. Blend into a smooth salsa.

Eggs on Tortillas
tortillas
eggs

salt and pepper
grated cheddar cheese
beans with greens (recipe above)
Tamatillo salsa (recipe above)

Heat a griddle. Place on two tortillas, cook until lightly toasted, flip and turn the heat to low. Sprinkle a handful of grated cheese on each tortilla, making an indentation in the center to trap the egg. Crack an egg into each cheese nest. Sprinkle with salt and pepper. Cook for a couple of minutes until the white starts to harden and the cheese melts. Flip each tortilla and cook on the second side until the yoke just starts to set. Serve the tortilla and eggs with the beans and greens and a generous drizzle of tomatillo  salsa. Enjoy.

Sunday, January 20, 2013

Soft Tofu Hotpot (Soondubu Jjigae)


Our latest favorite use for homemade kimchi is in Korean stews cooked with soft tofu. Here is my husband's guest post about this winter treat.


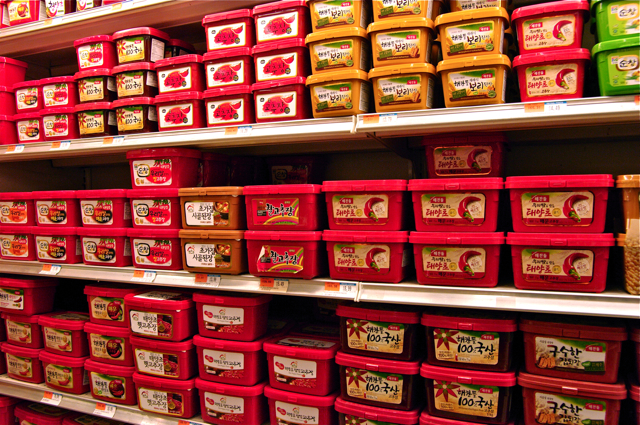
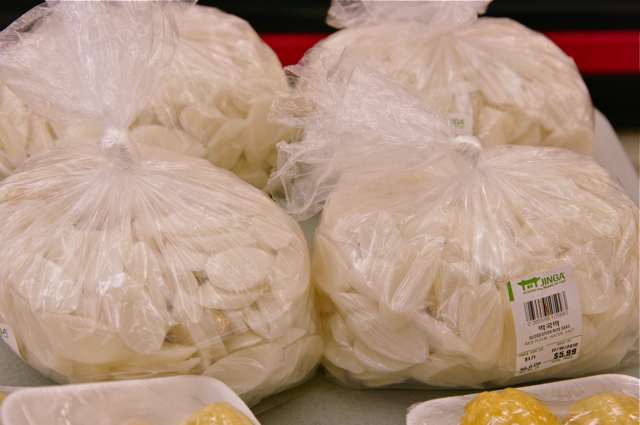
In the winter a young man's fancy lightly turns to thoughts of soondubu jjigae, or Korean soft tofu hotpot. This easy dish is perfect for cold evenings, and the combination of a broth overloaded with richness and custard-soft tofu gives a great framework for adding whatever is handy around the kitchen. It does take a few specialty items and ingredients, but it is well worth a trip to an Asian grocery to pick them up. The first is the hotpot, a stone pot coated in enamel. In Eugene, Sunrise market carries these in the back corner. Other specialty items (also available at Sunrise) are soon tofu, which is even softer than soft or silken tofu, and Korean chili paste, Gochujang (this comes in a tub or as a sweeter condiment in a ketchup-style bottle, get the tub).


Soft Tofu Hotpot (Soondubu Jjigae)
serves two (split ingredients between two hot pots)
1 tablespoon vegetable oil
1/3 lb top sirloin, sliced thin against the grain (or try a seafood version, adding clams and mussels to the broth)
3 garlic cloves, minced
3 green onions, sliced into rounds.
1 tablespoon fish sauce
1/2 tablespoon soy sauce
2 tablespoons Gochujang
vegetables -- beet greens, kale, carrot, zucchini, whatever.
1/2 cup sliced rice cake (optional)
2 cups good stock (I used homemade chicken stock)
1/4 cup diced shiitake mushrooms
4 tablespoons kimchi
1 small package soon tofu

for serving
dried kelp
2 eggs
cooked white rice

1. Set the hot pots directly on the stove top and heat with a medium low heat. Then set some rice cooking, so it will be ready along with everything else. Next, slice the sirloin, mince the garlic and cut the green onion. Then prep the vegetables (slicing carrots or washing greens). 

2. Turn the heat up to medium, and add the oil to the hot pots. Add the sliced sirloin, letting it sear a bit on one side (around a minute). Give the meat a stir, then add the minced garlic and the white part of the chopped green onion. Stir for another minute. Add the fish sauce, soy sauce and Gochujang. Stir a bit, then add the stock, fresh vegetables that need more cooking time, such as carrots, shiitake mushrooms, and rice cakes, if using. At this point I turn the heat up a bit more, to get the broth boiling. As it all heats up, add the kimchi. After heating for several minutes, the soon tofu can be gently spooned into the broth, taking care not to break it up. You can add other things as well, such as greens and zucchini. Don't overfill the hot pot though, or else you may end up severely burned transporting it to the table!

3. Get the table ready, bringing out the rice, kelp sheets, green onion greens, and an egg for each person. Also put out a heat-resistant pad for each hot pot! At this point, the hot pot should be at a good simmer, so put on oven mitts and carefully carry each hot pot out to the table. As soon as it is served, each diner should crack an egg into the hotpot and immediately break the egg yolk with a fork, giving it a good stir so the egg dissipates into the broth. Tear in some kelp, sprinkle on green onion, and then add rice as you eat, which slowly thickens the broth over time. The richness of the broth comes from the seared beef, fish sauce, mushroom, stock, kelp and stirred-in egg, all of which add to the incredible umami flavor. The hot pot keeps the contents searingly hot until the end, and the Gochujang gives a spiciness that adds to the overall warming sensation.

Friday, April 27, 2012

Beet Green Gomae


Recently my husband and I indulged in a rare adults only evening out. We enjoyed the neighborhood tavern feel of Izakaya Meiji, where we sampled an addictively delicious spinach gomae, a dish of steamed spinach with a salty and sweet sesame sauce. I wanted to try making this at home and attempted to puree toasted white sesame seeds in a mini food processor, but was thwarted when they stealthily slipped beneath the blade and remained defiantly intact. The resulting dish was light and refreshing, speckled with toasted sesame seeds, but it didn't capture the rich nuttiness I was trying to recreate.


For my next attempt, I procured some roasted black sesame seeds from Sunrise Asian Food Market. This time I took the seed grinding into my own hands and smashed them in a molcajete, which produced a satisfying paste. The only problem was that in my excitement about the black sesame seeds (an 8 ounce jar for under five dollars!), I had forgot to pick up any spinach.


Luckily, this gardening assistant was helping pull up overwintered beets, which provided an abundance of fresh beet greens for me. I blanched them, like spinach leaves, in boiling water and then quickly transferred them to an ice water bath to halt the cooking process. 


After squeezing out the water and chopping them, I tossed them in the inky, grainy paste that resembled the black dirt from which they had so recently been plucked. As if by magic, the flavors were just what I had been dreaming about. I may even prefer the beet greens to spinach with their extra bitterness as a foil for the sweet nuttiness of the sauce.


Beet Green Gomae
makes two appetizer-sized servings

I bunch beet greens or spinach leaves
2 Tbsp roasted black sesame seeds (or toast some sesame seeds yourself)
1 1/2 tsp sugar
1 Tbsp rice wine
1 1/2 tsp soy sauce

1. Smash the sesame seeds into a paste using a coarse mortar and pestle (a Mexican molcajete works well for this) or a spice grinder. Mix in the sugar, rice wine, and soy sauce.

2. Boil a pot of salted water and prepare a bath of ice water. Rinse the greens. If using spinach bunches, you can keep them intact during the blanching process and trim off the stems and roots afterwards. When the water is boiling, submerge the greens into the water for just under a minute and then quickly drain and toss into the ice water bath. 

3. Wait a minute and then drain the cooled greens, wringing out excess water. Lay the greens on a cutting board. Trim off the roots of the spinach if necessary and chop the greens into 1 inch strips. Toss with the sesame sauce and serve.

Saturday, April 14, 2012

Lentils with Butter and Parsley


Not unlike the trajectory of an obstinate, dawdling toddler who needs to be coaxed out of every puddle on the endless walk home, springtime's arrival seems to be stalled by intermittent stormy tantrums. Still there are signs of progress, such as the longer evenings and the increasing diversity of fresh green offerings through Eugene Local Foods. These signs inspired me to turn to the Spring section of Elin England's treasure trove of seasonal recipes in Eating Close to Home: A Guide to Local Seasonal Sustenance in the Pacific Northwest. Here I discovered her lentils with butter and parsley, which make an especially bright and refreshing springtime dish.


The recipe has you simmer lentils with garlic cloves, a bay leaf, and parsley stems, reserving the leaves for a parsley butter to mix in at the end, along with a dash of lemon juice. As opposed to deliciously enveloping lentils in rendered bacon fat, this gentle tossing with uncooked butter lets the legumes' distinctive flavor shine. I first made this dish with red chief lentils from Camas Country Mill, which made a soft and tangy accompaniment to seared salmon.


The next time I used Camas Country Mill's small brown lentils, similar to French or puy lentils. They gave a nice texture and heft to an after-Easter salad with hard boiled eggs and strips of ham on top and a bed of garlicy sauteed mixed greens from Sweetwater Farm below. These little legumes provide the heart of a satisfying meal and the satisfaction of supporting a local solution to feeding our community through partnerships between local growers and Food for Lane County. 


Lentils with Butter and Parsley
slightly adapted from Eating Close to Home by Elin England


1 cup (~1/2 lb) lentils rinsed and drained
1 large bay leaf
1 small bunch of parsley stems, tied together
3 large garlic cloves, pealed and cut in half
2 Tbsp butter, softened
juice and zest from 1 small or 1/2 large lemon 
1/2 cup flat leaf parsley leaves
salt and pepper to taste


1. Place the lentils in a pan with with 4 cups water, the bay leaf, parsley stems, garlic, and a generous pinch of salt. Bring to a boil and then simmer on medium low heat until the lentils are tender but not falling apart, about 20 minutes. Discard the bay leaf, parsley stem bunch, and garlic, and drain the lentils or transfer them to a bowl with a slotted spoon.


2. Meanwhile, prepare the parsley butter. You could use a small food processor to mix together the parsley leaves, lemon zest and juice, and butter, or do this by hand in a bowl, first snipping the parsley finely with kitchen shears.


3. When the lentils are done, mix in the parsley butter. Season with salt and pepper to taste. Serve warm or at room temperature.