Saturday, May 31, 2014

Market Start and Grilled Fava Beans


The Fairmount Neighborhood Farmers Market starts this Sunday June 1! You can look forward to whole pastured chickens and a selection of grass-fed lamb cuts from Fair Valley Farm, and Good Food Easy at Sweetwater Farm will have the following offerings: 

Fresh
Artichokes
Baby Beets 
Broccoli
Cabbage (Green, Red, Napa, & Savoy!)
Carrots
Cauliflower
Chard
Collard Greens
Cucumbers
Fava Beans (large and baby)
Fresh Herbs (cilantro, dill, oregano, sage, thyme) plus our own home-grown lemon grass!!
Garlic (baby stalks)
Kohlrabi
New Potatoes
Spring Onions
Summer Squash
Fresh Strawberries!

Preserves
From Sweet Creek Foods:
Dill Pickles
Chili Dill Pickles
Bread 'N Butter Pickles
Pickle Relish
Blueberry, Strawberry, Blackberry, & Raspberry Fruit Spreads
Enchilada Sauce
Salsa
From SLO Farm: Applesauce

Bean & Grains
Our own Polenta & Cornmeal!
Assorted from Camas Country Mill


With those baby fava beans, I can highly recommend trying them grilled whole, which we had last week for my husband's birthday dinner, along with crispy salmon and sorrel sauce. See you at the market!


Grilled Fava Beans
from Ignacio Mattos, published by food52

1 pound fresh fava beans in their pods, the younger the better
1 teaspoon fleur de sel
1 teaspoon ground chile pepper
1 teaspoon picked rosemary
3 to 4 cloves chopped garlic
1/4 cup extra-virgin olive oil, plus more to finish
2 tablespoons water
1 lemon
7 or 8 canned anchovies in oil, chopped finely
1 handful toasted bread crumbs (optional)

1. Mix first 7 ingredients together in a large bowl. Toss to coat the fava pods, then place them on the grill over medium-high heat.

2. Grill favas for several minutes, until charred, then flip them over and char the other side, cooking until the pods seem about to open. You can use a grill pan for this.

3. Remove pods from grill, return them to the mixing bowl, and squeeze the lemon over them. Toss the pods to coat. Check the seasoning, and add salt if necessary.

4. Add the anchovies to the bowl, mixing well.

5. Place the pods on a serving platter, drizzle to taste with olive oil, and sprinkle the bread crumbs on top, if using. Serve hot or at room temperature.

Monday, May 26, 2014

Market Start June 1: Spread the Word


The fifth season of the Fairmount Neighborhood Farmers Market will start Sunday, June 1 and will be held every Sunday from 10 AM - 2 PM at the Sun Automotive lot on the corner of Agate St. and 19th Ave., as you can clearly see from this beautiful poster, designed by Raghuveer Parthasarathy. Please download the poster here and spread the word.

Thursday, May 22, 2014

Roasted Cumin Carrots and Red Lentil Salad


A meeting in Boston last weekend afforded many serendipitous treats: beautiful spring weather in place of the predicted rain, a lovely stroll through neighborhood streets of my childhood bursting with blooming dogwoods, a chance encounter with my favorite high school French teacher, and some precious time with my parents as just parents, rather than grandparents or parents-in-law. Also, I whipped up a delicious lunch for us with some roasted carrots and a packet of red lentils that had been lingering in the pantry since my last visit.


With the lentils I made approximately this pilaf and layered it on some lettuce leaves with mango slices on the side and the roasted carrots on top, finally drizzled everything with approximately this spiced yogurt sauce. Like the rest of the weekend, it was an unanticipated treat, well worth savoring.


Roasted Cumin Carrots and Red Lentil Salad
serves  four for lunch 
Roasted cumin carrots
6 carrots
1 Tbsp ground cumin
1 tsp tumeric
1 tsp paprika
pinch of salt
good drizzle of olive oil

Lettuce for four
1 mango

1. Rinse 1 cup of red lentils and soak for an hour or two. 

2. Preheat the oven to 450 degrees F. Trim and scrub the carrots and cut them along the diagonal into 1 inch long chunks. On a large, rimmed baking sheet, toss together the carrot chunks, spices, and olive oil such that the carrots are well coated. Spread out the carrots in a single layer and roast in the preheated oven for approximately 30 minutes, shaking every ten minutes or so, until they are soft and have started to brown and caramelize on the edges. 

3. While the carrots are roasting, assemble the spices for the lentil pilaf and prepare the yogurt sauce.

4. Cook the lentils, according to the pilaf directions, which will take about five minutes.

5. Assemble the lettuce on plates and arrange mango slices around the edges. Scoop on a pile of the red lentils in the center and top with a generous serving of roasted carrots. Drizzle over yogurt sauce and serve with more yogurt sauce at the table. Enjoy.

Sunday, May 11, 2014

Bread Starter Crumpets


Bakers refer to their bread starters as their "mother", but I must admit to harboring maternal feelings towards mine. For the past few weeks, I've fed it when it's hungry, kept it warm, and celebrated its accomplishments. One of the greatest challenges has been to deal with its excessive productively, just like the endless onslaught of artwork that returns in my children's backpacks each day. Sourdough waffles could help, but I needed the moral equivalent of a magical 12 quart minestrone recipe made from macaroni and dried bean collages. 


This crumpet recipe from Chocolate and Zucchini, adapted from King Arthur Flour, is essentially straight fried bread starter. The first time I tried it, my starter was a bit too thick and the baking soda didn't get mixed in well. For my next batch, in a small stroke of frugal kitchen genius, I added some yogurt whey that I had strained out to make a thickened yogurt sauce, which gave it the right consistency and added to the tangy flavor.

Why would someone happen to own crumpet rings, you might ask. Mine were a birthday gift that I received from my future husband shortly after we started dating. Special occasions can be awkward early in a relationship, but he handled the situation charmingly, preparing me a lovely dinner followed by a scavenger hunt for my gift, complete with rhyming clues. At the last clue, I realized with a sudden shock that the gift was going to be a ring, and just as quickly I realized what my answer would be if it were an engagement ring. When I opened the gift, I was overcome with happy relief at knowing I'd met the man I wanted to marry, mischievous scavenger hunts and all, and also knowing that we were only at the crumpet ring stage. Now sixteen years later, we have two children who can help make crumpets for Mother's Day tea.


Bread Starter Crumpets
Yields eight 9-cm (3 1/2-inch) crumpets.*

270 grams (1 cup) bread starter (can use older starter that has been kept in the fridge for a few weeks
)
a little yogurt whey or buttermilk for thinning, if necessary
1 teaspoon sugar
1/2 teaspoon sea salt

1/2 teaspoon baking soda
butter or vegetable oil for greasing

1. Place the starter in a large bowl. Add the sugar and salt, and whisk to combine. The batter should be the consistency of a very thick pancake batter and pourable. If necessary, thin the batter a little with some yogurt whey or buttermilk.

2. Heat a skillet over medium low heat. Grease the crumpet rings well. When the griddle is hot, melt a pad of butter  or pour on a little vegetable oil and spread it around with a spatula. 

3. Just before you are ready to cook the batter, whisk in the baking soda. As the baking soda reacts with the acid in the starter, the batter will foam and rise. Using a measuring cup or a small ladle, pour about 1/4 cup of the batter into each crumpet ring.

4. Cook for a few minutes, until the top is set and the bottoms are lightly browned when you peek underneath by lifting with a spatula. As they cook, the crumpets will gradually shrink back from the rings. Use pliers or tongs to lift the crumpet rings off the crumpets (you may need to run a knife around the edge to help them loose), and flip the crumpets to brown lightly on the other side.

5. Eat the crumpets warm off the griddle or cool them for toasting later. They can also be frozen once cooled. Wipe down the crumpet rings if necessary, re-grease, and place them on the skillet to preheat again before repeating with the remaining batter.

*Note: Clotilde Dusoulier recommends that if you have multiple cups of starter to use up, you should mix the batter in batches with 1 cup of starter at a time, so that the crumpets are cooked shortly after the addition of the baking soda.

Wednesday, May 7, 2014

Bread Experimentation


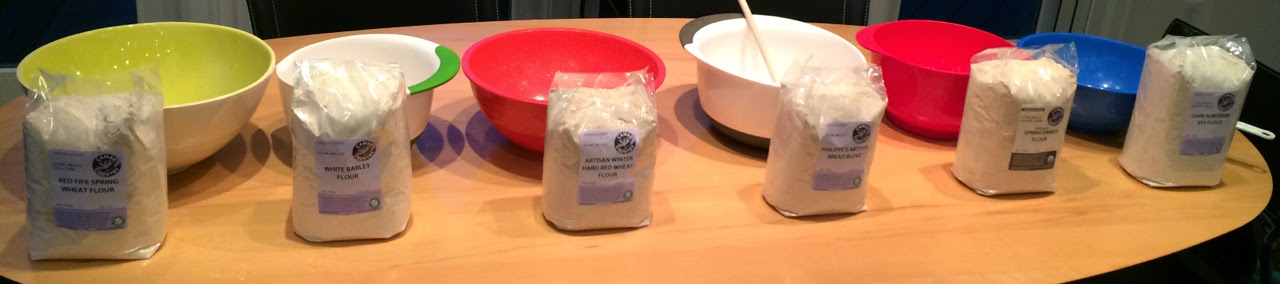
For our Bread 101 class, the five instructors conducted a grand experiment in bread making, with decidedly mixed, but edifying results


Each of us has also been experimenting on our own, with more success. Two weekends ago I tried a natural starter bread from Clotilde Dusoulier, author of the blog Chocolate and ZucchiniDusoulier follows a 1:2:3 ratio of starter: water: flour, which produces a very moist, but manageable dough. For baking, the shaped loaf is placed into a cold Dutch oven, where it finishes proofing as the oven heats. Following this recipe, and using a 50/50 mixture of Red Fife and white flour, I produced a lovely round loaf with a crisp crust. However, in a flu-addled fever, I omitted the salt, which produced a rather tasteless bread (lesson learned: don't bake when under the influence of viruses).


Last weekend I followed the instructions from Bread Lab baker Jonathan McDowell. This time I used all whole grain flour (80% Red Fife and 20% mixture of soft white wheat and buckwheat), and I remembered the salt. This dough is much wetter (87% hydration versus Dusoulier's 67%), which makes it challenging to handle. The hardest step for me was inverting the shaped loaf from my proofing "basket" into a piping hot Dutch oven without deflating it. The final bread had a delicious flavor and lovely crumb, but was decidedly flat. For a beginning bread baker like myself, I would recommend starting with Dusoulier's recipe, but McDowell's offers a great next challenge. Both will produce bread that is well worth the effort of nurturing a bread starter for days on end.

Sunday, May 4, 2014

Market Start Date and Radish Ideas


Mark your calendars! June 1st, four Sundays from today, will be the start of the fifth season of the Fairmount Neighborhood Farmers Market. Sweet Water Farm will be back with their wide selection of fruits, vegetables, and preserves, Fair Valley Farm will have their pastured chickens, as well as pork and lamb cuts, and Tiger Lily Art Company will be offering gorgeous fresh cut flowers. The market will be open 10 AM-2 PM on Sundays in the Sun Automotive lot on the corner of Agate Street and 19th Avenue. In anticipation of the spring vegetables you can look forward to at the market, here are some ideas for the often overlooked and under appreciated radish. When young and fresh, these are delicious crunchy treats dipped in butter and sprinkled with fancy sea salt.


They are also wonderful sautĆ©ed in butter and tossed with fresh mint.


And they make a pretty pink pickle, a perfect garnish for Cinco de Mayo tacos. See you at the market in a month!


Quick Pickled Radishes
makes 1 pint
1 bunch radishes
1/2 cup cider or white vinegar
1/2 cup water
1 Tbsp sugar
1/2 tsp fine sea salt

Combine the brine ingredients in a small sauce pan and heat until the sugar and salt have dissolved. Allow to cool. Trim the tops and tails from the radishes and wash them well. Slice them into 1/4 inch slices and then cut these disks into strips. Pack the radish pieces into a clean pint jar. Once the brine has cooled, pour over the radishes so that they are all submerged. Seal and refrigerate. You can serve within 30 minutes, and they will last for a week or two refrigerated.

Thursday, May 1, 2014

Seeded Emmer Pan Loaf


While the rest of the world may be striving to recreate Chad Robertson's cult status country bread, the breads that caught my attention when I first read through his Tartine Book No. 3 were his dense pan loaves, resembling my favorite German Volkornbrot. I adapted his toasted barley loaf recipe to my pantry supplies from Lonesome Whistle Farm and Camas Country Mill, using cooked emmer (instead of barley), flax seeds, sesame seeds, sunflower seeds, and Red Fife wheat flour instead of spelt and einkorn.  


Packed full with all this particulate matter, the dough felt like wet concrete, as the recipe describes. And although never destined to rise above the rims of the baking pan, it achieved the lofty goal of living up to my German bread memories. My starter and I will be moving on to attempt some airier levain breads, inspired by a recent visit from wheat breeder Stephen Jones, who runs what the New York Times describes as "a Wonka-esque wonderland for crusty, airy-crumbed experimentation," but I know I'll be returning to this seeded pan loaf recipe again for its dense delivery of flavor.


Seeded Emmer Pan Loaf
adapted from the Toasted Barley Loaf from Tartine Book No. 3

200 g emmer berries cooked in 400 g cold water
250 g Red Fife or other high protein whole grain flour
157 g buttermilk
10 g dark malt syrup
238 g water
155 g leaven (well fed bread starter, described here)
8 g fine sea salt
102 g flax seeds
52 g sesame seeds
45 g sunflower seeds

1. Two days before you will bake the bread, give your stater an extra feeding halfway through its 24 hour cycle to make it extra active. Also go ahead and cook your emmer berries, simmering and covered, for about 40 minutes, until they have absorbed all the liquid. If you like, you could toast the emmer berries on a baking sheet at 350 degrees for about 20 minutes before cooking. Cool completely before using.

2. Start the dough the morning of the day before you will bake the bread. In a large bowl, combine the leaven with the buttermilk, malt syrup, and water, and mix by hand to incorporate.  Add the flour and mix by hand until thoroughly combined, about 5 minutes. Let the dough rest, covered, in the bowl for 30 minutes (this is the autolysis step). Add the salt, cooked emmer, and seeds and continue mixing by hand until incorporated. The dough should have the feel of wet concrete. 

3. Cover the bowl with a clean kitchen fowl and let rise at warm room temperature for about 3 hours (this is the first proofing). Every 45 minutes or so, fold the dough to strengthen the gluten network, either with your hands as shown here, or if you are less ambitious, with a scraper as shown here.

4. Butter a loaf pan very well. Scoop the dough into the pan and smooth the top with wet hands. Let the dough rise in the pan, uncovered, at a warm room temperature. Cover the pan with a clean, dry kitchen towel and let rise overnight in the refrigerator (this is the second proofing). 

5. The next day, preheat the oven to 425 degrees C. Use a pair of scissors to make shallow cuts in the top of the loaf to score and brush with water. Bake for about 1 hour and 20 minutes or until the internal temperature has reached 210 degrees F. Let the loaf cool on a wire rack for at least half a day before cutting. The bread keeps well for up to one week properly wrapped.

Thursday, April 24, 2014

Baking Brioche and Cheater Bostock


Last weekend, in my continued adventures with baking with a bread starter, I attempted a recipe from Chad Robertson's Tartine Book No. 3 for golden brioche. "This is a very forgiving dough" he promises. But not simple. It calls for three forms of yeast: the starter or leaven, an overnight poolish (a sponge inoculated with a small amount of instant yeast), and some instant yeast added at the time of mixing. It also calls for flour from kamult, an ancient grain that is a relative of durum wheat; I substituted in Red Fife. Most importantly, it calls for an ingredient almost impossible to procure in our modern world: uninterrupted time. I tried to attend to my dough's various needs for risings, turnings, and shaping, but it was given short shrift to dance lessons, karate birthday parties, and soccer games. By the end of a long day, the dough had not reached its growth milestones, but I needed to stick it in the oven, just as I needed to send over-exhausted and sugar-ramped children to bed despite the unlikelihood of their falling asleep. Bread baking, I decided, is not unlike parenting and one can only do one's best.


The resulting bread was decided more squat than the lofty brioche loaves pictured in Robertson's book, but it had a beautiful crumb and delicious flavor. I was excited to try it in the recipe on the next page for Bostock, which Robertson explains is simply "twice-baked brioche." It looked easy enough when I scanned the recipe (making a mental note not to trim the crusts as instructed, because discarding even a millimeter of my hard labor would be too painful). But when I began to assemble the ingredients, my heart sank. Not only would I need to make an orange syrup, to be layered underneath marmalade and sliced almonds, but I'd failed to notice the additional ingredient of "Pistachio Frangipane (page 325)." Leaven and polish had been asking a lot, but this was the last straw. Instead, I simply slathered a brioche slice with apricot marmalade, sprinkled on some sliced almonds, and stuck it in the toaster oven. It was scrumptious. And so, below I give you the recipe for Cheater Bostock, made with brioche that you can bake or procure by whatever means possible, because unlimited time is even harder to source than ancient grains.


Cheater Bostock
slices of brioche
orange marmalade or apricot jam
sliced almonds

Slather your brioche with orange marmalade or apricot jam, sprinkle with sliced almonds, and toast in a toaster oven until the almonds are golden and fragrant. Enjoy and savor your free time.

Monday, April 21, 2014

Bread Starter Waffles


Like a microbial cultural anthropologist, I've continued to try to study the habits of my bread starter. And like my co-instructors, I've been wondering what to do with all the leftover starter generated by a regular regimen of diluting my culture into fresh flour paste. Great minds think alike and so, like them, I resorted to breakfast fare; in their cases pancakes of one kind and another, in my case waffles. I started with a sourdough waffles recipe from King Arthur Flour, which I melded with these yeasted buckwheat waffles from Deborah Madison. The dough made with the starter had significantly more integrity than those I had made with an overnight sponge from commercial yeast, and the waffles had a more complex, tangy taste that paired nicely with tart, stewed rhubarb and fresh strawberries. I'm thinking that it might work well to keep my culture growing slowly in the refrigerator during the week and revive it on the weekends for bouts of bread baking and breakfasts. The microbes in my culture are likely studying me as well and learning to understand the habits of their human cohabitants who dash out of the house five mornings a week and lounge around the other two.


Bread Starter Buckwheat Waffles
(makes about 6 waffles in a Belgian waffle iron)
overnight sponge
1 cup sourdough starter, unfed
1 cup unbleached all-purpose flour
1 cup buckwheat flour
1 tablespoon honey
2 cups buttermilk

waffle or pancake batter
all of the overnight sponge
2 large eggs
1/4 cup vegetable oil or melted butter
3/4 teaspoon salt
1 teaspoon baking soda

1. To make the overnight sponge, stir down your refrigerated starter, and remove 1 cup. In a large mixing bowl, stir together the 1 cup starter, flour, honey, and buttermilk. Cover and let rest at room temperature overnight.

2. The next morning, finish the bater. In a small bowl or mixing cup, beat together the eggs, and oil or butter. Add to the overnight sponge. Add the salt and baking soda, stirring to combine. The batter will bubble.

3. Pour batter onto your preheated, greased waffle iron, and bake according to the manufacturer's instructions.

Serving suggestion: a dollop of plain yogurt, a drizzle of stewed rhubarb, fresh strawberries, and maple syrup.

Saturday, April 19, 2014

Marbled Tea Eggs


This year for Easter, in addition to our regular colored eggs (including these sauerkraut soaked beauties), we made some Chinese marbled tea eggs.


When we visited China last fall, I was struck by the ubiquitous displays of various eggs, like these in Tong-Li.


To make these marbled eggs, the strategy is to cook them, then crack them all over,


and then soak them in a delicious brew of tea, soy sauce, star anise, cinnamon, sugar, and Szechuan pepper corns. We followed a recipe from Steamy Kitchen.


The resulting eggs have a beautiful marbled pattern. The prettiest part are the shells. We ate these in a pan-Asian hodgepodge of kimchi fried rice and a kinpira made with rutabaga and carrots. A tasty and fun way to celebrate the return of spring.


Marbled Tea Eggs 
6 eggs
3/4 cup soy sauce
2 star anise
2 tablespoons black tea (or 2 tea bags)
1 cinnamon stick
1 teaspoon sugar
1 tablespoon Sichuan peppercorn (optional)
2 strips dried tangerine or mandarin orange peel (optional)

Gently place the eggs in a medium pot and fill with water to cover the eggs by 1-inch. Bring the pot to a boil, lower the heat and let simmer for 3 minutes. Remove the eggs (leaving the water in the pot) and let cool under running cool water. Using the back of a teaspoon, gently tap the eggshell to crack the shell all over. The more you tap, the more intricate the design. Do this with a delicate hand to keep the shell intact. To the same pot with the boiling water, return the eggs and add in the remaining ingredients. Bring the mixture to a boil and immediately turn the heat to low. Simmer for 40 minutes, cover with lid and let eggs steep for a few hours to overnight. The longer you steep, the more flavorful and deeply marbled the tea eggs will be. 

Sunday, April 13, 2014

Bread Starter


Teaching is the best way to learn, and this term I have the great pleasure of teaching a class on the science of bread, which I hope will make me more knowledgeable not only about the theory but also the practice of bread making. This breakfast spread of fresh breads at a recent conference in Germany offered further inspiration for bread baking.


And so, along with my students, I have been tackling the challenge of cultivating and nurturing a bread starter, following the detailed instructions from Chad Robertson’s new book on whole grain baking, Tartine Book 3.


The process involves a certain degree of precision (flour and water doled out in grams) and a great deal of chance, as one hopes for wild yeast and lactic acid bacteria to alight in one’s bowl and set up shop fermenting the complex polysaccharides of the grains. 


Magically my flour paste started to produce bubbles after a day (can one fault the proponents of spontaneous generation?)


Rather than leave it all to chance, I took my starter out for a bit of wild yeast hunting at Noisette Pastry KitchenI can't be sure whether this inoculation helped along the starter, but over a matter of days, I had an actively bubbling culture with a somewhat pleasant yogurt smell. 


How is it it that time and again, when people offer up a flour paste to the air, they are able to produce a leavening for bread? What we consider as the generous efforts of yeast and lactic acid bacteria to aerate our bread and fill it with delicious flavors, is, from a microbial perspective, quite antisocial behavior. The yeast strains that humans have selected over our history for their utility in bread, wine, and beer making, are unusual among microbes in their metabolic choices. When confronted with an abundance of simple sugars and plenty of oxygen with which to burn this fuel through aerobic respiration, Saccharomyces cerevisiae instead chooses to gobble these up in the sloppy and wasteful process of fermentation. Their voracious devouring of resources, spewing fermentation products in the process, inhibits the growth of other microbes who are outcompeted and repulsed by the yeasts' greedy and sloppy eating habits. Only the like-minded lactic acid producing bacteria will set up shop with the yeast, using a similar wasteful fermentation strategy once oxygen is depleted from the environment. And thus bread starters, although possessing individual nuanced flavors, are remarkably similar in their composition of microbial boors, who can produce the most refined breads.


Stay tuned for experiments with baking with this starter. And you can read more about my co-teachers' adventures with starters here and here.

Friday, April 4, 2014

Barley Flake Porridge


At a recent visit to Camas Country Mill, I picked up a bag of their streaker barley flakes. This barley variety, developed through a barley breeding project at OSU, gets its name because it is naked, or hull-less. From its local seed selection, to its production on the Huntons' farm, and processing at Grain Millers, this is a local product.


I tried these barley flakes in lieu of Scottish oats in my favorite weekday porridge with teff grain and flax seeds. These flakes need a little less liquid and they keep their shape more than oat flakes, resulting in a deliciously hefty and satisfying breakfast. 


Barley Flake Porridge
(1 serving)
1 tsp butter or coconut oil
1 scan Tbsp teff grain (or chia seeds)
1 scan Tbsp flax seeds
1/4 cup barley flakes
generous pinch of salt
2/3 cup boiling water
1/4 cup cow or almond milk

The evening before, boil a kettle with 2/3 cup water and set a small saucepan over medium heat. In a 1/3 cup measuring cup, sprinkle in the teff grain and flax seed (you can eyeball these) and fill to the top with barley flakes. Melt the butter or coconut oil in the pan, add the grains and salt, and cook, stirring frequently, for about 5 minutes until they give off a nice toasted aroma and the seeds begin to pop. Turn off the heat. Carefully add the hot water (it will splatter), stir, and cover. The next morning, add about 1/4 cup milk, and cook, stirring frequently, until the porridge has reached the desired thickness (about 5 minutes). Serve with nuts, dried or fresh fruit, and a sprinkle of brown sugar or maple syrup.

For a more leisurely morning meal, this can of course be prepared all at once. The grains will need about 15 to 20 minutes to cook. 

Friday, March 28, 2014

Kinpira Gobo (Stir Fried Burdock)


The burdock root in our Good Food Easy CSA share was the first example of this vegetable that I had encountered. Luckily Elin England's treasure trove of seasonal recipes, Eating Close to Home: A Guide to Local Seasonal Sustenance in the Pacific Northwest, provided a suggestion: the Japanese dish of kinpira gobo. Although the hey day for burdock root in European cuisine was the Middle Ages, it is still widely consumed in Japan, where "gobo" is often prepared in a style called "kinpira" which refers to stir frying followed by simmering. Carrots can be included or substituted. The main work of the dish is the chopping, after which the julienned vegetables cook up quickly, with the simmered liquids producing a delicious glaze. Burdock has a distinctive flavor that contrasts pleasantly with the sweet and salty glaze and was a big hit at our dinner table. Now I'll be scouring our farmers markets for burdock roots to make this again.


Kinpira Gobo
3 medium burdock roots
1 large carrot
2 Tbsp canola oil
Tbsp sake
3 Tbsp soy sauce
1 1/2 Tbsp sugar
1/4 tsp red pepper flakes (optional)
1 tsp sesame oil
2 tsp sesame seeds

1. Scrub the burdock root with a brush and trim the ends. You can also use the edge of a knife to scrape off a bit of the skin, but don't remove too much, because this part of the root contains many of the nutrients. Cut the burdock into 2 inch julienned matchsticks, submerging the pieces into a bowl of cold water as you work, to prevent discoloration. Scrub, trim, and cut the carrot into similar julienned matchsticks.

2. Mix together the sake, soy sauce, and sugar. Heat a pan or wok over medium heat and add the oil. When it is hot, add the drained burdock. Stir fry for about a minute. Add the carrots and continue to stir fry for another couple of minutes, until the vegetables start to soften. Add the sake mixture and continue cooking over medium heat, stirring occasionally, until the liquid has reduced. Remove from heat, drizzle with sesame oil and sprinkle with sesame seeds and red pepper flakes if you like. Serve at room temperature. Keeps about a week when refrigerated in a sealed container.

Sunday, March 23, 2014

Marcella Hazan's Bolognese Meat Sauce


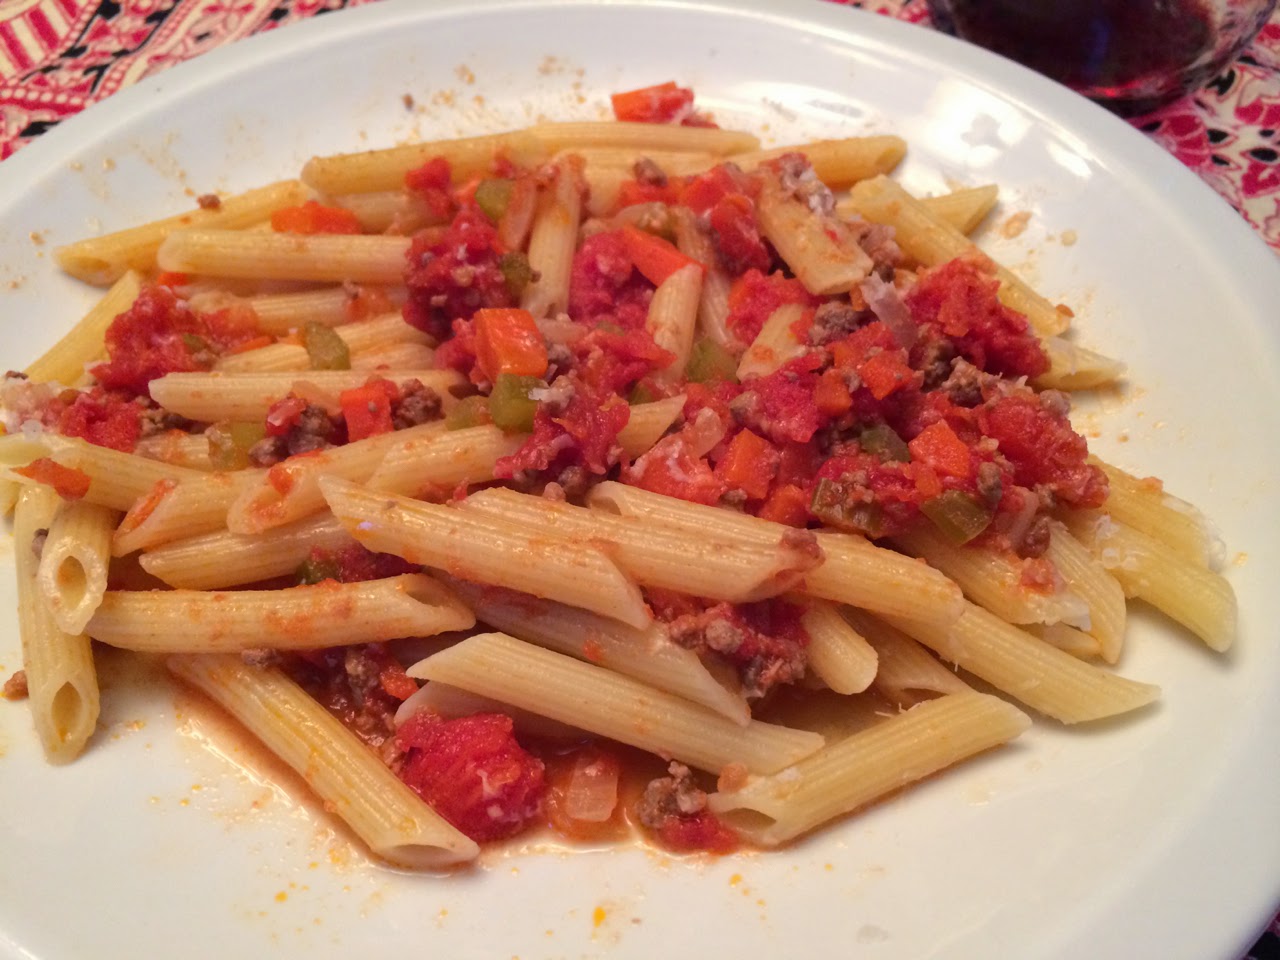
The arrival of spring break, after the neighborhood's buffeting with last month's ice storms and recent scary events, offers a welcome chance to decompress. For myself this took the form of slowly simmering a pot of Marcella Hazan's incomparable ragu alla bolognese.


Ragu recipes can elicit strong feelings and even commentary for beyond the grave, but for me this is unquestionably the quintessential version. Over the years, I've tweaked Hazan's recipe to accommodate a pound of ground beef and scaled up slightly the proportion of tomatoes (a convenient two large cans) and vegetables. This produces a plentiful pot of sauce with ample supplies to freeze for later, well worth doing after all of the hours of simmering down first the beef's milky bath and then its winey digestif. For this batch I used ground beef from Fair Valley Farm and a couple of quarts of frozen Sweetwater Farm tomatoes. With ingredients this good, the resulting ragu was particularly delicious, and the process of preparing it imbued the house with comforting smells and a sense of balance.


Marcella Hazan's Bolagnese Meat Sauce
(adapted slightly; makes about 5 pints of sauce, which can be frozen)

1 Tbsp olive oil
3 Tbsp butter
1 medium onion, chopped
3 stalks celery, trimmed and chopped
3 carrots, chopped
1 lb ground beef chuck
salt and freshly ground black pepper
1 cup milk
1 cup dry white wine (I use 1/2 cup dry vermouth)
2 28 ounce cans whole peeled tomatoes with their juices (or 2-3 quarts frozen peeled tomatoes)

1. Put the oil, butter, and chopped onion in a large heavy pot, such as a Dutch oven, and turn the heat on medium. Cook and stir the onion until it has become translucent, then add the chopped celery and carrot. Cook for about 2 minutes, stirring the vegetables to coat them well.

2. Add the ground beef, a large pinch of salt, and a few grindings of pepper. Crumble the meat with a fork, stir well, and cook until the beef has lost its raw, red color.

3. Add the milk, and let it simmer gently, stirring frequently, until it has bubbled away completely. At this point Hazan adds a tiny grating of nutmeg, but I omit this step because of my nutmeg aversion.

4.  Add the wine, let it simmer until it has evaporated, then add the tomatoes and stir thoroughly to coat all the ingredients well. When the tomatoes begin to bubble, turn the heat down so that the sauce cooks at the laziest of simmers, with just an intermittent bubble breaking through to the surface. Cook, uncovered, for 3 hours or more, stirring from time to time. Add 1/2 cup water at a time if it begins to dry out (I've never had this problem). At the end, however, no water at all must be left and rye fat must separate from the sauce. Taste and correct for salt.

5. Toss with cooked drained pasta and serve with freshly grated Parmesan on the side.

Saturday, March 15, 2014

Irish Soda Bread


In honor of St. Patrick's Day, I baked a loaf of this Irish soda bread. It is not a sweet treat, but rather a slightly buttery, savory quick bread with the tart flavor of buttermilk and nutty notes of whole wheat flour, toasted wheat germ, and oats.


This bread would be delicious with a hardy Irish stew, but we enjoyed it with lighter fare befitting our beautiful springtime day: as the backdrop for an egg and cheese sandwich for lunch, and slathered with butter and peach raspberry preserves for high tea. Happy spring.


Irish Soda Bread

1 1/4 cups all purpose flour, plus more for kneading and baking
1 cup whole wheat flour, such as Lonesome Whistle Farm red fife
1/2 cup Scottish oats or old-fashioned rolled oats
1/4 cup wheat germ
1 1/2 teaspoons baking soda
1 teaspoon kosher salt
4 tablespoons cold, unsalted butter, cut into bits
1 to 1 1/3 cup buttermilk

1. Place a rack in the center of the oven and heat to 425 degrees F. Sprinkle a baking sheet lightly with flour. In a dry skillet, toast the wheat germ for a couple of minutes until  fragrant.

2. In a large bowl, whisk together the dry ingredients. Add the butter and toss to coat in the flour. Use your fingers or two forks to cut the butter into the flour until the mixture resembles coarse meal. (You can also do this in the food processor if you'd like.) Gradually add the buttermilk and stir or pulse just until the dough comes together (you may not need all the buttermilk). (Note: I made the dough in a food processor and used just a cup of buttermilk).

3.  On a floured surface, knead the dough gently for about a minute until smooth. Shape the dough into a ball and transfer to the baking sheet. Pat gently into a 7-inch round and sprinkle the top evenly with about a tablespoon of flour; with your fingertips, gently spread the flour evenly over the top of the round. Using a very sharp knife, cut a shallow "X" in the top of the loaf. Bake for about 30 minutes, until the loaf is brown, and the bottom sounds hollow when you tap it. Cool on a rack for at least 2 hours before slicing.