Showing posts with label garlic. Show all posts

Sunday, April 12, 2015

Chicken in Milk


With a steady supply of pastured chickens from our Fair Valley Farm CSA, I'm always on the look out for easy whole chicken recipes. Today I tried a one pot Jamie Oliver recipe, classified as genius by food52, with a surprising ingredient list: cinnamon stick, lemon peel, garlic cloves, sage leaves, and milk. The end result was fragrant and succulent, and will definitely be staying on our dinner rotation. You start by browning your chicken in a snug pot, then after decanting the browned butter (which I used in our mashed potatoes), you toss in the remaining ingredients and shove it into the oven for 90 minutes, occasionally basting the chicken with the sauce. The chicken browns but stays wonderfully moist (I positioned the breast side down to keep it submerged), the milk solids separate out, leaving a flavorful sauce, and best of all are the whole roasted garlic cloves to squeeze into your mashed potatoes. This is a perfect weekend afternoon dish because it requires little attention, while infusing the house with delicious smells, and leaving time for other kitchen puttering. As the chicken cooked, I prepared the mashed potatoes and used the lower rack of the oven to rotate through several baking sheets to roast: broccoli for a couple dinners, and cumin carrots and chickpeas for a salad later in the week. It's nice to start the week with a chicken in one's pot and several dinners already in the bag.


One 3-pound (1 1/2-kilogram) organic chicken
Salt and freshly ground black pepper
4 ounces (1 stick or 115 grams) butter or olive oil
1/2 cinnamon stick
1 good handful fresh sage, leaves picked
Zest of 2 lemons, peeled in thick strips with a peeler
10 garlic cloves, skins left on
1 pint (565 milliliters) whole milk

1. Preheat the oven to 375° F and find a snug-fitting pot for the chicken. Season the chicken generously all over with salt and pepper and fry it in the butter or olive oil, turning the chicken to get an even color all over, until golden. Remove from the heat, put the chicken on a plate, and throw away the butter left in the pot (or save for another use). This will leave you with tasty sticky goodness at the bottom of the pan, which will give you a lovely caramel flavor later on. 

2. Put your chicken back in the pot with the rest of the ingredients, then cook it in the preheated oven for 1 1/2 hours. Baste with the cooking juice when you remember. (Oliver leaves the pot uncovered, but you can leave it partially covered if you'd like it to retain more moisture and make more sauce.) The lemon zest will sort of split the milk, making a sauce, which is absolutely fantastic. 

3. To serve, pull the meat off the bones and divide it on to your plates. Spoon over plenty of juice and the little curds. Serve with wilted spinach or greens and some mashed potato.

Friday, September 12, 2014

Roasted Tomatillo Salsa


This Sunday at at the Fairmount Neighborhood Farmers Market, you can look forward to a selection of pastured chicken, lamb, and pork cuts from Fair Valley Farm and beautiful fresh cut flower bouquets from Tiger Lily Art Company. Good Food Easy at Sweetwater Farm will have the following offerings:  

Fresh
corn (add to fish tacos) and tomatillos (make the salsa below) 
watermelon, cantaloupes, peaches, and Italian prune plums
Gravenstein apples, Asian pears and bartlett pears from SLO farm (make a barley salad)
lots of tomatoes, including cherries and flats of romas (restock your sauce supply)
sweet and hot peppers of all kinds (for salsas)
green and yellow beans, potatoes, and baby beets 
eggplants and broccoli (make a roasted salad)
fennel, cucumbers, kohlrabi, carrots, and radish (toppings for peanut sauce noodles)
crookneck squash, summer squash, and zucchini (try Erica's recipe published in the RG)
cabbage (green, red, savoy) (make some mung bean and kimchi pancakes)
radicchio, chard, kale, lettuce, including bagged mix (make kale pesto)
turnips and delicata squash (try roasted with spices)
garlic and fresh herbs (basil, oregano, sage, thyme) and home-grown lemon grass

Preserves, Beans, and Grains
From Sweet Creek Foods:
Dill Pickles, Chili Dill Pickles, Bread 'N Butter Pickles, Pickle Relish
Blueberry, Strawberry, Blackberry, and Raspberry Fruit Spreads
Enchilada Sauce and Salsa
From SLO Farm: Applesauce
Assorted beans and grains from Camas Country Mill


Pan roasted tomatillos make delicious salsa. Their natural bright tartness, combined with the charred flavors from the roasting, are all that you need for a perfect topping for tacos. 


Rick Bayless Mexican Everyday has a couple of recipes for pan roasted tomatillo salsas. I've often made his version with chipotle peppers, but this time decided to use some fresh jalapeños from Sweetwater Farm.


We slathered this salsa on fish tacos with pan roasted corn kernels for an easy weeknight Farmers Market feast.


Roasted Tomatillo Salsa
8-10 tomatillos
1-2 cloves garlic
1-2 spicy peppers such as jalapeños
salt

To roast the tomatillos, you will want to use a cast iron or nonstick skillet, or to avoid a messy cleanup, you can line a regular skillet with foil. Heat the skillet over medium high heat, and place in the unpeeled garlic cloves and whole jalapeños. Meanwhile, remove the husks from the tomatillos, rinse them, and cut them in half. Turn the jalapeños and garlic and cook until they are charred on both sides. Remove from the pan to cool. Place the tomatillo halves into the hot pan, cut side down, and allow to cook until they start to soften and collapse, turn more yellow, and char on the bottom. Flip them over and cook them for a few minutes on the other side. Remove the skillet from the heat and allow to cool for a few minutes. While the tomatillos are cooking, peel the garlic and place in a blender jar. Remove the stems from the jalapeño and all or some of the seeds, according to your preference for spiciness, and add these to the blender jar. Once the tomatillos have cooled a bit, add them to the blender jar, including all the charred bits from the bottom of the pan. Add a generous pinch of salt and blend until smooth. Taste and add more salt if needed. Pour into a bowl. You could mix in chopped cilantro and diced white onions if you like. Enjoy over tacos, with chips, on frittatas, or thin with stock for an enchilada sauce.

Friday, September 5, 2014

Fermented Green Bean Pickles


This Sunday at at the Fairmount Neighborhood Farmers Market, you can look forward to a selection of pastured chicken, lamb, and pork cuts from Fair Valley Farm and beautiful fresh cut flower bouquets from Tiger Lily Art Company. Good Food Easy at Sweetwater Farm will have the following offerings:  

Fresh
lots of corn (make savory corn pudding)
watermelon, cantaloupes, peaches, and Italian prune plums (nice waffle toppings)
Gravenstein apples, Asian pears and bartlett pears from SLO farm (put on pizza)
lots of tomatoes, including cherries and flats of romas (restock your sauce supply)
sweet and hot peppers of all kinds (use in bean pickles)
green and yellow beans (make bean pickles)
eggplants and broccoli (try these grilled eggplant dips)
fennel, cucumbers, and tomatillos (make pan roasted tomatillo salsa) 
potatoes, baby beets, kohlrabi, carrots, and daikon radish (make banh mi)
crookneck squash, summer squash, and zucchini (bake a gratin)
cabbage (green, red, savoy) (great in slow cooker soup)
radicchio, chard, kale, lettuce, including bagged mix (make kale Salade Lyonnaise)
garlic and fresh herbs (basil, oregano, sage, thyme) and home-grown lemon grass

Preserves, Beans, and Grains
From Sweet Creek Foods:
Dill Pickles, Chili Dill Pickles, Bread 'N Butter Pickles, Pickle Relish
Blueberry, Strawberry, Blackberry, and Raspberry Fruit Spreads
Enchilada Sauce and Salsa
From SLO Farm: Applesauce
Assorted beans and grains from Camas Country Mill


Having experimented with fermenting cabbage, wheat, and cream, I thought I'd try my hand at some fermented green bean pickles. I followed the general guidelines for fermented yard-long beans from Liana Krissoff's Canning for a New Generation, but added some of Sweetwater Farm's cherry bomb peppers, garlic, and chives for flavoring.  


Just as with these other ferments, I was amazed at how easily I could harness the Lactobacillus workhorses of the microbial world. Within a week of resting on my counter, quietly bubbling away, my beans had transformed into tart and sour pickles, infused with spiciness and the sharp flavors of garlic and chives, the perfect accompaniment for a corn, summer squash and millet succotash, a green salad, and my latest loaf of sourdough bread.


Fermented Green Bean Pickles
adapted from Canning for a New Generation, makes one quart
8 ounces green beans
6 cloves garlic
2 or 3 spicy peppers, such as cherry bombs
12 chives
1/4 cup pure kosher salt
8 cups water

Wipe off the beans, trim the stem ends, and cut into 1 inch lengths. Peel and coarsely chop the garlic. Stem, seed, and chop the peppers. Chop the chives into 1 inch lengths. Place all the ingredients into a clean quart-sized mason jar, preferably wide mouthed. Combine the salt and water in a large pitcher and stir until the salt is dissolved. Pour the brine over the beans in the mason jar, and place the jar in a bowl. Pour the remaining brine into a gallon-sized resealable bag, seal, and place the bag on top of the beans in the jar such that the bag covers the jar mouth and submerges the beans into their brine. Cover the container with a clean towel and let the beans ferment at room temperature. After a couple of days, you should see the fermentation process happening as small bubbles form along the beans. Skim off any scum that forms on the surface. Taste the beans and continue fermenting until they are the desired sourness, about one week. Seal and refrigerate in the brine for several weeks, or drain and freeze in freezer bags for up to 6 months.

Saturday, June 28, 2014

Grilled Garlic Whistle Salsa


This Sunday at at the Fairmount Neighborhood Farmers Market, you can look forward to a selection of pastured chicken and grass-fed lamb cuts from Fair Valley Farm and beautiful fresh cut flower bouquets from Tiger Lily Art Company. Good Food Easy at Sweetwater Farm will have the following offerings: 

Fresh
Leeks, scallions, baby stalks of garlic and garlic whistles, also called scapes (try in salsa)
Anaheim and poblano chile peppers and some early tomatoes
Artichokes, baby beets, and kohlrabi (try grilled kohlrabi)
New potatoes, cauliflower and broccoli
Carrots, summer squash, and cucumbers (try these tsukemono pickles from Ume Grill)
Chard, collard greens, and kale
Fresh herbs (basil, oregano, sage, thyme) and home-grown lemon grass!!
Lettuce, including ready-to-eat bagged mix (make some lettuce wraps)
Cherries and Blenheim apricots (from Washington)

Preserves, Beans, and Grains
From Sweet Creek Foods:
Dill Pickles, Chili Dill Pickles, Bread 'N Butter Pickles, Pickle Relish
Blueberry, Strawberry, Blackberry, and Raspberry Fruit Spreads
Enchilada Sauce and Salsa
From SLO Farm: Applesauce
Assorted beans and grains from Camas Country Mill


Before their season is over, be sure to try some of these crazy spiraling garlic whistles (also called scapes). One way to soften their stalks and temper their garlic punch is to  grilled or seared them on a hot skillet.


Once charred and diced into rounds, these make a delicious garnish for tacos and add a smoky punch to your favorite tomato salsa.


Grilled Garlic Whistle Salsa
1 bunch garlic whistles (also called scapes)
1 jalapeño pepper
1 15 ounce can of fire roasted tomatoes (or fresh or frozen tomatoes)
1 bunch cilantro
salt to taste

1. Heat a grill or a large cast iron skillet and throw on the garlic whistles and the jalapeño. Cook, turning occasionally, until they are charred and fragrant. Trim off the garlic scape blossom tips and cut the stalks into small rounds. Stem and seed the jalapeño and dice.

2. In a blender or food processor, blend together the tomatoes and cilantro. Add salt to taste. Stir in the chopped charred garlic scales and jalapeño in batches and taste until it's to your liking (save any unused scapes and jalapeño for taco garnish). Enjoy.

Thursday, June 20, 2013

Springtime Spaghetti Carbonara


This Sunday at the Fairmount Neighborhood Farmers Market you can look forward to fresh produce from Sweetwater Farm and pasture-raised poultry from Fair Valley Farm including:

kohlrabi (delicious in salads)
fava beans and sugar snap peas (make carbonara)
pattypan squash and zucchini (try tsukemono pickles)
spring onions, fresh spring garlic, and garlic scapes (make some scallion pancakes)
kale, chard, collards, braising greens mix, lettuce, and salad mix (try this sauteed kale)
broccoli, Italian green cauliflower, and beets (make some bright pink beet pasta)
strawberries (try tapioca flamingos)
dried beans and grains from Camus Country Mill (pick up fixings for hot oatmeal)
jams, salsa, and pickles from Sweet Creek Foods
pastured chickens, as well as chicken hearts and livers (try this chicken liver pate)


Spaghetti carbonara was one of the dietary staples of my mother (before she was my mother) and her roommate (my future aunt) when living 
as impoverished students in a Paris garret. The recipe persisted in the family and it was one of the first dishes that both my cousins and my sister and I learned to make. It is appealingly simple: toss hot cooked spaghetti into raw eggs and grated cheese and the pasta strands become coated with a lovely creamy sauce. Then add bacon and possibly some alliums and vegetables. This dish is elevated from subsistence fare if you use top quality bacon (such as my parents sent my husband for his birthday) and increase the vegetables; during my childhood we often had it with onions, bell peppers, and zucchini. Last week I discovered that if you use the freshest spring snap peas and garlic scapes, the dish is transformed into something truly sublime and worthy of the finest dining establishment in Paris. 


Springtime Spaghetti Carbonara
1/2 lb bacon
3/4 lb snap peas
4 garlic scapes
2 eggs
1/4 cup grated parmesan cheese
plenty of freshly ground black pepper
1 lb spaghetti

1. Set a large pot of salted water to boil.

2. In a large serving bowl, combine the eggs, grated cheese and plenty of black pepper, and mix well.

3. Rinse the snap peas, snap off the stem ends and remove the threads from the top of the pods. Cut the pods along the diagonal into 1/2 inch pieces. Rinse the garlic scapes, trim off the flower ends and slice the stems into 1/4 inch pieces.

4. Cut the bacon strips into 1/2 inch pieces. When the water is close to a boil, start cooking the bacon pieces in a large skillet over medium heat until the fat is rendered and the bacon is crispy. Remove the bacon from the pan with a slotted spoon. Drain off all but 1 or 2 Tbsp of bacon fat, return the pan to the heat source, and toss in the garlic scapes. Cook, stirring for about about one minute, then add the snap peas. Cook for about two minutes, and then add back the bacon pieces to the pan. Cook the mixture for about one more minute until the peas have turned a more brilliant green but still have plenty of crunch. Remove from heat.

5. While the bacon is cooking, throw your spaghetti into the boiling water and cook according to the instructions. Position your colander in the sink and your serving bowl with the egg mixture close by. As soon as the spaghetti is ready, drain it and then quickly toss it into the serving bowl. Use tongs or large serving utensils to toss the hot spaghetti in the egg mixture until the eggs are completely cooked and coat the spaghetti strands. Now toss in the bacon and snap pea topping and toss again. Serve immediately with more grated parmesan cheese and fresh black pepper.

Thursday, July 12, 2012

Garlic Scape Pesto Pizza


This past week at the Fairmount Neighborhood Farmers Market, Sweetwater Farm offered garlic scapes. These fleeting spring treats are delicious ground up into a pungent pesto. The punch of the garlic flavor will vary with the scapes, from subtle to powerful, depending on their age and thickness. For hefty scapes, you can temper the garlic flavor by sauteing them first in a little olive oil before pureeing them, or you can bake the pesto afterwards on a pizza. 


We dolloped our garlic scape pesto on whole wheat pizza dough and topped them with spring vegetables: sauteed asparagus spears on one and sauteed zucchini slices with diced ham on another. This pungent green paste would serve as a delicious backdrop as well to any number of summer or fall vegetables (cherry tomatoes, peppers, cubed squash), so if you get a chance, freeze some garlic scape pesto for later in the season. 


Garlic Scape Pesto Pizza
makes two medium pizzas


garlic scape pesto
1 bunch garlic scapes
1/2 cup whole almonds, toasted
1/2 cup olive oil
salt to taste


pizza dough
1 1/2 tsp yeast
1 cup warm water
1 tsp salt 
1 Tbsp olive oil
1/4 cup medium or course ground corn meal
2 cups all purpose white flour
1 cup whole wheat flour (I used red fife from Lonesome Whistle Farm)


topping suggestions
~4 ounces fresh mozzarella cheese
~4 ounces crumbled feta cheese 
sauteed asparagus spears
sauteed zucchini and diced ham


1.  At least two and a half hours ahead, prepare the pizza dough. In a large mixing bowl, mix the yeast and 1/4 cup warm water and allow to sit for a few minutes until it foams up. Mix in the olive oil, salt, and corn meal. Mix in the remaining ingredients, alternating between the flour and water. You may need a little more or less of the water or flour, depending on ambient moisture. When combined, turn the dough onto a work surface (I like to use a large silicone mat for easy clean up) and knead for several minutes until the dough is satisfyingly elastic. Transfer the dough to a lightly oiled bowl, or if using, loosely wrap the dough in the silicone mat and transfer it right back into the dough mixing bowl. Allow the dough to rise until it has doubled in bulk for a coupe of hours. You can also make this dough in the morning and let it rise in the refrigerator during the day and it will be ready at dinnertime.

2. Prepare the garlic scape pesto. In a toaster oven or on the stovetop in a dry skillet, toast the almonds until fragrant. Place in a food processor. Coarsely chop the garlic scapes and add these to the food processor, as well as the olive oil and a generous pinch of salt. Process until you have a fairly smooth, bright green paste. Taste and add more salt or olive oil as desired. Reserve.

3. Prepare toppings. Snap the hard ends off the asparagus spears and cut into 1 inch long pieces. Heat a skillet over medium high heat. Add a splash of olive oil and saute the asparagus with a pinch of salt for a few minutes until they are bright green and have started to soften. Reserve. Slice the zucchini in half moons and dice ham. Saute together with a little olive oil until the zucchini have just started to brown. Reserve. Dice the feta cheese and slice the mozzarella.

4. Preheat the oven to 450 degrees and insert a pizza stone if you wish. Divide the dough in half and roll out two pizzas, each about 10 by 14 inches. If using a pizza stone, assemble the pizza on a peel, or assemble it on a baking sheet sprinkled with some coarse corn meal. Spread half the pesto over one of the pizzas, then top with the asparagus and half of the cheese. Repeat with the second pizza, using the zucchini and ham. If using a pizza stone, carefully slide the pizza from the peel onto the stone. Bake the pizza for about 12 minutes until the crust sounds hard when tapped and the cheese has started to brown. Serve at once. 

Friday, July 1, 2011

Pesto Pasta with Fresh Roasted Garlic on the Side


At the Fairmount Neighborhood Farmers Market this Sunday July 3, you can expect to find these produce items from SLO Farm and Songbird Farm:


strawberries
sugar snap peas
green cabbage
cucmbers
potatoes
kale
chard
lettuce mix
basil
parsley
eggs
honey

Out of our Coop will have fresh eggs and chickens (perfect for a 4th of July BBQ). There won't be any beans and grains from the Southern Willamette Valley Bean and Grain Project, but you can expect them back the following Sunday.


With our bounty of basil, parsley, and eggs last week, we made a delicious pasta. My daughter, as regular readers know, is an accomplished pasta maker, and this batch was a gorgeous yellow when made with fresh eggs. 


To go with the pesto, I roasted some cherry tomatoes, which brings out their best, even when they are not quite in their prime (Songbird Farm promises some ripe cherry tomatoes soon, which would obviate this step). Since I had the oven on, I threw in a quartered head of fresh garlic. This was my first experience cooking fresh garlic, and it was a revelation. The final roasted garlic (which required a few more minutes than the tomatoes) was mellow and sweet, milder than the dried variety. The lovely plump quarters offered a solution to my personal pet peeve about pesto, that it is often overpowered with raw garlic. The answer: roasted garlic as a condiment.


I prepared my pesto in its purest form: basil, parsley, toasted pine nuts and a glug of olive oil. When the pasta was ready, I tossed it in this brilliant green paste, along with the tomatoes and some diced feta cheese. And then I served it with freshly grated parmesan and a roasted garlic wedge on the side. This way, everyone could squeeze out their own pungent roasted garlic paste and slather it about at their discretion.


Pesto and Fresh Pasta

Pasta
4 eggs
scan 3 cups flour
pinch of salt

Pesto
1 large bunch of basil
1 small handful of parsley
1/3 cup pine nuts
~1/3 cup olive oil
salt and pepper to taste

Goodies
1 pint cherry tomatoes
1 head fresh or dried garlic
~3 ounces feta cheese, diced
freshly grated parmesan cheese

1. Heat the oven to 350 degrees.  In an oven proof pan, roll the cherry tomatoes around in a splash of olive oil until they are coated, and throw in a quartered head of garlic. Roast the tomatoes for about 30 minutes, until they are collapsed and fragrant. Transfer these to a bowl and keep roasting the garlic until its skin is quite brown and it is soft throughout, another 15 minutes or so.

2. Prepare the pasta dough in a food processor. Combine the ingredients and process until the dough just starts to come together into a ball. Use a little water or more flour to achieve the right consistency. Roll out the dough with a pasta maker and cut it into strip.

3. Toast the pine nuts in a dry skillet or toaster oven, and watch them like a hawk so that they don't burn (they are too expensive to waste! You could also use toasted almond wedges and a handful of walnuts). Reserve a tablespoon of pine nuts for garnish, and put the rest in a food processor. Pulse briefly. Add the basil and parsley leaves, a glug of olive oil (~1/3 cup), salt and pepper, and pulse to the desired consistency.

4. Cook the pasta in a large pot of rapidly boiling salted water for just a couple of minutes. Strain and stir the pasta into the pesto, fold in the tomatoes and feta, sprinkle over the reserved pine nuts, and serve with freshly grated parmesan and a roasted garlic wedge.

Tuesday, August 24, 2010

Fresh Tomatoes and Fresh Pasta


The juxtaposition of plump red tomatoes and shiny green pasilla peppers at the SLO Farm stand last Sunday was the inspiration for a simple sauce to go with homemade pasta.  I love fresh, uncooked tomatoes on pasta, but they need a little something else, and it occurred to me that roasted pasillas and garlic would be just the thing to give the sauce some complexity.


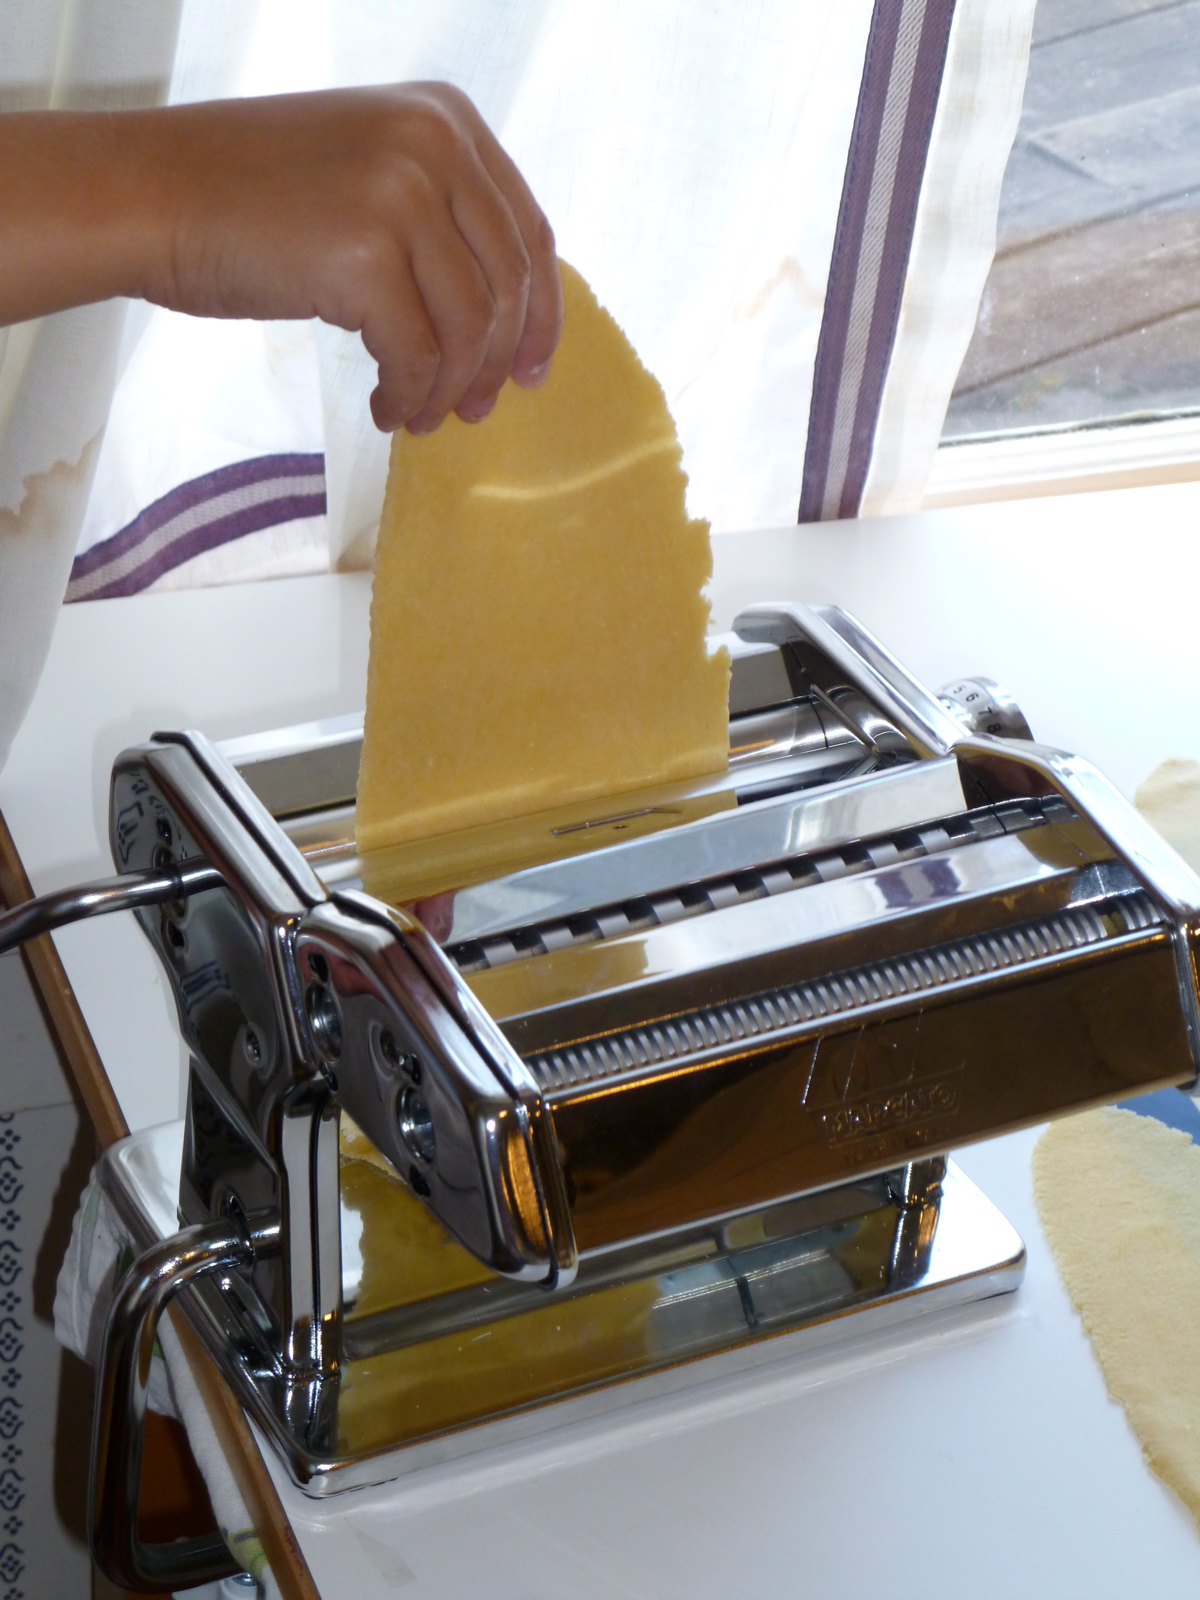
I recently gave my husband a pasta machine (more a present for myself, I must admit), but the real present to both of us was that our 7 year old daughter quickly became an accomplished pasta chef.  All I have to do is whip up the dough in the food processor (eggs and flour and a small drizzle of water until the dough just starts to come together).


Then she rolls it out


and cuts it, and presto: fresh pasta.


For the sauce, I broiled halved pasilla peppers and whole garlic cloves in the toaster oven, then peeled off the blistered skins from the peppers, chopped them together with the soft insides of the garlic cloves, and soaked them in olive oil.


While the peppers were roasting, I diced up tomatoes, and added chopped parsley and salt.


When the pasta was done, I tossed it with the tomatoes and poured over the garlicy, roasted pepper oil.  The dish had just the right balance of freshness and spicy smokiness.


Fresh Pasta with Fresh Tomatoes and Roasted Pasillas

For the pasta
2 eggs
2 cups flour
<1/4 cup water

1. Combine the eggs and flour in food processor and while it's running drizzle in just enough water for the dough to come together.

2. Roll out the dough with a pasta machine, cut, and cook in boiling water for 2 minutes.

For the sauce
4 tomatoes
2 pasilla peppers
generous handful of flat leaf parsley
6 cloves garlic
1/2 cup olive oil
salt

1. Roast the pasilla peppers and garlic.  You can do this under the broiler of a toasting oven if you don't feel like turning on your oven.  Remove the blistered skin of the peppers and dice finely.  Peel the garlic cloves and mash in with the peppers.  Cover with olive and let stand.

2.  Core and dice the tomatoes and put in your serving bowl.  Add chopped parsley and salt to taste.  Toss in the cooked pasta and pour over the roasted garlic and pepper oil.
Serves 2 adults and 2 small eaters